Juicy Ranch Chicken with Cheddar Finish

- Time: Active 10 minutes, Passive 15 minutes, Total 25 minutes
- Flavor/Texture Hook: Tangy, zesty, and ultra tender with a sharp cheddar finish.
- Perfect for: Busy weeknights, budget conscious meal prepping, and picky eaters.
- Proven Techniques for Juicy Ranch Chicken
- Essential Metrics for Your Kitchen
- Selecting Your Budget Friendly Ingredients
- Minimal Tools for Maximum Efficiency
- Simple Stages for Better Results
- Preventing Mistakes in the Kitchen
- Tasty Variations for Quick Meals
- Smart Storage and Leftover Tips
- Great Sides for Ranch Chicken
- Recipe FAQs
- 📝 Recipe Card
Proven Techniques for Juicy Ranch Chicken
I used to think ranch was strictly for dipping pizza crusts or wilted celery sticks until a particularly chaotic Tuesday changed my mind. I had exactly 1.5 lbs of chicken breasts in the fridge and a singular packet of dry ranch seasoning staring me down.
I was tempted to just order takeout, but the thought of another delivery fee made me pivot. I decided to try something a bit different than the standard "dump and bake" method.
The first time I threw this together, the sizzle of the chicken hitting the olive oil was immediately followed by that unmistakable, herby aroma of garlic and dill. It wasn't just "good for a weeknight"; it was genuinely impressive.
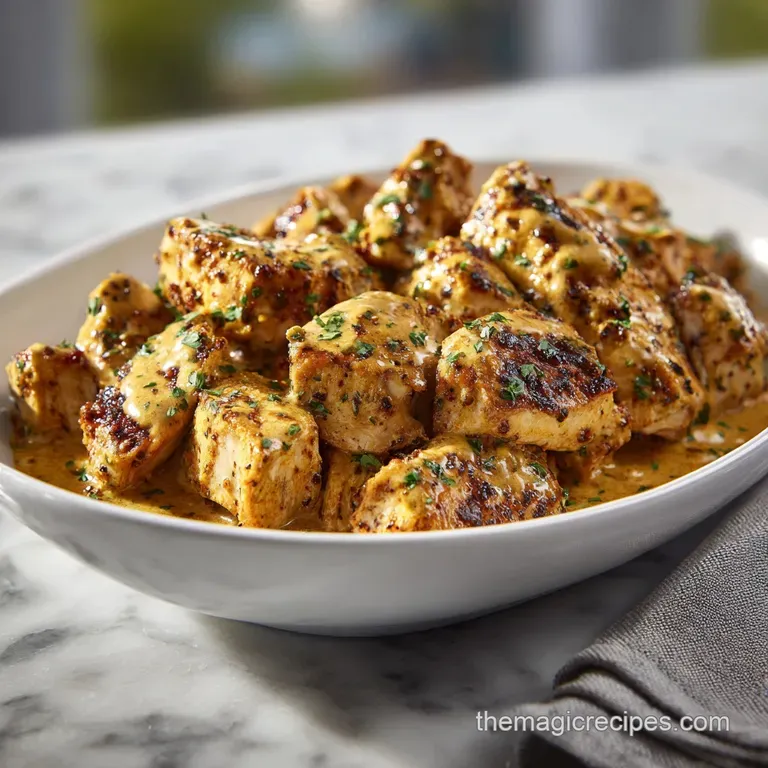
The way the sharp cheddar melted into the tangy yogurt base created this velvety coating that didn't slide off the meat. It was a total win, and I've been tweaking the process ever since to make it faster and even more budget friendly.
We are going to focus on getting that golden sear without drying out the interior. It is all about the thickness of the meat and the timing. If you have ever suffered through a rubbery, tasteless chicken breast, this is the remedy you’ve been looking for. It is simple, it is fast, and it works every single time.
The Science of the Tang
Lactic Tenderization: The Greek yogurt contains lactic acid which breaks down protein fibers more gently than vinegar or citrus, ensuring a velvety texture. This slow acting acid prevents the meat from becoming mushy while keeping it incredibly moist during over high heat cooking.
| Thickness | Internal Temp | Rest Time | Visual Cue |
|---|---|---|---|
| 1/2 inch | 165°F | 5 minutes | Juices run clear, center is opaque |
| 3/4 inch | 165°F | 7 minutes | Firm to the touch, no pink remains |
| 1 inch | 165°F | 8 minutes | Deep golden exterior, edges slightly crisp |
Choosing the right thickness is the biggest hurdle for most home cooks. By pounding the 1.5 lbs of chicken breasts to a uniform 1/2 inch, we ensure the heat penetrates the center at the exact same moment the exterior reaches that beautiful golden brown.
Essential Metrics for Your Kitchen
When you are trying to get dinner on the table in 25 minutes, you don't want to be guessing. I always keep my digital thermometer handy because "guessing" is how we end up with dry meat. This recipe is built for speed, but it relies on a few specific numbers to keep everything balanced.
Component Analysis
| Ingredient | Science Role | Pro Secret |
|---|---|---|
| Dry Ranch Mix | Flavor/Dry Brine | The salt in the mix pulls moisture in before cooking. |
| Greek Yogurt | Emulsifier/Tenderizer | Thickens the coating so it clings to the chicken. |
| Smoked Paprika | Color/Maillard Helper | Adds a deep red hue and a hint of charred flavor. |
Using non fat Greek yogurt is a smart budget swap for heavy creams or expensive sour creams. It provides the same acidity and body for a fraction of the cost, and it boosts the protein content significantly. Plus, it has a higher heat tolerance than mayo, which means it won't break or become greasy in the pan.
Selecting Your Budget Friendly Ingredients
You don't need a huge grocery list for this. Most of these items are probably sitting in your pantry right now. I love this recipe because it uses a 28g dry ranch dressing seasoning packet, which is much cheaper than buying individual jars of dried dill, parsley, and onion powder.
- 1.5 lbs chicken breasts: Ensure they are boneless and skinless for the fastest cooking time.
- 28g dry ranch seasoning: One standard packet is exactly what you need.
- 1 tsp smoked paprika: This provides that "cooked over fire" taste without the grill. Why this? It adds visual depth and a smoky counterpoint to the tangy ranch.
- 0.5 tsp black pepper: Freshly cracked is always better if you have it.
- 0.5 cup Greek yogurt: Use plain, non fat yogurt for the best texture and health profile.
- 2 cloves garlic: Mince these finely so they distribute evenly in the glaze.
- 50g sharp cheddar cheese: Shred your own if possible for a better melt. Why this? Pre shredded cheese has starch that prevents a smooth, velvety melt.
- 1 tbsp olive oil: A little goes a long way for that initial sear.
- 1 tbsp fresh chives: The perfect bright finish to cut through the richness.
| Original Ingredient | Substitute | Why It Works |
|---|---|---|
| Greek Yogurt | Sour Cream | Similar acidity level. Note: Slightly higher fat content, richer mouthfeel. |
| Smoked Paprika | Chili Powder | Provides color and a mild earthy heat. |
| Sharp Cheddar | Parmesan | Adds a salty, nutty kick but won't be as "melty." |
If you are looking for more ways to use that chicken in your freezer, you might want to check out some other Chicken Breast Recipes that use similar pan searing techniques.
Minimal Tools for Maximum Efficiency
You really don't need a kitchen full of gadgets for this one. I'm a big fan of minimal cleanup, so I try to keep it to one or two main pieces of equipment. A heavy bottomed skillet, like a Lodge cast iron or a thick stainless steel pan, is your best friend here.
It holds heat better, which means your chicken won't drop the pan temperature when you add it.
Chef's Tip: Freeze your cheddar cheese for 10 minutes before grating. It makes the block firmer and prevents it from clumping or turning into a mushy mess on the grater.
You will also want a meat mallet or even a heavy rolling pin. Pounding the chicken isn't just about releasing stress; it’s about physics. Even thickness equals even cooking. If one side of your breast is an inch thick and the other is a quarter inch, the thin side will be dry as a bone before the thick side is even safe to eat.
Simple Stages for Better Results
- Prep the chicken. Place your 1.5 lbs of chicken breasts between two sheets of plastic wrap and pound them to a uniform 1/2 inch thickness. Note: This ensures every bite cooks at the same rate.
- Season the meat. Sprinkle the 28g ranch packet, 1 tsp smoked paprika, and 0.5 tsp black pepper over both sides of the chicken.
- Mix the glaze. In a small bowl, whisk together 0.5 cup Greek yogurt, 2 minced garlic cloves, and 50g shredded cheddar.
- Heat the pan. Add 1 tbsp olive oil to your skillet over medium high heat until it shimmers and barely starts to smoke.
- Sear the first side. Place the chicken in the pan. Cook for 4 minutes until the edges are golden and the bottom is deeply browned.
- Flip and coat. Turn the chicken over. Immediately spread the yogurt garlic cheese mixture over the seared side.
- Finish cooking. Reduce heat to medium, cover the pan, and cook for another 4-5 minutes until the cheese is bubbling and the chicken is opaque.
- Verify doneness. Ensure the internal temperature has reached 165°F with a meat thermometer.
- Rest the meat. Remove from the pan and let it sit for 5 minutes. Note: This allows the juices to redistribute so they don't flood the plate when you cut in.
- Garnish and serve. Sprinkle with 1 tbsp fresh chives and serve immediately.
Preventing Mistakes in the Kitchen
The most common issue with this recipe is the coating sliding off. This usually happens because the chicken was too wet when it hit the pan. If there is moisture on the surface of the meat, it creates steam, which acts as a barrier between the chicken and the seasoning.
To Prevent Rubbery Texture
If your chicken feels like a bouncy ball, you've likely overcooked it. Once chicken hits 170°F or higher, the proteins tighten up and squeeze out all the moisture. The 5 minute rest is non negotiable. During this time, carryover cooking will finish the job while the fibers relax.
| Problem | Root Cause | Solution |
|---|---|---|
| Soggy coating | Pan was too cold | Wait for the oil to shimmer before adding meat. |
| Curdled yogurt | Heat was too high | Reduce heat to medium before adding the yogurt glaze. |
| Bland flavor | Not enough seasoning | Press the dry ranch into the meat firmly before searing. |
Common Mistakes Checklist
- ✓ Pat the chicken completely dry with paper towels before adding the dry rub.
- ✓ Don't overcrowd the pan; if the breasts are touching, they will steam instead of sear.
- ✓ Use a meat thermometer to pull the chicken at exactly 165°F.
- ✓ Let the pan reheat for 60 seconds between batches if you are cooking in stages.
- ✓ Avoid moving the chicken for the first 3 minutes to allow the crust to form.
If you find yourself with extra ranch seasoning, it pairs beautifully with sides. I often serve this alongside my Ranch Carrots Recipe for a cohesive, themed dinner that the kids actually finish.
Tasty Variations for Quick Meals
If you want to change things up, this recipe is incredibly flexible. You can easily swap the chicken breasts for 30 minute ranch chicken thighs if you prefer darker meat. Thighs are much more forgiving and stay juicy even if you accidentally overcook them by a few minutes.
For a Spicy Kick
Add a teaspoon of cayenne pepper or a tablespoon of Buffalo sauce to the yogurt mixture. This creates a zesty "Buffalo Ranch" vibe that is excellent with a side of celery and blue cheese. If you love that flavor profile, you have to try my Buffalo Chicken Dip recipe next time you have friends over.
For a dairy-free Alternative
You can use a dairy-free plain almond or soy yogurt. Just make sure it is "plain" and not "vanilla" trust me, I've made that mistake once, and vanilla ranch chicken is not a culinary discovery I wish to repeat. You can also skip the cheese or use a nutritional yeast blend to keep that savory, "cheesy" hit.
Smart Storage and Leftover Tips
This chicken stores surprisingly well because the yogurt coating acts as a moisture seal. I actually think it tastes even better the next day when the garlic has had time to really permeate the meat.
- Fridge: Store in an airtight container for up to 4 days.
- Freezer: You can freeze the cooked chicken for up to 3 months. Wrap it tightly in foil and then place it in a freezer bag to prevent freezer burn.
- Reheating: Avoid the microwave if you can. It turns the chicken rubbery. Instead, place it in a 350°F (180°C) oven for 10 minutes or until warmed through.
- Zero Waste Tip: If you have leftover chicken, shred it and toss it into a salad or use it as a filling for a Costco Chicken Bake recipe copycat. The bones from the thighs (if you used them) can be tossed into a bag in the freezer to make a quick stock later.
Great Sides for Ranch Chicken
Since this dish is so savory and tangy, I usually look for sides that offer a bit of crunch or sweetness to balance it out. A simple roasted broccoli or a crisp green salad works wonders.
If you're feeling a bit more indulgent, mashed potatoes are the perfect vehicle for any extra yogurt cheese sauce that might be left in the pan. The smoky paprika in the chicken provides a nice bridge to roasted root vegetables as well.
Kitchen Myths Debunked
One major myth is that you need mayonnaise to get ranch chicken to stay moist. While mayo works, Greek yogurt provides the same fat emulsion benefits with more protein and a brighter tang. Another myth is that you should wash your chicken before cooking. Please don't.
It doesn't kill bacteria; it just splashes them all over your sink and counters. The heat of the pan is what makes the meat safe.
When scaling this recipe up for a crowd, remember that you don't need to double the spices exactly. Spices like paprika and pepper can become overwhelming, so I usually go for 1.5x the amount of spices if I'm doubling the meat.
However, you should always double the yogurt and cheese to ensure every piece gets that velvety finish.

Recipe FAQs
What is the secret to keeping Ranch Chicken juicy?
Use Greek yogurt as a marinade base. The lactic acid in the yogurt gently tenderizes the protein fibers, preventing them from seizing up and releasing moisture during high heat searing.
How do I prevent the cheese and yogurt topping from burning?
Reduce the heat immediately before adding the topping. Sear the chicken first over medium high heat, then flip, reduce the heat to medium, cover the pan, and finish cooking to allow the cheese to melt slowly without scorching.
How to ensure the chicken cooks evenly in the skillet?
Pound all chicken breasts to a uniform 1/2 inch thickness. Even thickness is crucial because it allows the center to reach the safe temperature of 165°F at the same time the exterior develops a golden crust.
Is it true that I must use full fat yogurt for the coating?
No, non-fat Greek yogurt works best for texture. Non-fat yogurt provides necessary body and acidity without adding excess fat that can cause separation or grease when heated.
How long must the chicken rest after cooking?
Rest the chicken for at least 5 minutes before slicing. This rest period allows the muscle fibers to relax and reabsorb the internal juices, ensuring they don't spill out onto your cutting board.
What is a good substitute for chicken if I only have pork chops?
Yes, you can use thin cut pork chops with minor adjustments. Use the exact same yogurt tenderizing technique, but watch your internal temperature closely, aiming for 145°F for medium, and you might enjoy a similar outcome to our Sour Cream Onion recipe flavor profile.
How should I reheat leftovers to avoid drying them out?
Bake leftovers in the oven at 350°F for 10 minutes. Microwaving degrades the texture; the oven method heats the sealed meat gently, retaining the moisture locked in by the initial yogurt brine.
25 Minute Ranch Chicken

Ingredients:
Instructions:
Nutrition Facts:
| Calories | 409 kcal |
|---|---|
| Protein | 59.1 g |
| Fat | 14.0 g |
| Carbs | 5.2 g |
| Fiber | 0.6 g |
| Sugar | 2.1 g |
| Sodium | 625 mg |
