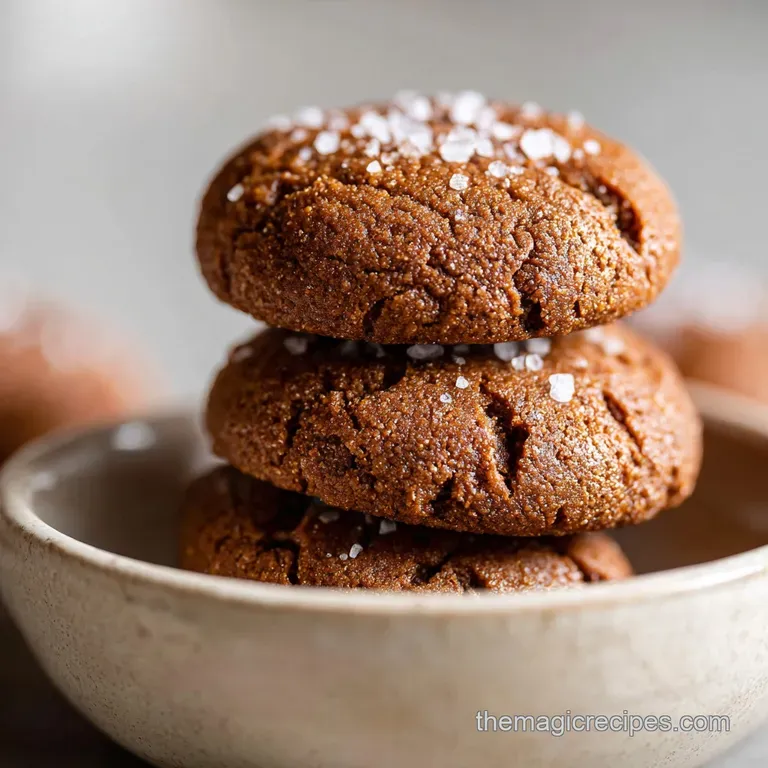
3-Ingredient Peanut Butter Cookie with Sea Salt
- Time: Active 5 minutes, Passive 10 minutes, Total 15 minutes
- Flavor/Texture Hook: Fudgy, melt in-the mouth crumb with a salty, crackling finish
- Perfect for: Last minute guests, gluten-free cravings, or beginner bakers wanting big results
- Mastering the Decadent 3 Ingredient Peanut Butter Cookie with Sea Salt
- The Science Behind This Flourless Indulgence
- Selecting the Finest Components for Bakery Results
- Essential Tools for a Seamless Bake
- Step-by-Step Guide to Fudgy Cookie Success
- Avoiding the Oily Mess: Troubleshooting Tips
- Gourmet Variations to Suit Your Cravings
- Freshness and Longevity: Proper Storage Methods
- Elevating Your Dessert Presentation and Pairings
- Recipe FAQs
- 📝 Recipe Card
Mastering the Decadent 3 Ingredient Peanut Butter Cookie with Sea Salt
Have you ever pulled a tray of peanut butter cookies from the oven only to find a puddle of oil and a sandy, gritty mess that falls apart the moment you touch it? It is one of the most frustrating experiences in the kitchen, especially when you are craving that specific, velvety richness that only peanut butter can provide.
Most people blame the brand of peanut butter or think they missed a secret step, but the reality is usually a failure of emulsification and temperature control. Discover how to make one incredible "3 Ingredient Peanut Butter Cookie with Sea Salt" that's sure to impress.
We have all been there, staring at a recipe that promises simplicity but delivers a brick. I used to think that without flour, a cookie simply could not hold its shape or provide that satisfying "snap" followed by a chewy center.
I would toss in extra sugar or overbake them until they were charred, hoping to find some structural integrity. It was a disaster every single time until I realized the magic is not in the number of ingredients, but in how you treat the few you have.
This recipe is the definitive fix for those oily, crumbly failures. We are stripping away the fillers and focusing on the interplay between protein and fat. You are going to learn why whisking an egg until it is frothy is the non negotiable step that saves your cookies from becoming a greasy lake.
By the time we are done, you will have a tray of bronzed, criss crossed beauties that look like they came from a high end patisserie rather than a three item pantry raid.
The Science Behind This Flourless Indulgence
When you remove flour from a cookie, you are removing the gluten, which is the traditional "glue" of baking. In this "3 Ingredient Peanut Butter Cookie with Sea Salt", we have to find a new way to create structure. This is where the egg comes in. Eggs are incredible protein machines.
When you whisk that egg vigorously for 30 seconds, you are unraveling those proteins and creating a web that will trap the fat from the peanut butter. Without this step, the oil in the peanut butter has nothing to hold onto, leading to that dreaded oil slick on your baking sheet.
Protein Denaturation: Whisking the egg creates a stable protein matrix that binds the heavy fats of the peanut butter during the heat of the bake.
Sugar Recrystallization: As the cookies cool, the dissolved granulated sugar begins to set back into a solid state, providing the "snap" on the edges while keeping the center fudgy.
Fat to Protein Ratio: Peanut butter is naturally high in fat, which inhibits gluten (if it were present) but here, it provides the "shortness" or melt in-the mouth quality.
Maillard Reaction: Even without flour, the proteins in the peanut butter and egg react with the sugar at 350°F (175°C) to create that deep, toasted aroma and bronzed color.
| Method | Time | Texture | Best For |
|---|---|---|---|
| Standard Bake | 10 minutes | Chewy & Soft | Classic indulgence |
| Slightly Underbaked | 8 minutes | Fudgy/Truffle like | Serving with ice cream |
| Extended Bake | 12 minutes | Crispy & Snap hard | Dipping in hot coffee |
The cooling process is just as important as the baking. Because these are flourless, they are incredibly fragile when they first come out of the oven. The sugar is still liquid, and the fats are loose. As they sit on the tray, the sugar cools and hardens, acting like a structural skeleton for the cookie.
If you try to move them too soon, they will simply crumble into delicious dust.
Selecting the Finest Components for Bakery Results
Not all peanut butter is created equal, and in a recipe with so few parts, the quality of each one is magnified. For this specific cookie, I strongly recommend using a standard "no stir" creamy peanut butter.
While I love the natural, oily stuff on my morning toast, the separation of oils in natural peanut butter can be unpredictable in a flourless dough. If you do use natural, make sure it is extremely well stirred and perhaps chilled for 10 minutes before mixing to help it emulsify.
| Ingredient | Science Role | Pro Secret |
|---|---|---|
| Creamy Peanut Butter | Primary fat and protein source | Use a commercial brand for a more consistent, silky texture |
| Granulated Sugar | Humectant and structural agent | Provides the necessary "crunch" that brown sugar lacks here |
| Large Egg | The emulsifier and binder | Must be at room temperature to incorporate smoothly with the fats |
The sugar choice is equally vital. We use granulated white sugar because it has a lower moisture content than brown sugar. In a recipe that already has plenty of moisture from the egg and fat from the peanut butter, white sugar helps the edges crisp up beautifully. This creates a contrast between the outer ring and the soft, dense interior. For a different texture profile, you might look at how fats interact in other recipes, like my Peanut Butter Balls recipe which uses a similar base.
Essential Tools for a Seamless Bake
You do not need a fancy stand mixer for this. In fact, doing it by hand gives you a better "feel" for when the dough has reached the right consistency. You want a sturdy silicone spatula because the dough becomes quite thick and tacky as the sugar and peanut butter combine.
A flimsy whisk won't handle the peanut butter well, so use the whisk only for the initial egg prep, then switch to the spatula.
A heavy duty baking sheet is your best friend here. Thin sheets tend to warp in the oven and heat unevenly, which can cause the bottoms of your cookies to burn before the tops are set.
Using parchment paper is non negotiable; since there is no flour to provide a dry exterior, these cookies are prone to sticking to even the best "non stick" pans.
Chef's Tip: If your kitchen is particularly warm, freeze your baking sheet for 5 minutes before lining it with parchment. This prevents the bottom of the dough balls from softening too much while you are marking the criss cross patterns.
step-by-step Guide to Fudgy Cookie Success
1. Preparation and Aeration
Preheat your oven to 350°F (175°C). Line a large baking sheet with parchment paper. In a mixing bowl, whisk the large egg vigorously for 30 seconds until it is pale, frothy, and streak free. This aeration is the secret to a cookie that isn't heavy or leaden.
2. The One Bowl Emulsion
Add the 1 cup (250g) creamy peanut butter and 1 cup (200g) granulated sugar to the whisked egg. Use a sturdy silicone spatula to fold the ingredients together until a cohesive dough forms and pulls away from the sides.
If the dough looks like it's sweating oil, let it rest for 2 minutes to allow the sugar to absorb some of that moisture.
3. Shaping and Texturizing
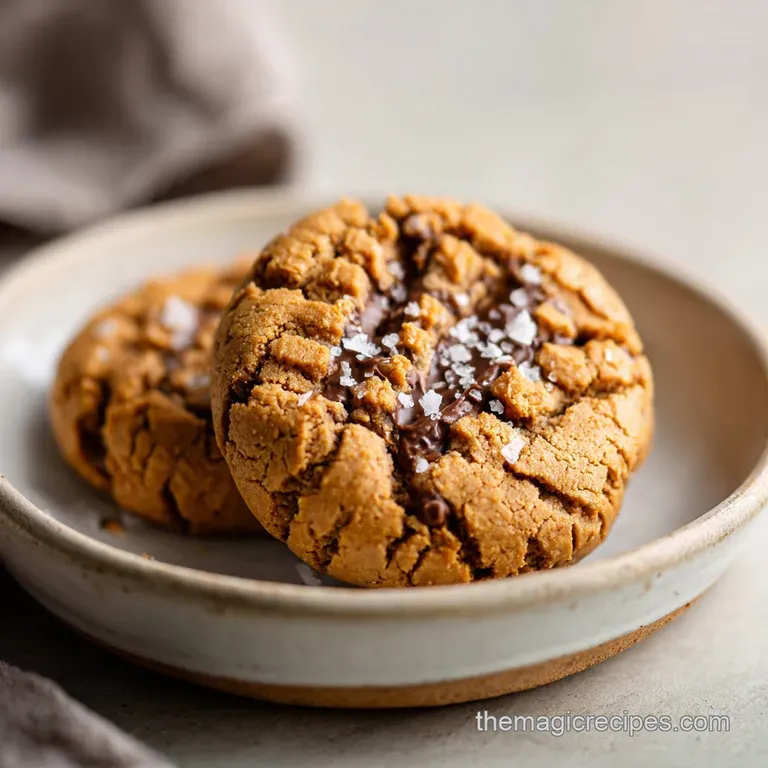
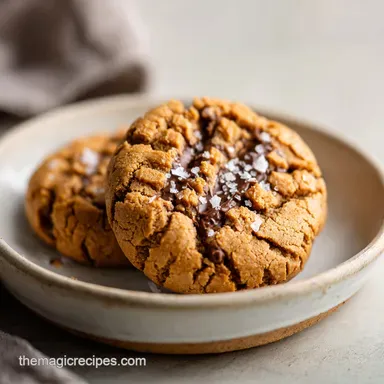
Scoop rounded tablespoons of dough and roll them into 1 inch balls. Place them 2 inches apart on the prepared baking tray. Use the tines of a dinner fork to press a criss cross pattern into each ball, flattening them to a 1/2 inch thickness.
This pattern isn't just for looks; it increases surface area for better browning.
4. The Precision Bake
Bake for 8 to 10 minutes. The cookies are finished when the edges are set and slightly bronzed. Do not wait for the centers to look "done" or firm; they will firm up as they cool. Overbaking by even 60 seconds can lead to a dry, sandy texture.
5. The Finishing Touch
Remove from the oven and immediately sprinkle with the 1 tsp flaky sea salt while still warm to ensure adherence. The heat helps the salt crystals "sink" slightly into the surface so they don't just roll off when you take a bite.
| Original Ingredient | Substitute | Why It Works |
|---|---|---|
| Creamy Peanut Butter | Almond Butter (no stir) | Similar fat profile. Note: Slightly grainier texture |
| Granulated Sugar | Monk Fruit Sweetener | 1:1 replacement. Note: May result in a cooler aftertaste |
| Large Egg | Flax Egg (1 tbsp meal + 3 tbsp water) | Provides binding. Note: Cookies will be much more fragile |
Using sea salt is the bridge between "sweet snack" and "gourmet dessert." The salt cuts through the richness of the peanut butter and the intensity of the sugar, making the whole experience much more balanced. If you find yourself enjoying this salty sweet profile, you should check out these Chewy peanut butter cookies which offer a more traditional flour based texture.
Avoiding the Oily Mess: Troubleshooting Tips
Prevent Crumbly Texture
If your cookies are falling apart after cooling, the most likely culprit is the egg size. A "Large" egg is standard, but if you used a "Medium" egg, there isn't enough protein to bind the cup of sugar and peanut butter. Plus,, ensure you aren't using a "natural" peanut butter that is too liquidy.
If the dough feels loose, add another tablespoon of sugar to help tighten the structure.
Stop Cookies from Spreading
Cookies that spread into thin pancakes usually suffered from a "warm" start. If your peanut butter was room temperature and your kitchen was hot, the fats will melt before the egg protein can set. Try chilling the rolled dough balls for 15 minutes before pressing them with the fork.
This gives the oven a "head start" on setting the structure before the fat liquefies.
For Perfectly Round Edges
If you want that "Instagram perfect" look, use a round cookie cutter or a wide mouthed glass immediately after taking the tray out of the oven. Place the glass over the warm cookie and gently move it in a circular motion.
This "scooting" method tucks in any jagged edges while the cookie is still malleable, resulting in a perfectly circular, professional looking finish.
| Problem | Root Cause | Solution |
|---|---|---|
| Greasy surface | Poor emulsification | Whisk egg longer; ensure egg is room temp |
| Gritty mouthfeel | Sugar didn't dissolve | Let dough rest 5 mins before rolling balls |
| Burnt bottoms | Dark baking sheet | Use a light colored pan or double stack pans |
Common Mistakes Checklist
- ✓ Never skip the parchment paper - these will stick to even greased pans.
- ✓ Don't use a "cold" egg; it won't emulsify with the room temperature fats.
- ✓ Avoid "Natural" peanut butter with a thick layer of oil on top.
- ✓ Do not over mix once the sugar is in; you want to avoid "tough" cookies.
- ✓ Let the cookies rest on the tray for at least 5 minutes before moving them.
Gourmet Variations to Suit Your Cravings
For the Chocolate Obsessed
There is no pairing more iconic than peanut butter and chocolate. To elevate this 3 ingredient peanut butter cookie, fold in 1/2 cup of dark chocolate chips (at least 60% cocoa) into the dough after it has formed. The bitterness of the dark chocolate balances the sweetness of the base dough perfectly.
You can also press a single Hershey's Kiss into the center of each cookie the moment they come out of the oven for a "blossom" style treat.
For a Warm Spice Profile
If you want something that feels more autumnal, add 1/2 teaspoon of ground cinnamon and a pinch of nutmeg to the sugar before mixing. This transforms the profile into something reminiscent of a snickerdoodle but with the deep, nutty undertones of the peanut butter.
A tiny dash of cayenne pepper can also add a "Mexican chocolate" vibe if you are using the chocolate chip variation mentioned above.
Chef's Tip: Freeze your chocolate chips for 10 minutes before folding them into the dough. This prevents them from melting prematurely during the mixing process, ensuring you get distinct "pockets" of chocolate rather than a swirled, brown dough.
If you are looking to scale this recipe down for a solo snack, you can use half an egg (whisk a whole egg and measure out 1.5 tablespoons) and half a cup of the other ingredients. Scaling up works beautifully too, but remember that the salt and spices should only be increased by 1.5x rather than doubled to avoid an overpowering flavor.
Freshness and Longevity: Proper Storage Methods
Because these cookies are flourless and rely on sugar and fat for structure, they actually stay moist much longer than traditional cookies. In an airtight container, they will remain fudgy for up to 5 days at room temperature.
If you find they are softening too much (especially in humid climates), you can move them to the fridge. The cold temperature will make them firmer and almost candy like in texture, which some people actually prefer!
For long term storage, these cookies freeze exceptionally well. You can freeze the baked cookies for up to 3 months. To eat, simply let them thaw on the counter for 15 minutes. Even better, freeze the raw dough balls.
When a craving hits, you can bake them directly from frozen just add 2 minutes to the total baking time. This "zero waste" approach ensures you always have a high-quality dessert ready to go without having to make a full batch every time.
One myth I have to debunk is that you "must" use expensive, artisanal peanut butter for a good cookie. In fact, many high end brands lack the stabilizers (like a tiny bit of palm oil) that help these flourless cookies hold their shape.
The "cheap" stuff from the grocery store often produces the most consistent, velvety results because the emulsifiers are already doing half the work for you.
Elevating Your Dessert Presentation and Pairings
Presentation is everything when you are working with such a simple recipe. To make these "3 Ingredient Peanut Butter Cookie with Sea Salt" look truly indulgent, don't just sprinkle the salt haphazardly. Aim for 3-4 large flakes right in the center of the criss cross.
This creates a focal point and ensures every bite has that targeted "pop" of salinity.
- If you want a decadent sundae: Crumble two warm cookies over vanilla bean ice cream and drizzle with a bit of warmed honey.
- If you want a sophisticated pairing: Serve these alongside a double shot of espresso or a dark roast coffee. The bitterness of the coffee highlights the toasted nut flavors.
- If you want a classic experience: Nothing beats a cold glass of whole milk. The fats in the milk help wash away the "sticky" feeling peanut butter can leave on the roof of your mouth.
These cookies are more than just a shortcut; they are a lesson in how a few quality ingredients, treated with the right technique, can outperform a dozen mediocre ones. By focusing on the egg's protein, the sugar's structure, and the peanut butter's richness, you have created something truly bakery quality in the time it takes to brew a pot of coffee.
Enjoy the indulgence!

Recipe FAQs
How do you make 3-ingredient peanut butter cookies?
Whisk one large egg for 30 seconds until frothy, then fold in one cup of creamy peanut butter and one cup of sugar until a cohesive dough forms. Scoop into 1 inch balls, flatten with a fork, and bake at 350°F (175°C) for 8 to 10 minutes.
What does sea salt do for cookies?
It creates a contrast that enhances sweetness. By adding a sprinkle of flaky sea salt while the cookies are still warm, you cut through the richness of the peanut butter to balance the overall flavor profile.
Is this the famous 3-ingredient cookie recipe Snoop Dogg makes?
No, this is a distinct, classic preparation. While many flourless peanut butter recipes share similar base ingredients, our method relies on a specific protein whisking technique to ensure the structure holds together without wheat based binders.
Can you put sea salt on peanut butter cookies?
Yes, it is highly recommended. Adding salt immediately after removing the tray from the oven ensures the crystals adhere to the soft surface of the cookie for the best texture and taste.
How to keep these cookies from being too oily?
Let the dough rest for two minutes after mixing if you notice excess oils separating from the peanut butter. If you enjoyed the tender, crumbly texture we achieved here, you will find that resting dough allows the fats to stabilize, making it easier to handle and shape.
How to tell when these cookies are done baking?
Check that the edges are set and slightly bronzed. They will look soft in the center at the 8-minute mark, which is intentional; remove them immediately to maintain a chewy, fudge like consistency.
Is it necessary to use a hand mixer for this recipe?
No, a manual whisk and silicone spatula are sufficient. Because the ingredient list is minimal, you can achieve the necessary dough consistency by hand without the need for mechanical mixing equipment.
3 Ingredient Peanut Butter Cookie
Ingredients:
Instructions:
Nutrition Facts:
| Calories | 193 kcal |
|---|---|
| Protein | 5.7 g |
| Fat | 11.1 g |
| Carbs | 20.9 g |
| Fiber | 1.3 g |
| Sugar | 18.5 g |
| Sodium | 161 mg |
