No Bake Chocolate Eclair Cake
- Time: Active 20 minutes, Passive 8 hours, Total 8 hours 20 mins
- Flavor/Texture Hook: Silky custard meets a shatter thin chocolate glaze
- Perfect for: Potlucks, summer gatherings, or low effort weekend indulgence
- The Ultimate Chilled Chocolate Eclair Cake
- Why This Layered Treat Works
- Essential Recipe Specifications and Metrics
- Component Analysis of Key Elements
- Your Indulgent Shopping List Breakdown
- Tools for Dessert Success
- Building Layers from Prep to Plate
- Troubleshooting for a Flawless Finish
- Creative Flavor Twists and Swaps
- Smarter Scaling for Bigger Crowds
- Debunking Common No Bake Myths
- Storage Tips and Zero Waste
- Presentation Tips for Wow Factor
- Final Success Secrets for Bakers
- Chocolate Eclair Cake FAQs
- 📝 Recipe Card
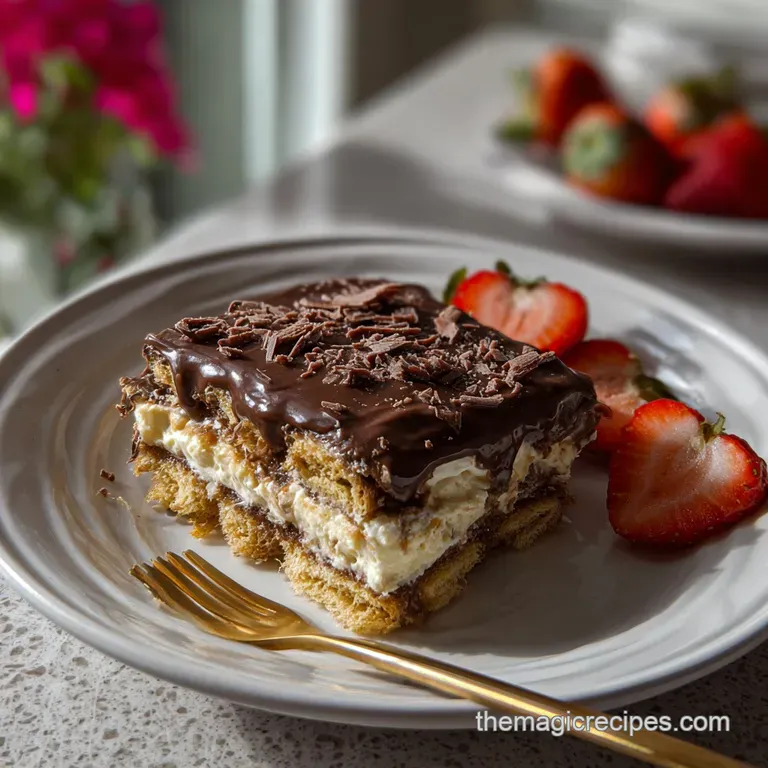
The Ultimate Chilled Chocolate Eclair Cake
Listen, if you haven't experienced the moment a spoon glides through a chilled chocolate eclair cake like it’s cutting through a cloud, you’re missing out on one of life’s simplest joys. I remember the first time I made this for a family BBQ.
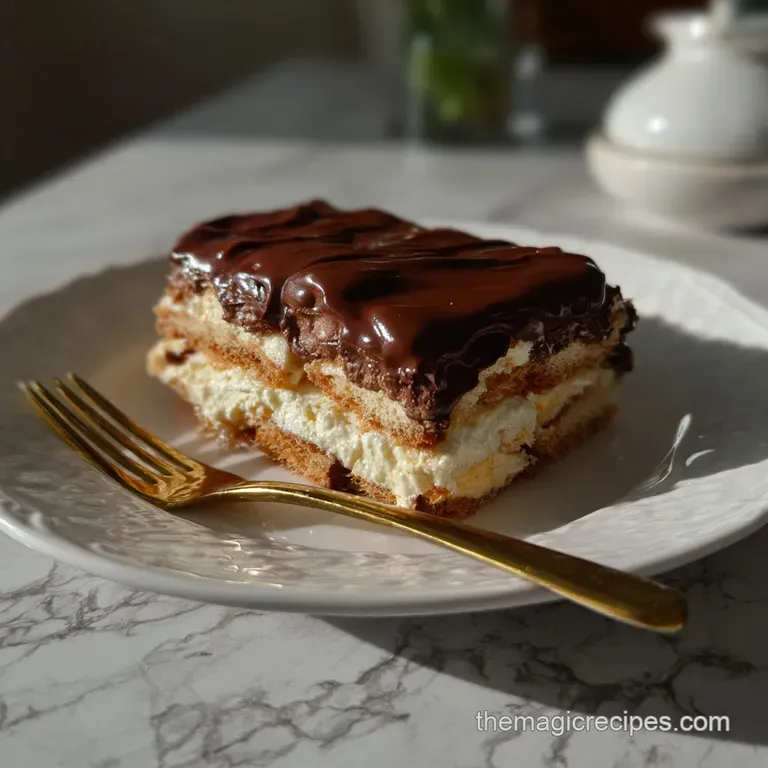
I was skeptical that a box of honey graham crackers could ever mimic the delicate, airy pastry of a real eclair. I was so wrong. By the next morning, those crackers had absorbed the moisture from the pudding, turning into these tender, cake like layers that honestly rival any sponge I’ve spent hours whisking.
This isn't just another "pudding in a pan" situation. We are talking about a specific architectural marvel of home baking. The contrast is what gets you: that cool, creamy interior paired with a rich, dark glaze that sets just enough to give you a little resistance before it melts away.
It’s the kind of treat that makes people ask for the recipe before they’ve even finished their first slice.
We’re going to walk through how to stack these layers so they don't slide, how to cook a glaze that doesn't turn grainy, and why waiting 8 hours is the hardest but most important part of the process.
Trust me, the payoff is a dessert that looks like you spent all day in a French patisserie, even though you mostly just operated a whisk and a spatula.
Why This Layered Treat Works
The magic here isn't just luck; it's a beautiful bit of kitchen physics. When we stack these components, we are initiating a slow motion transformation that completely changes the molecular structure of the dry ingredients. It's brilliant how a few hours in the fridge can do the work of a hot oven.
- Moisture Migration: The graham crackers act as a desiccant, pulling water from the pudding to soften their gluten structure into a "cake" texture.
- Starch Gelatinization: Using cold milk with instant pudding mix allows the modified cornstarch to hydrate and thicken instantly, creating a stable internal scaffold.
- Fat Stabilization: Folding in the whipped topping introduces air bubbles trapped in fat, which prevents the filling from becoming too dense or heavy.
- Thermal Set: The cooked glaze uses a high sugar to fat ratio, ensuring it hardens into a glossy shell as the temperature drops in the fridge.
Essential Recipe Specifications and Metrics
Getting the proportions right is the difference between a dessert that stands tall and one that turns into a puddle the second it hits room temperature. Use these checkpoints to stay on track.
| Metric | Target Value | Why It Matters |
|---|---|---|
| Whisking Time | 2 minutes | Ensures the pudding starch fully activates and thickens. |
| Glaze Boil | 1 minute | Stabilizes the sugar crystals so the frosting sets properly. |
| Chill Duration | 8 hours | Essential for the graham crackers to reach a cake like consistency. |
Component Analysis of Key Elements
Understanding what each part does helps you avoid the "soup" disaster I dealt with during my first attempt. Choosing the right brands can actually change the final mouthfeel of the cake.
| Ingredient | Science Role | Pro Secret |
|---|---|---|
| Pudding Mix | Primary thickening agent | Use Jell O Instant Vanilla Pudding for the most reliable set. |
| Whole Milk | Hydrates starch | High fat content ensures a velvety, rich custard flavor. |
| Whipped Topping | Aeration and body | Keep it fully thawed before folding to avoid "icy" pockets. |
| Graham Crackers | Structural foundation | Honey Maid crackers have the perfect density for absorbing moisture. |
Your Indulgent Shopping List Breakdown
Make sure you have everything ready before you start, as the pudding sets quickly and you’ll want to layer while it's still pliable.
- 6.8 oz instant vanilla pudding mix: This is usually two smaller boxes. Why this? Provides the essential starch base for the creamy filling.
- 3.5 cups cold whole milk: Use it straight from the fridge. Why this? Cold temperatures are required for instant pudding to thicken.
- 8 oz whipped topping: Such as Kraft Cool Whip. Why this? Adds permanent airiness that regular whipped cream can't maintain.
- 2 tsp pure vanilla extract: Look for Nielsen Massey for the best aroma. Why this? Rounds out the sweetness and adds a "bakery" scent.
- 14.4 oz honey graham crackers: One full standard box. Why this? They transform into the "eclair" pastry layers when hydrated.
- 45 g unsweetened cocoa powder: Hershey's Special Dark is a great choice here. Why this? Provides the deep, bitter contrast to the sweet filling.
- 400 g granulated sugar: Standard white sugar. Why this? Creates the structure and "snap" for the cooked glaze.
- 113 g unsalted butter: One full stick. Why this? Adds a silky sheen and rich flavor to the chocolate top.
Tools for Dessert Success
You don't need a high end kitchen, but a few specific tools make the layering much cleaner.
Chef's Note: If you have a glass 9x13 pan, use it! Seeing those distinct layers through the side of the dish is half the fun.
- 9x13 Pyrex Baking Dish: The standard size for this volume of ingredients.
- KitchenAid Hand Mixer: Perfect for getting the pudding perfectly smooth without lumps.
- Offset Spatula: This is the secret to a perfectly flat chocolate top.
- Heavy Bottomed Saucepan: Prevents the sugar and cocoa from scorching while you boil the glaze.
Building Layers from Prep to Plate
This process is more about assembly than "cooking," but the order and technique matter for that clean, professional slice.
- Whisk pudding. Combine the 6.8 oz instant vanilla pudding mix with 3.5 cups cold whole milk. Note: Whisk vigorously for 2 full minutes until the mixture begins to resist the whisk.
- Infuse vanilla. Stir in the 2 tsp pure vanilla extract.
- Fold topping. Gently incorporate the 8 oz whipped topping into the pudding. Note: Use a "cut and fold" motion so you don't deflate the air bubbles.
- Base layer. Arrange a single layer of 14.4 oz honey graham crackers in the bottom of your dish.
- Spread filling. Pour half of the pudding mixture over the crackers. Spread until it hits all four corners.
- Repeat layers. Add another layer of crackers, followed by the remaining pudding mixture.
- Final crackers. Top with a third and final layer of graham crackers.
- Boil glaze. In a saucepan, combine 113 g unsalted butter, 400 g granulated sugar, and 45 g cocoa powder. Bring to a rolling boil.
- Simmer glaze. Let the chocolate mixture boil for exactly 1 minute until it becomes shiny and thick.
- Final pour. Pour the hot glaze over the top layer of crackers immediately. Note: The heat helps the top crackers soften faster.
- Cold set. Refrigerate for 8 hours until the crackers are completely tender.
Troubleshooting for a Flawless Finish
Even simple recipes can have their quirks. I've had my share of "soupy" cakes because I tried to rush the chilling process. Here is how to handle the most common hiccups.
Why is my filling too runny?
If the pudding doesn't set, it's usually because the milk wasn't cold enough or the ratio was slightly off. This is why I always use whole milk; the higher fat content helps with stabilization.
If you've already mixed it and it looks like soup, try whisking in an extra tablespoon of pudding mix if you have it, or just accept it'll be a "spoonable" dessert rather than a sliceable one.
The chocolate frosting is grainy
This happens when the sugar doesn't fully dissolve during the boiling stage. You really need that full minute of bubbling. If it's already on the cake, there isn't much you can do for this batch, but next time, try adding a tablespoon of corn syrup to the boil; it prevents sugar crystals from latching onto each other.
| Problem | Cause | Fix | Pro Tip |
|---|---|---|---|
| Soggy Crackers | Too much milk | Measure milk with a liquid cup, not dry. | Use slightly stale crackers; they absorb better! |
| Cracking Glaze | Boiling too long | Stop at 60 seconds sharp. | Dip your knife in hot water before slicing. |
| Sliding Layers | Not enough chill time | Wait the full 8 hours. | Clear a flat spot in the fridge to keep it level. |
Creative Flavor Twists and Swaps
Once you have the classic down, you can start playing with the profile. This recipe is essentially a blank canvas for your favorite flavors. It’s a lot like the flexibility you find in a Butter Cake recipe, where the base is simple but the variations are endless.
| Original Ingredient | Substitute | Why It Works |
|---|---|---|
| Vanilla Pudding | Chocolate or Banana | Changes the core flavor profile entirely. |
| Honey Grahams | Chocolate Grahams | Adds a deeper cocoa punch to every bite. Note: Slightly more brittle. |
| Granulated Sugar | Brown Sugar | Adds a molasses/toffee undertone to the glaze. |
- The "Salted Caramel" Upgrade: Drizzle salted caramel sauce between the layers for an extra indulgent treat.
- The Berry Fresh Variation: Add a layer of sliced strawberries on top of the first pudding layer for a bright, acidic pop.
- Mocha Infusion: Add 1 tablespoon of espresso powder to the boiling glaze. It makes the chocolate taste ten times more intense, similar to the technique in my Banana and Chocolate recipe.
Smarter Scaling for Bigger Crowds
If you’re feeding a whole neighborhood, you can double this easily. Just be careful with the glaze, as larger volumes of sugar and butter can behave differently when boiling.
- Scaling UP (2x): Use two separate 9x13 pans rather than one giant deep dish. It ensures the layers hydrate evenly. Increase the boiling time for the glaze by about 30 seconds since the larger mass takes longer to reach temperature.
- Scaling DOWN (1/2): Use an 8x8 square pan. Reduce the boiling time for the glaze to 45 seconds so it doesn't turn into hard candy.
Debunking Common No Bake Myths
- Myth: You must use heavy cream for the filling. Actually, whipped topping (like Cool Whip) is often better for this specific cake because it contains stabilizers that keep the cake from collapsing over several days. Real whipped cream can weep and turn the crackers into mush too quickly.
- Myth: Graham crackers must be soaked first. Never do this! The crackers are designed to pull moisture slowly from the pudding. If you soak them, you'll end up with a textureless paste instead of defined, soft layers.
- Myth: Homemade frosting is always better. For this cake, the "boiled" cocoa frosting is superior to a standard buttercream. It creates a specific fudge like texture that mimics the top of a real eclair. If you want a different topping, you can check out this Chocolate Icing Recipe for a similar glossy finish.
Storage Tips and Zero Waste
This is one of those rare desserts that actually tastes better on day two. The flavors have more time to mingle, and the texture becomes even more unified.
- Fridge: Store in an airtight container for up to 4 days. After that, the crackers might start to get a bit too soft.
- Freezer: You can freeze this! Wrap it tightly in plastic wrap and foil. It will keep for 2 months. Thaw it in the fridge overnight before serving don't try to microwave it or you'll have a melted disaster.
- Zero Waste: If you have leftover graham cracker crumbs at the bottom of the bag, don't toss them. Sprinkle them over the top of the glaze before it sets for a little bit of "crunch" contrast. If you have extra pudding, it makes a great base for a quick fruit parfaits the next morning.
Presentation Tips for Wow Factor
Even though this is a "homestyle" dessert, you can make it look stunning with minimal effort.
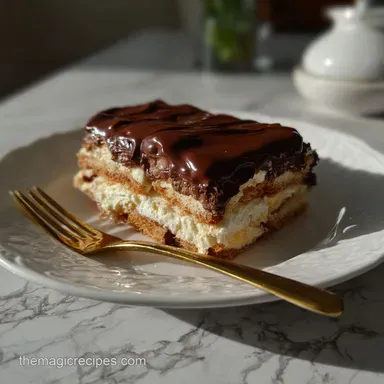
- The Clean Slice: For those perfect, sharp edged squares you see in photos, wipe your knife with a warm, damp cloth between every single cut.
- The Lattice Drizzle: If your glaze looks a bit plain, take a white chocolate bar, melt it, and drizzle thin lines across the top. It breaks up the dark surface and looks very "fancy bakery."
- The Texture Contrast: Right before serving, add a handful of toasted sliced almonds. The "crunch" against the velvety pudding is a game changer.
Decision Shortcut:If you want a firmer cake, use 3 cups of milk instead of 3.5. If you want a darker finish, use Dutch processed cocoa powder.
If you are short on time, use a pre made tub of chocolate frosting (melted slightly), though the cooked version is much better!
Final Success Secrets for Bakers
One thing I've learned from years of making this is that the temperature of your ingredients matters more than you think. Always ensure your pudding is cold and your glaze is hot. The hot glaze hitting the top layer of dry crackers is what jumpstarts the softening process for that top layer, ensuring it doesn't stay crunchy while the bottom is soft.
Also, don't be afraid to experiment with the cracker brands. While I love the honey version, cinnamon grahams add a warm, spicy note that pairs beautifully with the chocolate. It’s all about creating those indulgent treats that make your kitchen the favorite place in the house.
Now, grab your whisk and get started you've got 8 hours of waiting ahead of you, and trust me, every minute is worth it.

Chocolate Eclair Cake FAQs
How long must this cake chill before it is safe to slice?
Yes, the full 8 hours is mandatory. This extended time allows the moisture from the pudding to fully hydrate the graham crackers, transforming them from crisp to cake like.
Can I substitute the whole milk with skim milk to lower fat?
No, sticking with whole milk is best for texture. Skim milk does not provide enough fat to create the rich, velvety mouthfeel necessary to balance the sweetness of the glaze.
My filling is runny; did I use the wrong type of pudding mix?
Yes, you likely used cook and-serve instead of instant pudding. Instant pudding contains modified starches that set up rapidly at cold temperatures without heating.
Is it possible to freeze the finished eclair cake?
Yes, it freezes surprisingly well for up to two months. Wrap it tightly to prevent freezer burn, and always thaw it slowly in the refrigerator overnight for the best texture.
How do I ensure the chocolate glaze doesn't become grainy?
You must boil the glaze for a full 60 seconds. This ensures the sugar fully dissolves and stabilizes the fat content, resulting in a glossy, smooth shell rather than sandy sugar crystals.
What is the best way to get clean, sharp slices?
Use a knife dipped in hot water between every cut. Wiping the blade keeps the warm fudge top from dragging and smearing across the cool filling, giving you clean edges, similar to how you'd portion a firm Energy Balls Recipe: No-Bake Peanut Butter Chocolate Bites.
Can I use chocolate pudding instead of vanilla for a double chocolate version?
Yes, substituting chocolate pudding works perfectly. If you master the technique of keeping the layers level here, you can apply the same precision when working with high hydration doughs in a Cookie Recipes: Best Chewy Brown Butter Chocolate Chip recipe.
Chocolate Eclair Cake Recipe
Ingredients:
Instructions:
Nutrition Facts:
| Calories | 501 calories |
|---|---|
| Protein | 5 g |
| Fat | 18 g |
| Carbs | 78 g |
| Fiber | 2 g |
| Sugar | 55 g |
| Sodium | 685 mg |
