Cinnamon Rolls: Fluffy & Velvety
- Time: Active 25 minutes, Passive 1 hours 55 mins, Total 2 hours 20 mins
- Flavor/Texture Hook: Fluffy, buttery crumb with a caramelized, cinnamon rich center.
- Perfect for: Indulgent weekend brunches or a special holiday morning treat.
- Create Soft Pillowy Bliss with this Cinnamon Rolls Recipe
- The Science of Why it Works
- Unlocking the Secrets to a Perfectly Tender Yeast Dough
- The Essential Numbers for Your Sunday Morning Baking Project
- Gathering the Best Components for an Indulgent Breakfast Treat
- The Tool Kit Required for Bakery Quality Results at Home
- Mastering the Motion of Rolling and Slicing Your Dough
- Solving the Most Frequent Struggles When Working with Yeast
- Modifying the Classic Formula for Different Occasions and Needs
- Preserving That Melt in Your Mouth Softness for Later
- Finishing Touches That Make Your Treats Look Professionally Made
- Recipe FAQs
- 📝 Recipe Card
Create Soft Pillowy Bliss with this Cinnamon Rolls Recipe
There is absolutely nothing like the aroma of yeast hitting warm milk, followed by that intoxicating scent of cinnamon swirling through the house. I remember the first time I tried making these, I was so impatient that I didn't let the dough rise long enough.
I ended up with what I can only describe as sweet, cinnamon flavored bricks. It was a tragedy, honestly, but it taught me that the secret to a world class treat isn't just the sugar, it's the patience and the science behind the gluten.
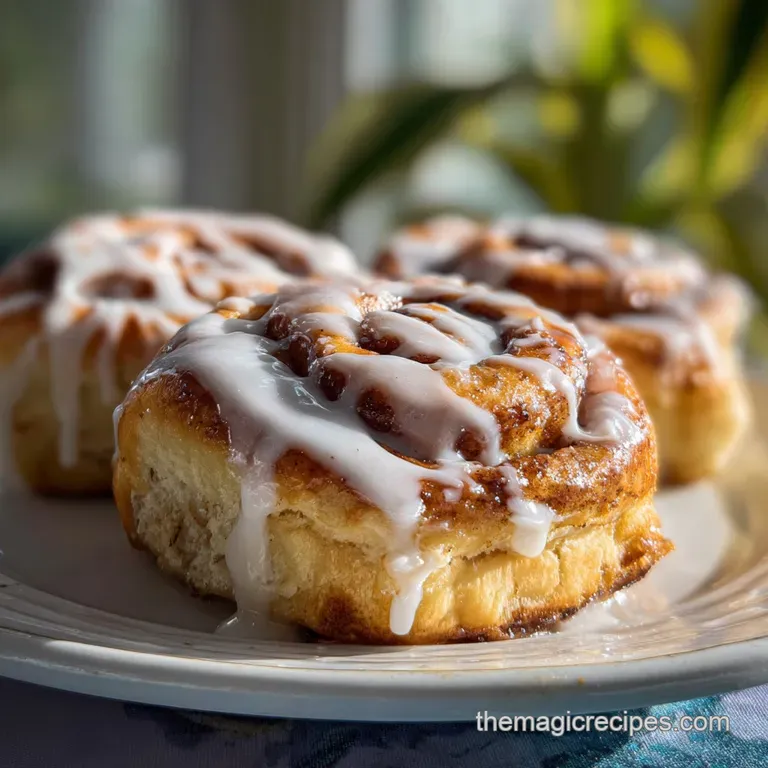
We are aiming for a contrast here that hits every sensory note. You want the edges to have a slight, golden brown "shatter" when you bite into them, leading immediately into a center that is so soft it practically dissolves.
The filling needs to be gooey, not grainy, and that frosting has to be thick enough to hold its shape but silky enough to seep into the warm crevices of the rolls.
If you have ever felt intimidated by yeast, don't be. We are going to walk through this step-by-step, focusing on the tactile cues like the "tacky but not sticky" feel of the dough. We've all seen those gorgeous photos online, but today we are actually going to make them in your kitchen.
Trust me, once you pull these out of the oven and see that glaze melting over the warm spirals, you'll never go back to the canned stuff again.
The Science of Why it Works
Yeast Fermentation: The yeast consumes sugars to release carbon dioxide, which creates tiny air pockets that expand the dough's protein structure.
Gluten Network: Using bread flour with a higher protein content allows for a stronger, more elastic web that traps those air bubbles for a superior rise.
Maillard Reaction: The combination of sugars and proteins in the milk and butter browns the crust, creating a complex, toasted flavor profile.
Flavor Profile Map
- Base Notes: Yeasty, buttery, toasted wheat
- Heart Notes: Spicy cinnamon, earthy nutmeg, deep molasses
- Top Notes: Tangy cream cheese, floral vanilla, sweet cream
| Method | Time | Texture | Best For |
|---|---|---|---|
| Standard Oven | 25 minutes | Uniformly fluffy and golden | Classic large batches |
| Cast Iron Skillet | 22 minutes | Crispy, caramelized bottom crust | Extra "gooey" centers |
| Air Fryer | 15 minutes | Deeply browned and slightly firmer | Small batches/singles |
When I first started experimenting with different pans, I noticed that the material changes the heat distribution significantly. While a standard ceramic dish is great, using a cast iron skillet creates a wonderful contrast between a crunchy, sugary base and a soft top. It's the kind of detail that makes people ask for your secret. Similar to the logic in my Cinnamon Rolls recipe, the vessel you choose dictates the final "bite" of the roll.
| Ingredient | Science Role | Pro Secret |
|---|---|---|
| Whole Milk (240ml) | Hydrates flour and softens crumb | Warm to exactly 110°F to wake yeast without killing it. |
| Bread Flour (530g) | Provides structural gluten | Measure by weight to avoid a dry, heavy dough. |
| Brown Sugar (200g) | Adds moisture and caramel notes | Pack it tightly to ensure a dense, gooey filling. |
Unlocking the Secrets to a Perfectly Tender Yeast Dough
One thing I've learned the hard way is that "room temperature" isn't just a suggestion; it's a requirement. If your egg is cold from the fridge, it can seize up the melted butter and cause the dough to be lumpy and uneven.
I like to drop my cold egg into a bowl of warm water for 5 minutes while I'm prepping everything else. It makes a massive difference in how smoothly the dough comes together.
The kneading process is where most people get nervous. Is it too sticky? Is it too dry? I used to keep adding flour until the dough didn't stick to my hands at all, but that was a mistake. You want the dough to be slightly tacky.
It should pull away from the sides of the mixer, but if you touch it, it should feel like a sticky note, not like wet glue. This high hydration is what keeps the rolls moist even after they've cooled down.
The Essential Numbers for Your Sunday Morning Baking Project
- Yield: 12 large rolls
- Proofing Temp: 75°F to 80°F (Ideal environment)
- Bake Temp: 350°F (175°C)
- Internal Doneness: 190°F (88°C)
Gathering the Best Components for an Indulgent Breakfast Treat
- Whole milk (240ml): Why this? The fat content ensures a tender, rich crumb that stays soft for days.
- Substitute: 2% milk (Result: Slightly less rich, still very good).
- Water (60ml): Why this? Lightens the dough slightly for a better rise.
- Substitute: Extra milk (Result: A denser, more brioche like texture).
- Active dry yeast (2.25 tsp): Why this? Provides the reliable lift needed for heavy, enriched doughs.
- Substitute: Instant yeast (Result: Skips the 10 minute bloom time).
- Granulated sugar (100g): Why this? Feeds the yeast and sweetens the dough base.
- Substitute: Honey (Result: Adds floral notes and extra moisture).
- Unsalted butter (75g melted/113g soft/57g soft): Why this? Adds the fat required for that signature "melt in-your mouth" feel.
- Substitute: Salted butter (Result: Omit the additional sea salt in the recipe).
- Large egg (1): Why this? Acts as an emulsifier for a smooth, cohesive dough.
- Substitute: 0.25 cup unsweetened applesauce (Result: More compact crumb).
- Fine sea salt (1 tsp): Why this? Balances the sweetness and strengthens the gluten structure.
- Substitute: Kosher salt (use 1.5 tsp).
- Bread flour (530g): Why this? High protein ensures the rolls hold their shape without collapsing.
- Substitute: All purpose flour (Result: Softer, but more delicate and prone to tearing).
- Brown sugar (200g): Why this? Molasses content creates the "gooey" filling texture.
- Substitute: Coconut sugar (Result: Earthier, less sweet flavor).
- Ground cinnamon (2.5 tbsp): Why this? The star of the show; provides the warm, spicy kick.
- Substitute: Pumpkin pie spice (Result: More complex, autumnal flavor).
- Ground nutmeg (0.25 tsp): Why this? Adds a subtle depth that makes the cinnamon pop.
- Substitute: Cardamom (Result: Brighter, citrusy undertones).
- Cream cheese (115g): Why this? Provides the tangy contrast to the sweet roll.
- Substitute: Greek yogurt (Result: Thinner, much tangier glaze).
- Powdered sugar (180g): Why this? Creates a smooth, grit free frosting.
- Substitute: Granulated sugar blended fine (Result: May remain slightly grainy).
- Vanilla extract (1 tsp): Why this? Rounds out the flavors of the frosting.
- Heavy cream (1.5 tbsp): Why this? Thins the frosting to a spreadable, velvety consistency.
- Substitute: Whole milk (Result: A slightly lighter, less creamy glaze).
The Tool Kit Required for Bakery Quality Results at Home

You don't need a professional kitchen, but a few specific tools will make your life significantly easier. I highly recommend using a digital scale for the flour. A "cup" of flour can vary by 20 or 30 grams depending on how tightly you pack it, and that's enough to turn a soft roll into a dry one.
A stand mixer (like a KitchenAid) is a lifesaver for the 5-7 minutes of kneading required, but if you're doing this by hand, just think of it as your workout for the day! You'll also want a sharp serrated knife or, even better, unflavored dental floss.
Using floss to cut the rolls prevents you from squishing the delicate layers, keeping those beautiful spirals intact. Finally, a 9x13 inch (23x33cm) baking pan is the perfect size to give the rolls enough room to rise up, not just out.
Mastering the Motion of Rolling and Slicing Your Dough
Phase 1: Blooming the Yeast and Mixing
Combine the 240ml warm milk, 60ml water, and 2.25 tsp yeast in a bowl. Let it sit for 10 minutes until it looks foamy and smells like bread. Note: If it doesn't foam, your yeast might be dead; start over with fresh yeast.
Phase 2: The Knead for Elasticity
Whisk in the 100g granulated sugar, 75g melted butter, egg, and 1 tsp salt. Gradually add the 530g bread flour, kneading for 5-7 minutes until the dough is smooth and bounces back when poked.
Phase 3: The Accelerated First Rise
Place the dough in a greased bowl, cover with a warm damp cloth, and let rise for 1 hour until it has doubled in size. Note: A warm spot like the top of a preheating oven works wonders here.
Phase 4: Rolling and Filling
Punch the dough down to release air. On a floured surface, roll it into a 12x18 inch (30x45cm) rectangle. Spread the 113g soft butter edge to edge, then sprinkle the mixture of 200g brown sugar, 2.5 tbsp cinnamon, and 0.25 tsp nutmeg until every inch is covered in spice.
Phase 5: The Floss Cut and Final Rise
Roll the dough tightly starting from the long edge. Use dental floss to slice into 12 even pieces. Place in a greased pan and let rise for 45 minutes until the rolls are touching and look puffy.
Phase 6: Baking and Glazing
Bake at 350°F (175°C) for 25 minutes until the tops are deeply golden and the centers look set. While they bake, whisk the 115g cream cheese, 57g butter, 180g powdered sugar, vanilla, and 1.5 tbsp heavy cream until the texture is velvety and smooth.
Spread the frosting over the rolls while they are still warm so it melts into the layers.
Solving the Most Frequent Struggles When Working with Yeast
My Dough Won't Rise
This is usually a temperature issue. Yeast is a living organism; if the milk was too hot (over 120°F), you likely killed it. If the room is too cold, the yeast is just hibernating. Try moving the bowl to a warmer spot, like inside an oven that is turned off but has the light on.
The Rolls are Dry or Hard
If your rolls come out more like biscuits than clouds, you likely over baked them or added too much flour during the kneading phase. Next time, aim for that "tacky" feeling in the dough and use a thermometer to check the internal temperature. If you want a different style of brunch dish that's a bit more forgiving, you might enjoy my Cinnamon Roll Casserole recipe.
| Problem | Root Cause | Solution |
|---|---|---|
| Filling leaks out | Butter was melted, not softened | Use "room temp" butter that holds its shape. |
| Center is raw | Pan was overcrowded or oven too hot | Use a 9x13 pan and tent with foil if browning too fast. |
| Frosting is runny | Added cream too quickly | Add liquid 1 teaspoon at a time until desired thickness. |
Common Mistakes Checklist
- ✓ Never use cold eggs; they will curdle your melted butter and ruin the dough's emulsion.
- ✓ Don't skip the second rise; this is what creates the airy, light texture inside the rolls.
- ✓ Avoid over flouring the work surface; excess flour gets rolled into the dough, making it tough.
- ✓ Check your yeast's expiration date; old yeast is the number one cause of "flat" rolls.
- ✓ Let the rolls cool for at least 10 minutes before frosting, or the icing will just run off into the pan.
Modifying the Classic Formula for Different Occasions and Needs
To Save 30 Minutes (The Overnight Method)
If you don't want to wake up at 5:00 AM, you can do the first rise, shape the rolls, and put them in the pan. Cover tightly with plastic wrap and put them in the fridge. In the morning, let them sit on the counter for 45 minutes to take the chill off and finish their rise before baking.
For a dairy-free Version
You can swap the whole milk for full fat oat milk and the butter for a high-quality vegan butter stick. For the frosting, use a vegan cream cheese. Note that the dough may rise a bit slower due to the different protein structures in plant based milks.
Making a Half Batch
If you are only cooking for two, you can easily halve the recipe. Use a small 8x8 inch square pan and reduce the baking time by about 5 minutes. Since you can't really halve an egg easily, beat one egg in a small bowl and use exactly 2 tablespoons of it for the half recipe dough.
Preserving That Melt in Your Mouth Softness for Later
Storage: Keep these in an airtight container at room temperature for up to 2 days. If you keep them any longer, the fridge is better (up to 5 days), but they will need a quick zap in the microwave to soften the butter back up.
Freezing: You can freeze unbaked rolls! After the second rise, wrap the pan tightly in a double layer of plastic wrap and foil. They stay good for 2 months. To bake, thaw in the fridge overnight and then bake as directed.
You can also freeze baked rolls individually; just wrap them well once they have cooled completely.
Zero Waste: If you find yourself with leftover rolls that have gone a bit stale, don't throw them out! They make the most incredible French toast or bread pudding. Simply slice them up, soak them in a basic custard of egg and milk, and griddle them until golden.
The cinnamon and sugar are already there, so you barely need any toppings.
Finishing Touches That Make Your Treats Look Professionally Made
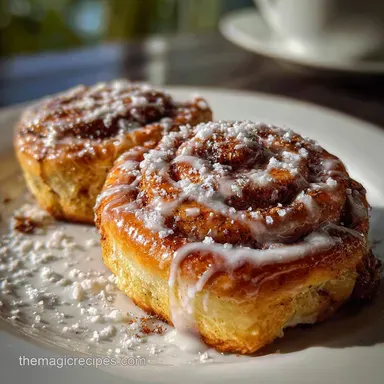
A big misconception is that you should wait for the rolls to be completely cold before frosting them. If you do that, the frosting just sits on top like a cap. You want to apply about half of the frosting when they are about 10 minutes out of the oven.
This allows some of that sweet, tangy goodness to melt down into the spirals, while the remaining frosting stays thick and creamy on top.
If you want to get fancy, a light dusting of extra cinnamon or a few toasted pecans on top can add a beautiful visual contrast. These are meant to be indulgent, so don't hold back. If you are looking for another crowd pleaser for a holiday, you might want to try this Christmas Morning Breakfast recipe which uses a similar enriched dough technique.
Decision Shortcut
- If you want a "Cinnabon" style roll: Add 1 extra tablespoon of heavy cream to the frosting and apply it while the rolls are very hot.
- If you want a more "Bread like" roll: Increase the bread flour by 30g and reduce the sugar in the dough by half.
- If you want a citrus twist: Add the zest of one orange to the sugar filling for a bright, floral aroma.
Baking Myths Debunked
"Sugar kills yeast if they touch directly." This isn't true in standard recipes. While a massive amount of sugar can slow yeast through osmotic pressure, the 100g we use actually helps jumpstart the fermentation.
"You must use a glass pan for the best rise." Actually, metal pans are better conductors of heat and often result in a more even bake and better browning on the bottom. Glass can take longer to heat up and may lead to gummy centers if you aren't careful.

Recipe FAQs
Can I use all-purpose flour instead of bread flour?
Yes, but expect a softer, more delicate result. Bread flour's higher protein content creates a stronger gluten network, essential for the tall, pillowy rise characteristic of these rolls. Using all-purpose flour will yield a delicious, but slightly less structurally sound, cinnamon roll.
My dough isn't rising, what could be wrong?
Check your yeast's expiration date and the water temperature. Yeast is a living organism; if the water was too hot (over 120°F), it likely killed it. Similarly, old or inactive yeast won't produce the carbon dioxide needed for rising. Try a warmer spot or fresh yeast.
How do I get that gooey filling without it leaking out?
Use softened, not melted, butter for the filling. Softened butter will hold its shape and create a barrier, preventing the brown sugar and cinnamon mixture from becoming too liquid and seeping out during baking. Think of it like spreading firm peanut butter versus pouring melted butter.
Why are my cinnamon rolls dry or hard?
This usually comes down to too much flour or over baking. Aim for a dough that feels tacky but not sticky during kneading. If you add too much flour, the dough becomes dense. Over baking also dries out the rolls quickly; check for a golden brown top and set center rather than dryness.
Can I make the dough ahead of time?
Yes, the overnight method is fantastic for convenience. After shaping the rolls, cover the pan and refrigerate them. In the morning, let them sit at room temperature for about 45 minutes to finish rising before baking. This method develops flavor and makes for a stress free morning bake.
How should I store leftover cinnamon rolls?
Store them in an airtight container at room temperature for up to 2 days. For longer storage, refrigerate them for up to 5 days, but be prepared to gently warm them in the microwave to restore that soft, buttery texture. If you're looking for a more forgiving brunch dish, consider trying something like Snickerdoodle Cookies: The Ultimate Soft Tangy Recipe which holds up well.
What's the best way to get a smooth, creamy frosting?
Start with softened cream cheese and butter, and add liquid gradually. Whisk them together until completely smooth before adding powdered sugar. If the frosting is too thick, add heavy cream or milk just a teaspoon at a time until you reach a velvety, spreadable consistency.
Cinnamon Rolls Homemade
Ingredients:
Instructions:
Nutrition Facts:
| Calories | 522 kcal |
|---|---|
| Protein | 7.2 g |
| Fat | 21.4 g |
| Carbs | 77.8 g |
| Fiber | 2.1 g |
| Sugar | 42.3 g |
| Sodium | 246 mg |
