Homemade Pizza: Crispy Crust Fresh Sauce

- Achieving Pizzeria Perfection: An Overview of This Classic Recipe
- Essential Components: Ingredients for the Dough, Sauce, and Toppings
- Master the Method: A Step-by-Step Guide to Baking Restaurant-Quality Pizza
- Expert Troubleshooting: Advanced Techniques and Common Pizza Pitfalls
- Prep Ahead and Preserve: Storing Pizza Dough and Baked Slices
- The Final Touch: Suggested Pairings and Presentation
- Recipe FAQs
- 📝 Recipe Card
Achieving Pizzeria Perfection: An Overview of This Classic Recipe
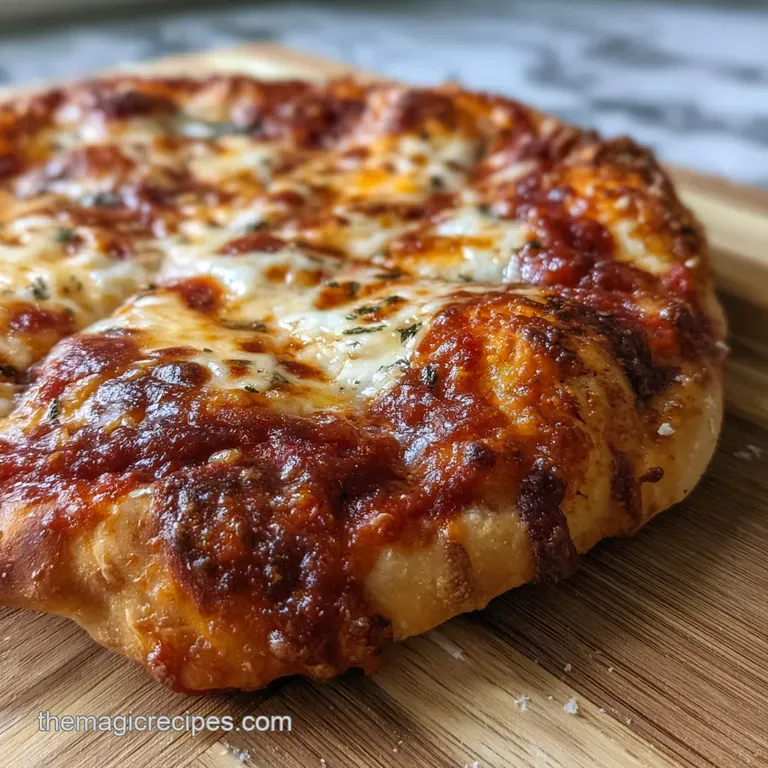
That smell, right? Yeast blooming, tomatoes bright, basil sharp nothing beats the anticipation of genuine homemade pizza . It’s the gentle sizzle when the dough hits the scorching stone, the sight of the crust puffing dramatically, and the promise of that perfectly melted cheese.
Pure kitchen magic awaits us.
Forget those soggy, supermarket nightmares you tried back in college; we’re making a dough that is perfectly chewy, light, and develops a beautiful, crisp exterior when baked at maximum heat.
Making homemade pizza from scratch is cheaper, intensely more satisfying, and surprisingly fast once you get the timing down. You get total control over the crust texture and the sauce intensity, which makes all the difference when chasing the ultimate slice of homemade pizza .
I’ve walked through the flour dusted kitchen of my dreams to perfect this technique for you. Let’s make a truly world class homemade pizza that will finally let you retire your delivery app.
What Defines a Truly Authentic Margherita Style Base
This specific homemade pizza recipe works because we treat the ingredients with the respect they deserve. The secret isn't just one step; it’s a triad of success: high protein flour, the no-cook sauce technique, and extreme heat.
Using strong bread flour means the gluten structure develops perfectly, trapping tiny gas bubbles during the long proof. When this well developed dough hits 500°F heat, those bubbles rapidly expand, creating that beautiful, light, airy crust the cornicione .
The Critical Role of High Heat in Crust Development
If you want that beautiful char and lift, you need extreme heat. Seriously. Preheating your oven to the maximum temperature (500°F/250°C, or higher!) is the single most important technique. Why?
It activates something called "oven spring." The moisture in the dough turns instantly to steam, forcing the crust to balloon upward and crisp dramatically before the dough can dry out. The texture of a great homemade pizza crust is impossible without that blast of heat.
Quick Comparison: Homemade vs. store-bought Pizza Kits
| Feature | This Homemade Pizza | Commercial Kit Dough |
|---|---|---|
| Crust Texture | Light, airy, chewy interior; crisp exterior | Dense, bready, uniform texture |
| Flavor Profile | Complex yeast development, bright tomato acidity | Flat, often salty, muted flavor |
| Time Investment | 2- 3 hours (mostly passive proofing time) | 15 minutes (if using pre-made sauce/dough) |
| Cost | Very economical, pennies per slice | Higher, and quality is sacrificed |
Essential Components: Ingredients for the Dough, Sauce, and Toppings
Making good homemade pizza means obsessing over the details. We’re aiming for simplicity, so quality ingredients are everything. This base is the starting point for countless homemade pizza recipes .
Selecting the Right Flour (High Protein vs. All-Purpose)
We use strong bread flour because it has a higher protein content than standard all-purpose flour. This higher protein develops stronger gluten chains, which gives your homemade pizza dough recipe the necessary elasticity and chewiness.
If you use all-purpose flour, your crust will still taste great, but it will be slightly less chewy and might not puff quite as dramatically.
Deciphering Fresh Mozzarella vs. Low-Moisture Shredded
This is where people get confused and end up with a watery mess. While fresh mozzarella is decadent, it holds a ton of moisture. If you use it, you must rip it up and let it drain on paper towels for at least an hour. Otherwise, that excess liquid steams your dough instead of allowing it to crisp.
For an easy life and crispier results, stick to good quality, low-moisture shredded mozzarella for your homemade pizza toppings .
Best Canned Tomatoes for an Uncooked Sauce
The secret to a vibrant, fresh homemade pizza sauce is not cooking it! By simply combining high-quality crushed San Marzano tomatoes with garlic and seasoning, you maintain their bright, acidic flavor. San Marzano tomatoes are typically less acidic and sweeter than regular canned varieties.
Don't skip these; they make the sauce pop.
Chef’s Note: Using a no-cook sauce preserves the fresh tomato flavor, making it taste like summer. You’ll be shocked at how much better this simple sauce tastes than anything you simmered for hours.
Ingredient Swaps for Dietary Adjustments
| Ingredient | Substitute | Impact |
|---|---|---|
| Strong Bread Flour | All-Purpose Flour (or gluten-free Blend) | Slightly less chewiness/Requires Xanthan Gum |
| Active Dry Yeast | Fresh Yeast (Use double the quantity) | None (must dissolve thoroughly in water) |
| Mozzarella | Provolone or Vegan Mozzarella | Flavor changes (more sharp) or texture changes |
| San Marzano Tomatoes | Diced, high-quality Canned Plum Tomatoes | Slight increase in acidity; still works well |
Master the Method: A step-by-step Guide to Baking Restaurant Quality Pizza
This method focuses heavily on technique. Patience with your proofing means a superior final product. Seriously, stop rushing your homemade pizza dough .
Mixing and Kneading the Perfect Dough Structure
First, you need to confirm your yeast is active. Combine the warm water (it should feel like a warm bath, not hot tea!) and yeast, and let it stand until frothy about 5 to 10 minutes. This is non-negotiable for a good homemade pizza .
Combine your flour and salt, then pour in the liquid and olive oil. Knead the dough for a full 8– 10 minutes until it is smooth and elastic. I once cut this short because my arm was tired, and the resulting crust was dense and sad. Don't be like past me.
Shaping the Base: Achieving Thinness Without Tearing
After the dough has doubled during the first proof (about 1.5– 2 hours), punch it down gently and divide it into two balls. Let them rest for 30 minutes this "bench rest" relaxes the gluten, making stretching easy.
On a surface dusted generously with semolina, gently stretch one dough ball into a 12 inch circle. Stretch, don't roll! Rolling pins push the gas out of the dough, preventing that beautiful oven spring. Use your hands to coax the dough into shape, maintaining a thick crust edge.
If it snaps back, walk away for five minutes, then try again.
Strategic Topping Application (Sauce, Cheese, and Basil Placement)
Less is absolutely more here. Overloading the pizza is the fastest route to the "soggy center syndrome." Stick strictly to the measurements. Spread the sauce thinly, leaving a 1 inch border. Distribute the mozzarella evenly but sparsely. You want pockets of dough to still be visible.
Save the fresh basil leaves until after the pizza comes out of the oven so they don't wilt and turn black. This keeps the flavor bright and fresh on your glorious homemade pizza .
Optimal Baking Setup: Oven Temperature and Pizza Stone Use
You need heat. Place your pizza stone or steel onto the middle rack of your oven and preheat the oven to its highest possible temperature (500°F or more). Allow the stone/steel to preheat for at least 30 minutes that stone needs to be scorching hot.
This preheating is what simulates the floor of a professional brick oven, giving your homemade pizza crust that necessary rapid bottom crisp.
Expert Troubleshooting: Advanced Techniques and Common Pizza Pitfalls
We’ve all been there: staring mournfully at a crust glued irrevocably to the pizza peel. Here are the real tricks I learned while perfecting my homemade pizza process.
Preventing the Pizza from Sticking to the Peel
This is the number one cause of kitchen meltdowns. The solution is simple: Semolina flour. Use semolina (the stuff for pasta) instead of plain flour on your peel.
It acts like tiny ball bearings, ensuring your raw homemade pizza slides off smoothly and prevents sticking far better than plain flour. Once the pizza is stretched and on the peel, give it one quick shake before adding toppings to confirm it moves freely.
If it doesn't, lift the edge and dust more semolina underneath.
Solving the Soggy Center Syndrome (Wet Toppings Management)
As mentioned, excessive moisture ruins a crisp base. Always pat your low-moisture mozzarella dry. If you insist on using fresh mozzarella, it must be drained for an hour first. Do not put too much sauce on the pizza. Spread it thin.
If you’re adding other fresh toppings, like pre-sliced tomatoes, dry them with a paper towel or even pre-roast them to remove excess water.
Achieving Maximum Oven Spring and Air Pockets
This comes down to two things: perfect kneading (8- 10 minutes!) and using the "stretch, not roll" method. If you roll the dough, you compress the gas created by the yeast.
By stretching it gently by hand, you preserve those delicate air pockets, which will turn into the beautiful bubbles and blistering when exposed to the high heat.
Prep Ahead and Preserve: Storing Pizza Dough and Baked Slices
Life gets busy, but you still deserve amazing homemade pizza . Prep ahead is your friend.
Freezing Dough for Future Use (The Par-Bake Method)
You can absolutely freeze this dough, but I prefer to par-bake it first for the absolute best results later. Stretch the dough, add the sauce (but NO cheese yet), and bake it on the stone for about 5 minutes until the crust is set but not yet golden.
Cool completely, wrap tightly in plastic wrap, and freeze. When you are ready for a quick homemade pizza fix, take it out, top it, and bake it for about 8– 10 minutes.
Best Practices for Reheating Leftover Pizza
Never, ever microwave your leftover slices. It turns the crust rubbery. Reheat leftover homemade pizza in a skillet on medium low heat for 3– 5 minutes, covered with a lid. The bottom crisps up, and the trapped steam melts the cheese perfectly. If you have a few extra dough balls lying around, you can always make a side salad using my Coleslaw Recipe: The Best Creamy Homemade Picnic Side for an easy weeknight meal.
The Final Touch: Suggested Pairings and Presentation
You’ve done the hard work of making truly stunning homemade pizza . Now it’s time to enjoy the rewards!
Wine and Beer Pairings That Complement Fresh Tomato and Basil
When dealing with the high acidity of fresh tomato sauce and the richness of mozzarella, you need a drink that can cut through the fat without clashing with the acid. A crisp, dry Italian white wine (like a Vermentino) is ideal.
For beer lovers, a good quality, hoppy craft pale ale is robust enough to stand up to the cheese and basil.
Serve the Crusts Right!
Don't let those amazing, airy crusts go to waste! Serve the pizza with a small bowl of high-quality extra virgin olive oil mixed with a pinch of red pepper flakes and maybe a splash of balsamic vinegar.
It's the perfect dipping oil, and it ensures every last bite of your beautiful homemade pizza is utilized. Now go forth and create the best homemade pizza recipes of your life!

Recipe FAQs
Why is my homemade pizza crust soggy instead of developing a crispy bottom?
A soggy crust usually results from moisture overload or insufficient cooking heat. Ensure you drain wet toppings like fresh mozzarella thoroughly, and use a light hand with your sauce application, as too much liquid is the primary culprit.
Most importantly, preheat your pizza stone or steel for at least 45 minutes to guarantee a super hot surface that immediately crisps the dough upon contact.
My dough feels tough and dense after kneading and rising. What went wrong?
Tough dough typically indicates that the gluten structure is too tight, either from over kneading or insufficient proofing time. Ensure you follow the specified measurements for flour and water precisely, and if kneading by hand, stop once the dough passes the windowpane test, allowing the slow proofing process to finish relaxing the gluten fully.
Can I freeze the prepared pizza dough for use at a later date?
Yes, pizza dough freezes very well. After the first rise, punch the air out, lightly coat the dough ball in oil, and wrap it tightly in plastic wrap before placing it into a heavy duty freezer bag.
To use, thaw the dough overnight in the refrigerator, then let it sit at room temperature for about 30 minutes to activate the yeast before shaping.
I do not own a pizza stone or steel. Is there an alternative for achieving a crispy crust?
The goal is sustained, intense heat transfer. The best household alternative is using an inverted heavy duty baking sheet or a cast iron skillet, placed on the middle rack. Place the alternative in the oven during the entire preheating phase about 45 minutes to ensure it absorbs maximum heat before you launch the pizza onto its surface.
Is the long, slow proofing time truly necessary, or can I use a rapid rise technique?
The long, slow fermentation (proofing) is essential for developing complex flavor profiles and the desirable airy interior structure of the crust. While rapid rise methods can create dough faster, they result in a blander, less digestible crust lacking the depth that 24 hours of cold fermentation provides.
For restaurant quality results, the patience is worth the investment.
How should I store leftover baked pizza? Does it reheat well?
Store leftover slices tightly wrapped in foil or in an airtight container in the refrigerator for up to three days. For the best reheat, avoid the microwave, which steams the crust; instead, reheat slices on a skillet over medium heat or quickly in a hot oven (400°F/200°C) until the cheese melts and the crust re-crisps.
Classic Homemade Pizza Recipe

Ingredients:
Instructions:
Nutrition Facts:
| Calories | 614 kcal |
|---|---|
| Protein | 28.3 g |
| Fat | 23.8 g |
| Carbs | 71.8 g |
