Cool Whip Candy
- Time: Active 20 minutes, Passive 2 hours 30 mins, Total 2 hours 50 mins
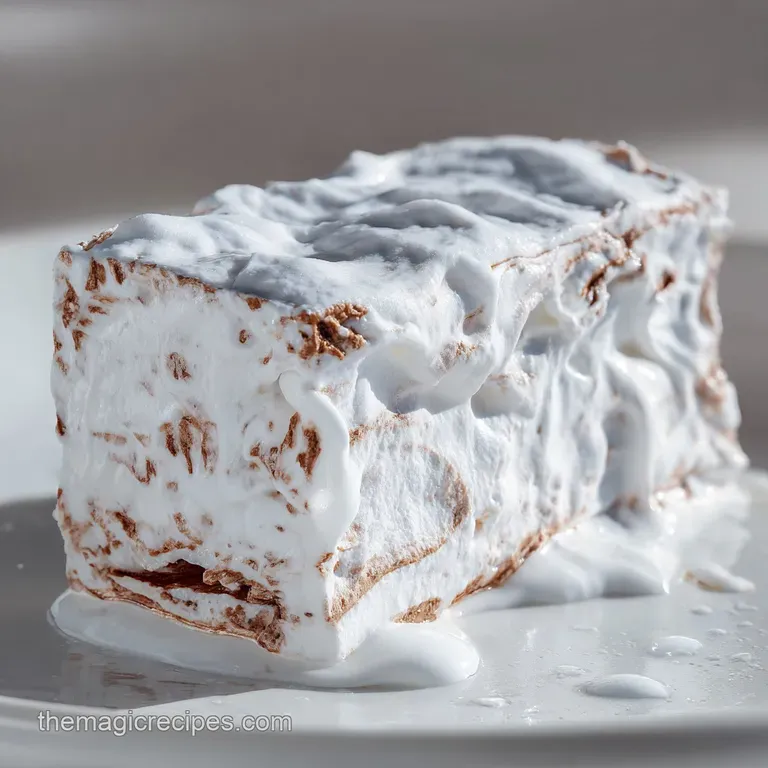
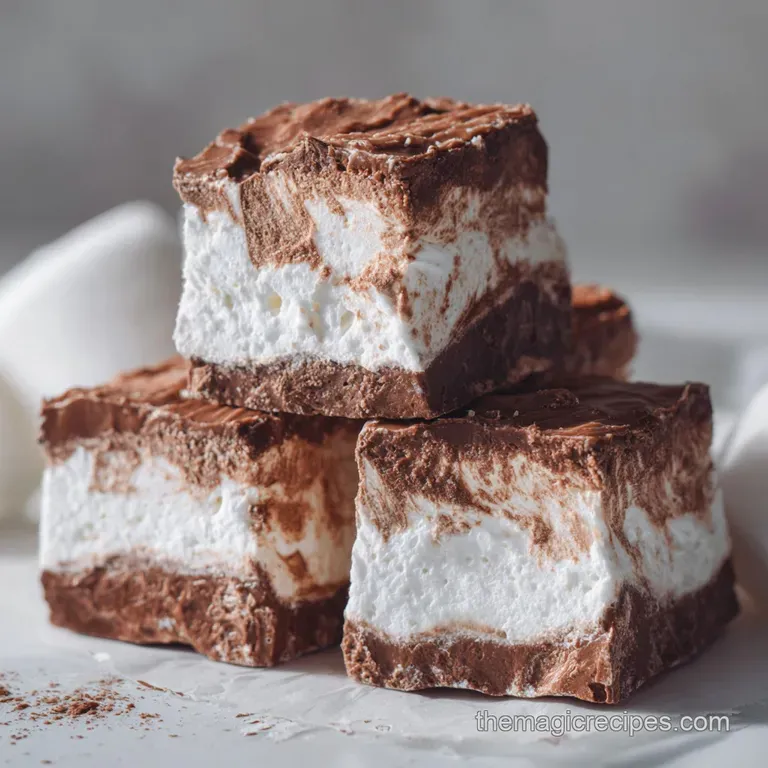
- Flavor/Texture Hook: Shatter crisp milk chocolate shell with a cloud like, malted style interior
- Perfect for: Holiday gift boxes, effortless dessert platters, and beginner confectioners
- Creating Decadent Three Ingredient Cool Whip Candy
- Why This Recipe Works
- Essential Recipe Specifications
- The Necessary Ingredients
- Tools For Success
- Step By Step Guide
- Solving Common Issues
- Flavor Variation Ideas
- Storage And Freezing
- Beautiful Presentation Tips
- Solving Confectionery Myths
- Recipe FAQs
- 📝 Recipe Card
Creating Decadent Three Ingredient Cool Whip Candy
Imagine the sound of a thin, glossy chocolate shell giving way to a center that feels like a frozen cloud. That first bite hits with the deep, familiar comfort of milk chocolate, followed immediately by a texture that is somehow both airy and rich.
It’s the kind of treat that makes you close your eyes and wonder how something so simple can taste so remarkably like a gourmet Three Musketeers bar. I remember the first time I set these out at a holiday party, tucked between fancy macarons and hand rolled truffles, and they were the very first thing to disappear.
We’ve all been there, standing over a stove with a candy thermometer, praying the sugar doesn't crystallize or the chocolate doesn't seize. This recipe is the antidote to that kitchen anxiety.
It’s a bit of a kitchen "cheat code" that I stumbled upon during a frantic Christmas Eve where half my baking had failed. I needed something indulgent but foolproof. By folding melted chips into whipped topping, we create a stable ganache style mousse that sets into a bite sized luxury.
You get all the glory of a professional confectioner without the specialized degrees.
The real magic happens in the contrast. We aren't just making a sweet blob, we are building layers of sensation. The chill of the center meets the snap of the room temperature coating, while a tiny pinch of sea salt at the end wakes up all those sugar molecules.
It is a decadent, effortless win for any home cook who loves the idea of homemade candy but hates the idea of messy, failed batches. Trust me, once you master the "fold and freeze," you’ll never look at a tub of whipped topping the same way again.
Why This Recipe Works
The Physics Of The Frost
Fat Stabilization: When melted chocolate meets the stabilized vegetable fats in the whipped topping, it creates a quick setting emulsion that maintains aeration even after freezing.
Thermal Resistance: The refined coconut oil in the coating lowers the melting point of the chocolate, ensuring the shell snaps perfectly without being too hard to bite through when cold.
Structure Retention: Freezing the centers before dipping prevents the warm chocolate coating from melting the delicate mousse, preserving that specific "cloud" texture.
Coating Method Comparison
| Method | Prep Time | Texture Result | Best Use Case |
|---|---|---|---|
| Microwave | 2 minutes | Thin, glossy | Quick weeknight batches |
| Double Boiler (Stovetop) | 10 minutes | Thick, velvety | Large holiday production |
| Slow Cooker | 15 minutes | Consistent, fluid | Dipping parties or events |
Using the stovetop method provides more control over the heat, ensuring the chocolate doesn't scorch, which is a common heartbreak with microwave melting. If you find yourself wanting more chocolatey goodness, you might also enjoy the rich layers in my Fudge recipe.
Essential Recipe Specifications
Before you start clearing space in your freezer, let's look at the numbers that make this batch successful. Precision in the chilling phases is what separates a messy glob from a professional looking candy bar.
Ingredient Deep Dive
| Ingredient | Science Role | Pro Secret |
|---|---|---|
| 11.5 oz Milk Chocolate Chips | Provides structural base | Use chips with higher cocoa butter for better melting |
| 8 oz Whipped Topping | Introduces air and volume | Ensure it is fully thawed but still cold to avoid deflation |
| 12 oz Melting Wafers | Creates the outer barrier | Wafers contain thinning agents that chips lack for dipping |
The Necessary Ingredients
To get that bakery quality finish, we need to be specific about our components. Don't grab the low-fat versions here, the fat is what carries the flavor and provides the silky mouthfeel we are after.
- 11.5 oz milk chocolate chips: These form the heart of the filling.
- 8 oz whipped topping (Cool Whip), thawed: This provides the "air" in the mousse.
- 12 oz milk chocolate melting wafers: Specifically designed for a smooth, thin coating.
- 1 tbsp refined coconut oil: This is the secret to a shell that doesn't crack or flake off.
- 1/4 tsp sea salt: Just enough to cut through the heavy sweetness.
- 2 tsp holiday sprinkles: For that visual pop and a tiny bit of crunch.
Substitution Options
| Original Ingredient | Substitute | Why It Works |
|---|---|---|
| Milk Chocolate Chips | Semi Sweet Chips | Provides a darker, more "adult" flavor profile with less sugar |
| Refined Coconut Oil | Vegetable Shortening | Similar fat structure that helps thin the chocolate for dipping |
| Melting Wafers | Chocolate Bar + 1 tsp Oil | Real chocolate bars have higher quality, but need thinning to dip |
If you happen to be a fan of the salty sweet combination, you could even try incorporating some of the techniques from my Peanut Butter Balls Recipe for a different flavor profile next time.
Tools For Success
You don't need a professional candy kitchen, but a few specific items will make your life much easier. A parchment lined baking sheet is non negotiable, unless you want to spend your evening scraping stuck candy off a tray.
I also highly recommend using a small cookie scoop (about 1 tablespoon size) to keep the portions identical. This ensures every piece of Cool Whip Candy looks uniform and professional.
For the dipping phase, a specialized dipping tool or a simple fork with the middle tines bent slightly can help the excess chocolate drain away. If the coating is too thick, your candy will look lumpy.
Having a microwave safe glass bowl is also helpful for the melting wafers, as glass holds heat better than plastic, keeping your chocolate fluid for longer.
step-by-step Guide
1. The Filling Preparation
Melt the 11.5 oz milk chocolate chips in a microwave safe bowl in 30 second intervals. Stir vigorously between each burst until the chocolate is silky and free of lumps. Note: Overheating here will cause the chocolate to seize and become grainy.
2. The Folding Phase
Gently fold the thawed 8 oz whipped topping into the melted chocolate. Use a wide spatula and a "cut and turn" motion until no white streaks remain. Note: If you stir too fast, you'll pop the air bubbles and lose the fluffiness.
3. The First Chill
Place the mixture in the freezer for 30 minutes. This allows the fats to firm up enough for scooping without sticking to everything.
4. Portioning The Bites
Line a tray with parchment paper. Scoop 1 tablespoon mounds of the mixture onto the tray until you have approximately 32 portions.
5. The Deep Freeze
Return the tray to the freezer for 1 hour 30 mins. This is the most critical step, as the centers must be rock hard before they hit the warm coating.
6. Preparing The Shell
Melt the 12 oz melting wafers with 1 tbsp coconut oil. Stir until the mixture runs off the spoon like thin honey.
7. The Enrobing Technique
Drop one frozen center into the melted coating. Use a fork to lift it out, tapping the side of the bowl until the excess chocolate stops dripping.
8. The Final Touch
Place the dipped candy back on the parchment. Immediately sprinkle with sea salt and holiday sprinkles until the coating begins to dull and set.
9. The Final Set
Let the candies sit at room temperature for 15 minutes or in the fridge for 5 minutes until the shells are completely firm to the touch.
Solving Common Issues
Oily Or Deflated Filling
If your filling looks flat or has pools of oil, the chocolate was likely too hot when you added the whipped topping. The heat literally melts the structure of the topping. Next time, let the chocolate sit for 2 minutes after melting before you start the folding process.
Thick Clumpy Coating
When the coating is too thick, it won't settle into a smooth shell. This usually happens because the chocolate is cooling down too much while you work. Re heat it for 10 seconds to bring back the fluid viscosity.
Centers Melting During Dipping
If your "cloud" starts to turn into a puddle in the dipping bowl, your centers weren't frozen long enough. They should feel like ice cubes. If they soften, put them back in the freezer for another 20 minutes before continuing.
| Problem | Root Cause | Solution |
|---|---|---|
| Shell Cracking | No oil in coating | Add 1 tbsp coconut oil to the wafers to increase flexibility |
| Sweating Candy | Temperature shock | Move from freezer to fridge, then to room temp gradually |
| Sticky Bottoms | Not enough chill time | Ensure the centers are frozen solid (90+ mins) before dipping |
Common Mistakes Checklist
- ✓ Thaw the whipped topping in the fridge, never the microwave.
- ✓ Use refined coconut oil so your candy doesn't taste like a tropical island.
- ✓ Don't skip the second freeze; "firm" is not "frozen."
- ✓ Work in small batches, keeping half the centers in the freezer while you dip the first half.
- ✓ Use a deep, narrow bowl for dipping to make enrobing easier.
Flavor Variation Ideas
If you want to move beyond the classic milk chocolate profile, this recipe is incredibly adaptable. For a holiday twist, you can add 1/2 teaspoon of peppermint extract to the filling. The minty freshness pairs beautifully with the creamy texture. If you're a fan of classic cookies, you might consider the flavor profile of a Peanut Butter Blossom Cookies recipe and add a dollop of creamy peanut butter to the center before freezing.
2 Flavor Twists
- Mocha Clouds: Fold 1 teaspoon of instant espresso powder into the melted chips before adding the whipped topping. The bitterness of the coffee balances the sugar perfectly.
- White Chocolate Raspberry: Use white chocolate chips for the filling and swirl in 2 tablespoons of seedless raspberry jam before the first freeze.
2 Dietary Swaps
- dairy-free Option: Use dairy-free chocolate chips and a coco whip alternative. Note: The texture will be slightly softer and may require extra freezer time.
- Dark Chocolate Version: Swap the milk chocolate wafers for 60% cacao wafers for a less sweet, more intense cocoa experience.
Storage And Freezing
Because of the whipped topping base, these candies are best kept cold. If they sit out on a warm counter for hours, the centers will eventually soften and lose that specific "snap." I recommend storing them in an airtight container in the refrigerator for up to 10 days.
They are actually quite delicious straight from the fridge!
For long term storage, these are freezer champions. You can keep them in a freezer safe bag for up to 3 months. When you're ready to eat one, just let it sit at room temperature for about 5 minutes so the shell softens slightly.
Regarding zero waste, if you have leftover dipping chocolate, drizzle it over popcorn or dip some pretzels in it. Never let good chocolate go to waste!
Beautiful Presentation Tips
To make these look like they came from a high end boutique, the garnish timing is everything. You have a window of about 30 seconds after dipping before the chocolate sets. I like to use a contrasting color for the sprinkles, like gold pearls against the dark chocolate.
If you're feeling fancy, you can also use a spoon to drizzle a "zigzag" of white chocolate across the top once the base coat is dry.
Packaging also makes a huge difference. Placing each Cool Whip Candy in a small paper truffle liner prevents them from bumping into each other and scuffing the glossy finish. If you're gifting them, a simple tin lined with wax paper looks rustic and elegant. Just remind the recipient to keep them in the fridge!
Solving Confectionery Myths
A common misconception is that you must temper chocolate to get a shine. While that’s true for pure chocolate bars, using melting wafers is a legitimate shortcut. Wafers contain oils that mimic the look of tempered chocolate without the complex temperature manipulation.
Another myth is that frozen candy will always "sweat" when moved to room temp. If you keep the container closed until they reach temperature, the condensation forms on the box, not the candy.
Finally,, many people think you can't use "fake" whipped topping for quality candy. In reality, the stabilizers in whipped topping are exactly what give this candy its unique, mousse like consistency.
Real whipped cream would deflate and separate far too quickly, leaving you with a greasy mess instead of a fluffy treat. Embrace the convenience!

Recipe FAQs
What is the hardest candy to make?
Hard candy like lollipops or brittle. These require precise sugar temperatures (around 300°F/150°C) and quick work before they harden, making them prone to scorching or crystallization if not handled carefully. If you're looking for a more forgiving candy, consider mastering the folding technique in our Peanut Butter Balls Recipe.
Why did they stop making Three Musketeers bars?
They didn't stop making them. Three Musketeers bars remain in production and are widely available. Perhaps you're thinking of a different limited edition candy or a specific regional variation that was discontinued.
What's a candy from the 80s that you can't find anymore?
Several candies have faded. Popular examples include the Marathon Bar (long licorice twist), Wisps (chocolate puffs), and Bonkers! (fruit chew bars with sour centers). Many unique flavors and types from that era have been discontinued due to changing consumer tastes or production costs.
What is the unhealthiest candy?
It's subjective and depends on nutritional goals. However, candies highest in sugar, saturated fat, and artificial ingredients with little to no nutritional value are generally considered the least healthy.
Options like pure sugar candy or those with excessive artificial colors and flavors fall into this category.
Can I use real whipped cream instead of Cool Whip?
No, stick with stabilized whipped topping. Real whipped cream contains too much water and fat that can separate or deflate, ruining the delicate, airy texture needed for this candy. Stabilizers in products like Cool Whip are crucial for maintaining structure.
How do I get a smooth chocolate coating on my candy?
Use melting wafers and a little oil. Melting wafers are formulated for easy, smooth dipping and hardening without tempering. Adding about 1 teaspoon of refined coconut oil per cup of wafers thins the chocolate for a beautiful, glossy shell. If you enjoyed mastering the smooth coating technique here, you can apply similar principles to achieve that glossy finish on cakes with our Chocolate Icing Recipe: The Ultimate Glossy Fudge Icing for Cakes.
How do I make the filling freeze firm enough to dip?
Freeze for at least 1 hour 30 minutes. The centers need to be rock solid, like little ice cubes. If they feel even slightly soft, they will melt into the warm chocolate coating, creating a mess rather than a neat candy. Ensure they're fully frozen before attempting to dip.
Cool Whip Candy

Ingredients:
Instructions:
Nutrition Facts:
| Calories | 135 kcal |
|---|---|
| Protein | 1.5 g |
| Fat | 8.4 g |
| Carbs | 14.2 g |
| Fiber | 0.4 g |
| Sugar | 12.3 g |
| Sodium | 26 mg |
