Honey Chicken: Crispy Takeaway Perfection at Home
- Mastering the Perfect Takeaway Classic at Home
- The Science Behind the Shattering Crispness
- Components: The Batter, The Glaze, and Essential Ingredients
- Your Step-by-Step Guide to Making Restaurant-Quality Honey Chicken
- Troubleshooting and Expert Tips for Optimal Results
- Serving, Storing, and Reheating this Glazed Delicacy
- Recipe FAQs
- 📝 Recipe Card
Mastering the Perfect Takeaway Classic at Home
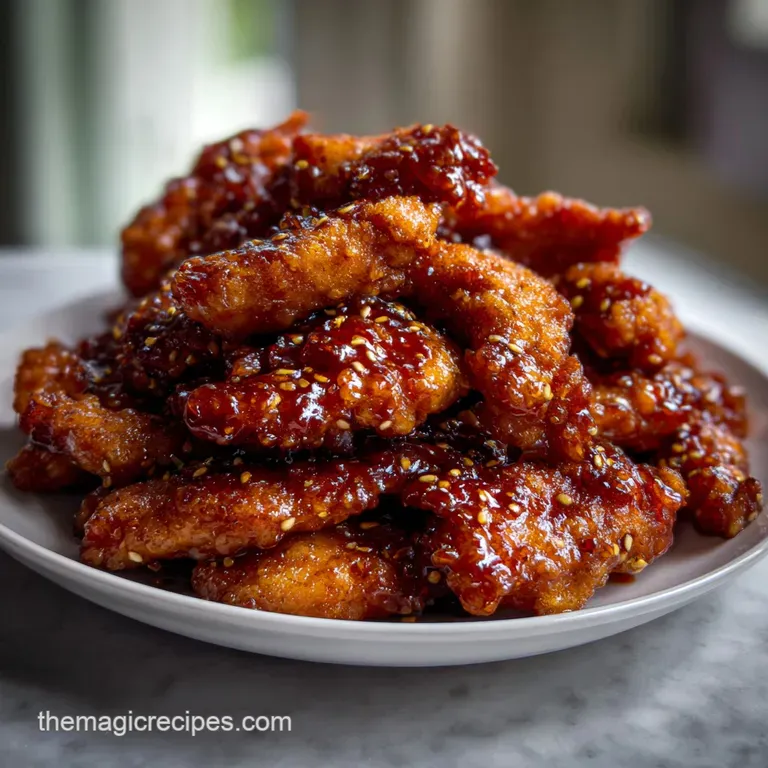
Can we talk about that moment? You know, the second that glossy, deep gold exterior of a perfectly fried chicken piece hits your teeth and delivers that satisfying shatter before giving way to tender meat.
That is the texture we are chasing with this homemade Honey Chicken recipe. It smells like pure nostalgia hot oil, sweet ginger, and something wonderfully sticky.
We often order this dish thinking it's too much fuss to tackle ourselves. But trust me, making restaurant quality, non-soggy Honey Chicken at home is not only achievable but ridiculously fast once you master the technique.
It saves money, lets you control the quality of the ingredients, and ensures every single piece is crispy gold. It’s the ultimate Friday fakeaway lifesaver.
So let’s stop relying on questionable delivery boxes and start impressing ourselves. I’ve broken down the exact ratio of starch to flour, explained the precise oil temperatures, and revealed the secret of the sticky glaze.
Get ready to cook the best damn Honey Chicken you’ve ever had.
The Science Behind the Shattering Crispness
This isn't just about throwing chicken into hot oil. The difference between a decent fried dish and truly legendary Honey Chicken lies in the controlled violence of the double fry technique and the clever construction of the batter.
The Secret to the Crispiest Coating
Standard flour alone results in a soft crust that immediately soaks up the glaze and turns into a floppy mess. Our batter utilizes a critical 1:1 ratio of all-purpose flour to cornstarch (or potato starch). The cornstarch prevents the formation of gluten, ensuring the crust is light and hard, not chewy.
But the real secret for next level Honey Chicken crispness? Using ice-cold water or, even better, soda water, which introduces bubbles and ensures the batter puffs up dramatically upon impact with the hot oil.
Why We Use a Sticky Ginger Glaze
The goal of the glaze is not just sweetness; it needs balance and body. The combination of runny honey and caster sugar provides the characteristic sweetness of good Honey Chicken , but the addition of rice vinegar cuts through that richness beautifully.
Crucially, the fresh, grated ginger provides an aromatic, slightly spicy lift that stops the whole dish from feeling cloying.
A Quick Overview of the Cooking Process
We use two distinctly different heat levels for this method. The first lower temperature fry (325°F or 160°C) is solely dedicated to cooking the meat all the way through without burning the coating. The second over high heat blast (375°F or 190°C) is purely for texture.
This ensures your homemade Honey Chicken is safe to eat and boasts maximum crunch.
The Double Fry Technique Explained
If you skip the second fry, your chicken will be pale and soft. The initial fry locks in the moisture and cooks the center. When you drop the pieces back into the screaming hot oil for the second fry, the high heat instantly vaporizes any remaining moisture on the surface, essentially creating an impermeable, extra crispy shell.
Trust me, if you are using tougher cuts like honey chicken thighs , this technique is non-negotiable for tender interiors.
Achieving the Ideal Batter Viscosity
Don't overmix the batter! A few small lumps are totally fine; overmixing makes gluten develop and results in a tough exterior. The resulting batter should be thin, like slightly thick milk or a crepe mix definitely not the heavy, viscous texture of pancake batter.
A thinner coat is what delivers that ethereal, shatteringly crisp exterior on your finished Honey Chicken Chinese dish.
Balancing Sweetness and Tang for the Glaze
The cornstarch slurry is our thickening agent here. When you whisk it into the simmering honey mixture, watch how quickly it changes. We want a sauce that clings to the chicken without dripping excessively, but if it gets too thick, it turns into sticky glue before you even finish tossing.
You can easily fix an overly thick sauce by adding a splash of water, which is a life saver when perfecting your Honey Chicken .
Components: The Batter, The Glaze, and Essential Ingredients

Breaking Down the Batter Ratios (Flour vs. Starch)
We use a straightforward 1:1 ratio of all-purpose flour to cornstarch, boosted by a teaspoon of baking powder. The baking powder helps the batter achieve lift when it hits the oil, making it lighter than air.
This combination ensures the perfect structural integrity for your crisp Honey Chicken .
Essential Components for the Sticky Glaze Base
The heart of this glaze relies on a simple syrup structure of honey, water, and sugar, amplified by the acidity of rice vinegar and the savory depth of soy sauce. I tried skipping the fresh ginger once, and the resulting Honey Chicken tasted flat and one-dimensional. Never again!
The fresh ginger provides essential brightness.
Ingredient Swaps and Dietary Modifications
Need to make this recipe accessible to everyone? No problem. If you need a fully gluten-free honey chicken thigh recipe , simply replace the all-purpose flour with a certified gluten-free blend, or rely solely on starch (use ¾ cup cornstarch total).
If you’re avoiding honey, maple syrup works wonderfully, though the flavor will be earthier.
| Ingredient | Viable Substitute | Notes |
|---|---|---|
| Rice Wine | Dry Sherry or Mirin | Essential for the marinade depth. |
| Rice Vinegar | Apple Cider Vinegar | Adds necessary tang, but use slightly less. |
| Cornstarch | Potato Starch or Tapioca Flour | Essential for the shatteringly crisp crust. |
Your step-by-step Guide to Making Restaurant Quality Honey Chicken
Preparing the Meat and Achieving Batter Adhesion
Cut the meat into uniform, 1 inch pieces. I prefer boneless chicken breast for this recipe, but if you love juicy meat, using thighs works great too. Toss the chicken with the basic honey chicken marinade ingredients soy, ginger, wine, and pepper.
Let it rest for just 15 minutes while you prepare the batter. This quick rest is enough to introduce flavor and moisture.
The Crucial First Fry (Par-Cooking)
Heat your oil to exactly 325°F (160° C) . Drop the battered chicken pieces in gently, working in small batches. Listen for a steady, gentle sizzle. If the oil is thrashing wildly, it's too hot! We are aiming for a pale blonde color here, not golden.
This stage ensures the interior of your future Honey Chicken is perfectly cooked and ready for the crisping step.
The Second Fry: Maximizing Crunch
Now, crank the heat until the oil reaches 375°F (190° C) . This is where the magic happens. Drop the par-cooked chicken back in, perhaps in a slightly bigger batch. The sizzling will be more aggressive, and the kitchen will smell incredible.
Fry for just 60 to 90 seconds until the crust is a deep, gorgeous golden brown and looks fiercely crunchy.
Finalizing the Glaze and Toss Technique
The clock is ticking! Once the sauce is slightly thickened (it should coat the back of a spoon, not drip off immediately), remove it from the heat. Transfer your piping hot, double fried chicken to a massive, clean bowl.
Pour the warmed honey glaze over the top and toss quickly and definitively . You must coat every piece in five seconds flat and immediately plate the Honey Chicken . Do not let it sit in the glaze.
Troubleshooting and Expert Tips for Optimal Results
Avoiding a Soggy Batter Disaster
A soggy crust is the death of great Honey Chicken . The two main culprits are insufficient draining and slow tossing. After both the first and second fry, drain the chicken on a wire rack set over a tray— not on paper towels.
Paper towels steam the underside of the crust. Next,, once the glaze is added, you have mere seconds to toss and serve. Speed is your friend here.
Temperature Control: The Key to Perfect Frying
I cannot stress this enough: Buy a cheap thermometer. If your oil temperature drops too low (below 325°F), the coating will absorb the oil, leaving you with greasy, heavy Honey Chicken . If the temperature is too high during the first fry, the outside burns before the inside cooks.
Maintaining 325°F then 375°F is the golden rule.
Common Mistakes When Preparing the Sticky Glaze
The most frequent error is over reducing the sauce. If you cook the glaze for too long without the cornstarch slurry, the sugars caramelize and become too thick and brittle. If this happens, your Honey Chicken will stick together in one massive, sugary clump.
Keep the simmer gentle, and only thicken until it just clings.
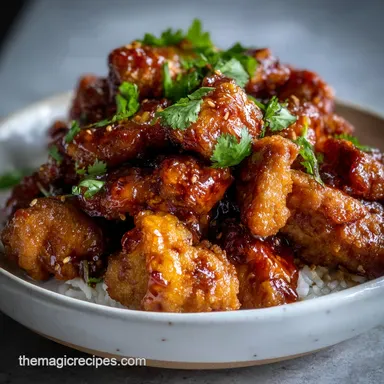
Recommended Side Dishes and Pairings
This rich, sweet, and tangy dish needs simple accompaniments. Steamed jasmine rice is mandatory for soaking up the extra glaze. For a green counterpoint, try lightly steaming some broccoli or crisp snow peas. For a lighter meal, you could serve this alongside high protein dishes, contrasting the richness with something fresh, like my High Protein Recipes: Harissa Chicken Quinoa Fritters . This makes a full, balanced meal.
Serving, Storing, and Reheating this Glazed Delicacy
How to Reheat While Maintaining the Crunch
This is the big question. Does leftover Honey Chicken freeze well? Not glazed, no. But if you have leftover fried chicken before glazing, it freezes beautifully. If you have leftover glazed Honey Chicken easy style, forget the microwave.
Place it on a rack in a 400°F (200°C) oven or an air fryer for 5– 7 minutes until sizzling hot. The heat will re-crisp the crust and reactivate the sticky glaze.
Safe Storage and Freezing Guidelines
Store leftover glazed Honey Chicken in an airtight container in the fridge for up to 3 days. If you are freezing, flash freeze the unglazed, double fried pieces on a tray first, then transfer them to a freezer bag. They will keep for up to 2 months.
To use, thaw them slightly, and give them a quick 30 second blast in hot oil (375°F) before tossing in fresh glaze. That's how you nail homemade Honey Chicken every time.

Recipe FAQs
Why isn't my chicken crispy, or why does it get soggy quickly?
Crispiness relies heavily on the double fry technique and maintaining a high oil temperature around 350°F (175°C). Ensure you do not crowd the pan during frying, as this causes the oil temperature to drop dramatically, leading to soggy results.
Always toss the crispy chicken in the glaze immediately before serving, as the sauce will naturally soften the crust over time.
My honey glaze is too thin and won't properly coat the chicken. How do I fix this?
The glaze needs adequate reduction time to achieve a syrupy consistency; if it is too runny, return it to the heat and let it gently simmer for a few extra minutes. If quick thickening is required, ensure you have adequately mixed your cornstarch slurry and added it while the sauce is actively bubbling.
The sauce should be able to thinly coat the back of a spoon when ready.
What is the best cut of chicken to use for this recipe?
Boneless, skinless chicken thighs are highly recommended because their higher fat content helps them remain incredibly moist and tender during the high heat frying process. While chicken breast can be used, it tends to dry out more easily, so be mindful not to overcook the white meat pieces.
Cut the chicken into uniform 1 inch pieces for consistent cooking.
Can I use an air fryer or oven instead of deep frying?
Yes, for a healthier alternative, you can adapt the recipe by air frying or baking the battered chicken. Lightly spray the pieces with oil and air fry at 400°F (200°C) until golden brown, or bake on a wire rack at 425°F (220°C).
Note that the resulting texture will be slightly drier and will not achieve the same shatteringly crisp texture as deep fried chicken.
How should I store leftover Honey Chicken, and can I reheat it?
Store leftovers in an airtight container in the refrigerator for up to 3 days, ideally keeping any remaining sauce separate from the chicken. To reheat, the best method is using an air fryer or oven at 350°F (175°C) to restore crispiness, rather than a microwave which promotes sogginess.
Once the chicken is heated through, quickly toss it in the warmed glaze before serving.
How can I prepare this recipe to be entirely gluten-free?
To make the chicken gluten-free, substitute the standard wheat flour in the batter with rice flour, potato starch, or a dedicated gluten-free flour blend. Additionally, ensure the soy sauce used in the ginger glaze is swapped out for tamari or a certified gluten-free soy sauce alternative.
These adjustments will maintain the flavor and the required texture.
Can I prepare the sauce or batter ahead of time to save time?
You can certainly prepare the honey glaze up to three days in advance and store it in the refrigerator; simply gently reheat it before coating the chicken. However, the batter should be mixed right before use because the leavening agents (like baking powder) start activating immediately.
Mixing the batter too early will result in flat, less airy coatings when fried.
Crispy Honey Chicken Recipe
Ingredients:
Instructions:
Nutrition Facts:
| Calories | 2284 kcal |
|---|---|
| Protein | 4.8 g |
| Fat | 222.9 g |
| Carbs | 75.5 g |
