Oven Baked Fries: Crispy and Fluffy
- Time: Active 50 minutes, Passive 35 minutes, Total 85 minutes
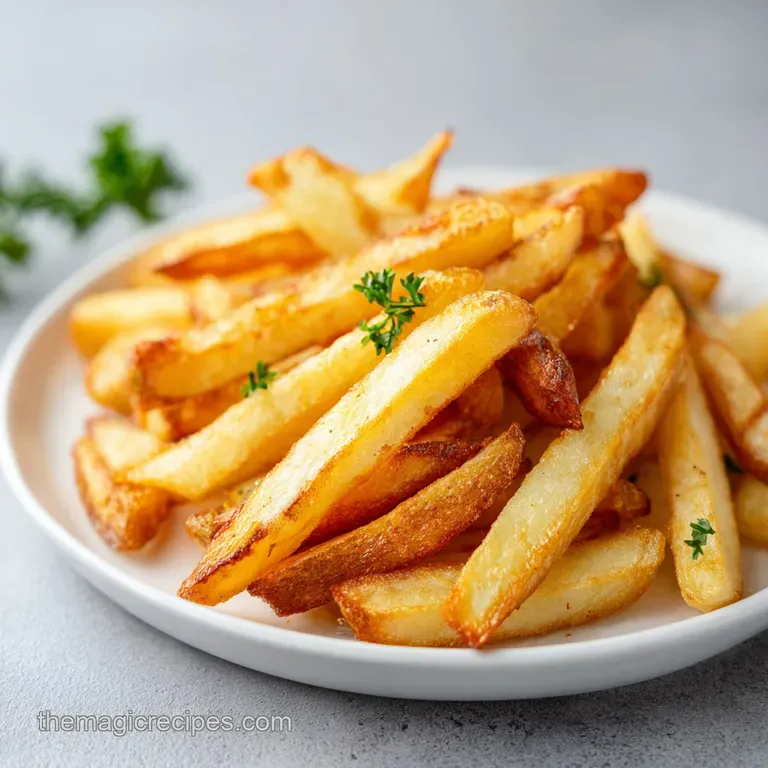
- Flavor/Texture Hook: Shatter crisp exterior with a fluffy, cloud like potato center
- Perfect for: Budget-friendly family weeknights or guilt free burger sides
- Making the Best Crispy Oven Baked Fries
- Secrets to Shattering Crispness
- Timing and Temperature Specs
- Potato and Starch Essentials
- Essential Tools for Success
- Executing the Perfect Batch
- Troubleshooting and Pro Tips
- Flavorful Swaps and Twists
- Storage and Reheating Secrets
- Plating and Serving Ideas
- Recipe FAQs
- 📝 Recipe Card
Making the Best Crispy Oven Baked Fries
Imagine standing on a breezy boardwalk in the middle of July. You can hear the gulls, feel the salt air, and most importantly, smell that hot oil and potato scent wafting from the fry stand. We’ve all tried to recreate that magic at home, right?
Usually, we end up with a tray of limp, greasy potato wedges that stick to the pan and make us wish we had just hit the drive thru. It’s frustrating when you want that specific crunch but end up with something soggy.
I remember one specific Friday night when I was determined to make a healthy ish version for my kids. I just sliced some potatoes, tossed them in oil, and hoped for the best. They were a disaster. Half were burnt, half were raw, and all of them were sad.
That was the night I realized that "easy" doesn't mean "lazy." You need a strategy to get that golden mahogany color and a crust that actually makes a sound when you bite into it.
This recipe is the result of many weeknight trials where I needed something functional and family friendly. We aren't doing anything fancy here, just using smart techniques with basic pantry staples. By focusing on how we handle the starch and the moisture, we can get results that honestly rival the deep fryer.
Let's get into what actually makes these Oven Baked Fries work so you can stop settling for mediocre sides.
Secrets to Shattering Crispness
Most people think you just need high heat to get things crispy, but it’s actually about surface area and moisture control. If the outside of the potato is wet, it will steam before it fries, which is why your fries turn out soft.
- The Starch Rinse: Soaking the matchsticks in cold water pulls away the surface sugars that usually burn before the inside is cooked.
- The Cornstarch Shield: This creates a microscopic barrier that absorbs any leftover moisture and fries into a thin, crackly shell.
- The High Point Oil: Avocado oil handles the 425°F heat without smoking, ensuring the potatoes roast rather than taste like burnt grease.
- The Single Layer Rule: If the fries touch, they trap steam between them, destroying any chance of a crunch.
| Method | Cook Time | Texture | Best For |
|---|---|---|---|
| Fast Oven Method | 35 minutes | Shatter crisp shell | Busy weeknights |
| Classic Deep Fry | 15 minutes | Soft but greasy | Occasional treats |
| Air Fryer | 25 minutes | Very dry/crunchy | Small batches only |
Choosing the right method depends on your schedule. The oven method is great because you can fit two pounds of potatoes on two sheets at once. It’s the most efficient way to feed a family of four without standing over a hot pot of bubbling oil.
Timing and Temperature Specs
When you are looking for a reliable weeknight solution, precision is your best friend. You don't want to be guessing if the potatoes are done while the rest of your dinner is getting cold. These numeric checkpoints are exactly what I use to ensure every batch comes out identical.
- Checkpoint 1 (Size): 1/4 inch thick matchsticks. If they are thicker, they'll be fluffy but not crispy. If they are thinner, they'll turn into potato chips.
- Checkpoint 2 (Heat): 425°F (220°C). This is the sweet spot where the exterior browns while the interior stays moist.
- Checkpoint 3 (Duration): 35 minutes total. You need the full time to drive out the moisture, with a flip at the 17 minute mark.
Chef's Tip: If your oven has a convection setting, turn it on and drop the temp to 400°F. The moving air helps dry out the surface of the Oven Baked Fries even faster.
If you are trying to decide how to prep these based on your goals, keep these shortcuts in mind. If you want maximum crunch, do not skip the 30 minute soak. If you are in a massive rush, you can skip the soak but you must double the cornstarch.
If you want a more rustic feel, leave the skins on for extra fiber and a deeper earthy flavor.
Potato and Starch Essentials
Not all potatoes are created equal. For this specific recipe, we use Russets because they have the highest starch content and the lowest moisture. This leads to that classic "mealy" or fluffy interior that we love in a French fry.
If you try this with red potatoes, they will stay waxy and firm, which isn't the vibe we're going for here.
| Ingredient | Science Role | Pro Secret |
|---|---|---|
| Russet Potatoes | High starch, low water | Keep them in ice water until the moment you dry them to keep them crisp. |
| Cornstarch | Moisture absorber | Toss the potatoes until the white powder disappears; it should look like a thin paste. |
| Avocado Oil | High smoke point fat | Use a spray if you want even thinner coverage, but 3 tbsp is the gold standard for 2 lbs. |
Using the right fat is just as important as the potato. Avocado oil is a workhorse in my kitchen because it's healthy and doesn't break down at high temperatures. If you're looking for a different flavor profile, you might enjoy my Garlic Parmesan Baked Steak Fries which use a similar over high heat logic but add a savory cheese crust.
Essential Tools for Success
You don't need a lot of gear for this, but the quality of your pans matters. Thin, cheap cookie sheets will warp at 425°F, causing your oil to pool in the corners and leaving some fries dry while others are drenched. A heavy duty rimmed baking sheet is a game changer for even heat distribution.
I highly recommend using parchment paper rather than foil. Foil can sometimes grab onto the starch coating and rip it right off when you try to flip the fries. Parchment is naturally non stick and makes cleanup much faster, which is always a win for a busy cook.
You'll also need a large mixing bowl to get that even coating of oil and spices. Don't try to toss them on the tray; you'll end up with "bald" spots on your potatoes.
Finally,, a sharp chef's knife is non negotiable. Trying to cut matchsticks with a dull blade is not only dangerous but results in uneven sizes. If your fries aren't uniform, the skinny ones will burn while the fat ones stay raw. Take the extra two minutes to focus on your knife work.
Executing the Perfect Batch
Now we get to the actual work. Follow these steps closely, especially the drying phase. That is where most people fail.
- Peel the 2 lbs of Russet potatoes and slice them into uniform 1/4 inch thick matchsticks. Note: Uniformity ensures they all finish cooking at the same second.
- Submerge the potato matchsticks in a bowl of 4 cups ice cold water for 30 minutes. Note: This removes the surface starch that cause sticking.
- Drain the potatoes and lay them out on lint free kitchen towels.
- Pat them until they are bone dry to prevent steaming.
- In a large mixing bowl, toss the dried potatoes with 3 tbsp avocado oil, 1.5 tbsp cornstarch, and all the spices.
- Arrange the fries in a single layer on two large rimmed baking sheets lined with parchment paper.
- Ensure the fries do not touch. Note: Space allows the hot air to circulate and crisp the edges.
- Bake at 425°F (220°C) for 35 minutes.
- Flip the fries halfway through the time until they are mahogany colored and crackling.
- Remove from the oven and let them sit for 2 minutes before serving to let the crust set.
Phase 1: The Precision Cut and Soak
Cutting the potatoes correctly is the foundation. I usually cut a thin slice off one side of the potato so it sits flat on the cutting board. This prevents it from rolling while you make your planks. Once you have your planks, stack a couple and cut them into matchsticks.
Dropping them immediately into the ice water prevents oxidation, which is why potatoes turn that weird grey color when they sit out.
Phase 2: The Critical Dry
After 30 minutes, your water will likely look cloudy. That’s the starch we want to get rid of. When you move them to the towels, don't just give them a quick dab. I literally roll them around and use a second dry towel.
If they feel even slightly damp, the cornstarch will turn into a gummy mess instead of a crisp shell.
Phase 3: The Starch Slurry Coating
When you toss the potatoes in the bowl with the cornstarch and oil, it might look a little strange at first. You want to keep tossing until the white powder is completely absorbed. It should look like a translucent, slightly shiny coating.
This is the "secret sauce" that makes Oven Baked Fries feel like they came out of a professional kitchen.
Phase 4: The over High heat Roast
Get those pans in the oven fast. You want the heat to hit that starch immediately. About 15 minutes in, you'll start to hear a sizzle. That is the sound of the water leaving the potato and the oil taking its place. When you flip them, be gentle. Use a wide spatula to turn over sections at a time.
Troubleshooting and Pro Tips
If your fries didn't turn out quite right, don't sweat it. Usually, it's a small mechanical error rather than a problem with the recipe itself.
Why Your Fries Are Soggy
This is almost always due to overcrowding. If you try to fit all two pounds on one single baking sheet, you are essentially making steamed potatoes. The moisture has nowhere to go, so it just sits there and softens the potato walls. Always use two sheets and give them breathing room.
| Problem | Root Cause | Solution |
|---|---|---|
| Fries sticking to pan | No parchment used | Always use parchment or a well oiled heavy pan. |
| Burnt ends, raw middle | Uneven cutting | Practice consistent 1/4 inch thickness for all pieces. |
| Gritty texture | Too much cornstarch | Measure exactly; 1.5 tbsp is plenty for 2 lbs. |
Another common culprit for sogginess is the oven temperature. Many home ovens aren't calibrated correctly. If yours runs cool, 425°F might actually be 400°F. If your fries look pale at the 30 minute mark, leave them in for another 5-10 minutes.
Use your eyes and ears, not just the timer.
Common Mistakes Checklist
- ✓ Pat potatoes completely dry before adding oil (prevents steaming).
- ✓ Use Russet potatoes only (Yukon Golds are too waxy for this method).
- ✓ Space the fries out so they don't touch (crucial for air circulation).
- ✓ Flip halfway through to ensure both sides hit the hot pan surface.
- ✓ Wait 2 minutes after baking before eating (the crust hardens as it cools).
Flavorful Swaps and Twists
While the smoked paprika and garlic powder combo is my go to for a family dinner, you can easily change the vibe of these fries with what's in your spice cabinet. The base method stays the same, you're just swapping the aromatics.
If you want something heartier, this recipe pairs beautifully with my Oven Fried Chicken. Both use high heat to get that golden crust without the mess of a deep fryer, making it a perfect "fake away" Friday meal.
| Original Ingredient | Substitute | Why It Works |
|---|---|---|
| Avocado Oil | Ghee (melted) | High smoke point with a rich, buttery flavor profile. |
| Smoked Paprika | Chili Powder | Provides a deeper, earthier heat rather than smoky notes. |
| Russet Potatoes | Large Sweet Potatoes | Same method works, but they will be softer. Note: Reduce time by 5 mins. |
If you go the sweet potato route, be aware that they have more natural sugar. This means they will brown much faster and can go from "perfect" to "burnt" in about 60 seconds. Keep a close eye on them during the last 10 minutes of cooking.
Storage and Reheating Secrets
Leftover fries are notoriously difficult, but they don't have to be trash. If you have extras, let them cool completely before putting them in a container. If you put hot fries in a Tupperware, the steam will turn them into mush instantly. They stay good in the fridge for about 3 days.
To reheat, avoid the microwave at all costs. It will make them rubbery. Instead, throw them back onto a baking sheet or into an air fryer at 400°F for about 5 minutes. They’ll crisp right back up.
For zero waste, if you have tiny potato scraps left over from cutting your matchsticks, don't toss them! Roast them right alongside the fries and use them the next morning in a breakfast hash with some eggs and peppers.
Plating and Serving Ideas
Presentation is half the fun, especially if you're serving these to kids or guests. I like to serve them in a parchment lined basket or a large wooden board in the center of the table. It feels more communal and "restaurant style."
Don't just settle for plain ketchup. Since these have that smoked paprika kick, try mixing some mayo with a little lime juice and extra garlic powder for a quick aioli. The creaminess cuts through the salt and starch perfectly.
If you really want to go all out, sprinkle some fresh parsley over the top right as they come out of the oven. The residual heat will wake up the oils in the herbs and smell incredible.
Making Oven Baked Fries is really about mastering the simple physics of the kitchen. Once you understand the soak, the dry, and the space, you'll never go back to the frozen bag again. It’s a healthy, cheap, and functional way to bring a little bit of that boardwalk joy into your own home any night of the week.

Recipe FAQs
How long do I bake my fries in the oven?
Bake them for exactly 35 minutes. This duration ensures the exterior reaches a deep, crispy mahogany color while the interior remains fluffy.
What is the secret to crispy oven fries?
Remove excess surface starch by soaking the potatoes in ice-cold water for 30 minutes. Drying the potatoes completely before adding the avocado oil and cornstarch coating is essential for achieving a perfect crunch.
How to do French fries in the oven?
Slice peeled Russet potatoes into uniform 1/4 inch matchsticks, soak to remove starch, and pat bone dry. Toss with oil, seasonings, and cornstarch, then arrange in a single, non-touching layer on parchment lined sheets and bake at 425°F for 35 minutes.
How long do I cook fries in the oven at 350 degrees?
Do not use 350 degrees for this recipe. Using a lower temperature will cause the potatoes to steam and soften rather than crisp; always bake at 425°F for 35 minutes to achieve the desired texture.
Is it true I can use a microwave to reheat my leftover fries?
No, this is a common misconception. Microwaving leftover fries makes them rubbery, so you should always reheat them on a baking sheet at 400°F for 5 minutes instead.
How do I prevent my fries from becoming mushy in storage?
Cool the fries completely before placing them in a storage container. Sealing hot fries traps steam, which immediately destroys their crispness. If you enjoyed mastering potato textures here, you can see how the same starch management principles are applied in our potato soup recipe.
Why is it necessary to arrange the potatoes in a single layer without touching?
Adequate airflow is required to crisp the surface of each fry. If the potatoes touch or overlap, they will steam each other, resulting in soft edges rather than a crisp finish.
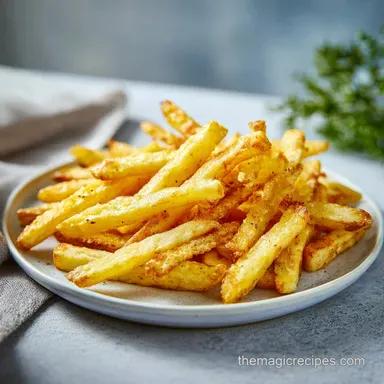
Crispy Oven Baked Fries
Ingredients:
Instructions:
Nutrition Facts:
| Calories | 281 kcal |
|---|---|
| Protein | 4.7 g |
| Fat | 10.8 g |
| Carbs | 42.9 g |
| Fiber | 5.2 g |
| Sugar | 1.4 g |
| Sodium | 602 mg |
