Dairy Free Brownies: Fudgy and Rich

- Time:10 minutes prep + 25 minutes cook + 3 minutes resting = 38 minutes total
- Flavor/Texture Hook: Decadent fudge with a shattering crinkle top
- Perfect for: Spooky Halloween parties and dairy-free school treats
- Achieving the Ultimate Texture in Spooky Dairy Free Brownies
- Why This Recipe Works
- Understanding Your Spooky Baking Specs for Success
- Selecting Premium Elements for a Decadent Chocolate Base
- Essential Kitchen Tools for Fudgy Brownie Mastery
- The Step by Step Guide to Fudgy Spooky Treats
- Solving Common Texture and Decoration Snags Easily
- Flavor Variations to Personalize Your Spooky Batch
- Preserving That Fresh Bakery Quality for Days
- Elevating the Presentation of Your Spooky Dessert Platter
- Debunking Common Myths About Dairy Free Baking
- Recipe FAQs
- 📝 Recipe Card
Achieving the Ultimate Texture in Spooky dairy-free Brownies
Imagine walking into a kitchen where the air is thick with the scent of toasted cocoa and warm vanilla. It is that specific, comforting aroma that signals a cozy October afternoon is in full swing.
I remember the first time I hosted a Halloween bash, I was terrified that my dairy-free friends would feel left out of the dessert spread. I tried making a batch of what were supposed to be brownies, but they turned out like sad, dry sponges.
That was the moment I realized that dairy-free baking isn't about just removing ingredients, it is about understanding how to replace them with things that actually bring more flavor to the table.
These spooky eyed halloween brownies dairy-free are the result of many afternoons spent tweaking the ratio of oil to sugar to ensure that we never have to sacrifice that classic "fudge" factor. When you pull these out of the oven, the house smells like a high end bakery, not a science experiment.
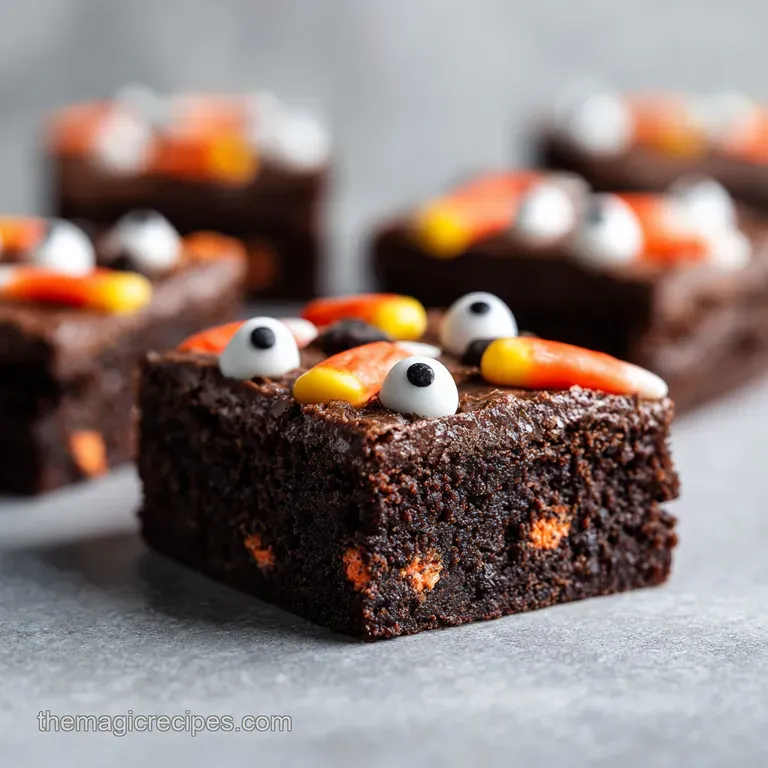
The chocolate chips provide a specific, satisfying snap against the velvety soft base, and the little candy eyes give them a personality that makes everyone smile before they even take a bite.
We are aiming for a result that is so rich and indulgent that your butter loving friends won't even suspect a thing. The trick lies in the way we handle the eggs and sugar, creating a structural integrity that holds up even without the milk solids.
This isn't just a "good for being dairy-free" recipe, it is a "best ever" recipe that happens to be inclusive. Let's get into the details of how to make these eyed halloween brownies dairy-free the highlight of your spooky season.
Why This Recipe Works
To get that bakery quality finish, we have to lean into a few specific mechanical steps that replace the usual dairy components.
- Aeration Structure: Whisking the oil, sugar, and eggs vigorously for exactly 2 minutes creates a stable foam that rises and then collapses slightly, forming the iconic crinkle top.
- Fat Fluidity: Using neutral oil instead of solid butter ensures the brownies stay moist and fudgy even after they have completely cooled, as oil remains liquid at room temperature.
- Starch Suspension: Sifting the dry ingredients prevents clumps of flour from soaking up too much moisture, keeping the crumb silky rather than bready.
- Sugar Dissolution: The 2 minute whisking period allows the granulated sugar to partially dissolve into the egg proteins, which is the secret to that shattering, paper thin top crust.
| Method | Time | Texture | Best For |
|---|---|---|---|
| Whisked (This Recipe) | 38 minutes | Fudgy with crinkle top | Crowds and parties |
| Melted Chocolate Base | 50 minutes | Extremely dense/truffle like | Small, rich servings |
| One Bowl Stirred | 35 minutes | Cake like and soft | Quick afternoon snacks |
Choosing the right method depends on how much you value that contrast between a crispy top and a gooey center. This specific whisked method is the most reliable way to get that professional look without needing a stand mixer or a degree in pastry arts.
It is all about the elbow grease in those first two minutes of mixing.
Understanding Your Spooky Baking Specs for Success
When we talk about "success" in the kitchen, it often comes down to the numbers. I used to be the person who just "eyeballed" everything, but baking is much more of a precision game.
For these brownies dairy-free, the timing is especially critical because the difference between "fudgy" and "overbaked" is about three minutes in the oven.
| Component | Science Role | Pro Secret |
|---|---|---|
| Neutral Oil | Provides moisture without flavor | Use avocado oil for a cleaner taste |
| Dutch Processed Cocoa | Neutralizes acidity for deep color | Sift twice to remove all tiny lumps |
| Granulated Sugar | Creates the crinkle top | Don't reduce the amount or the top won't crack |
| Large Eggs | Acts as the primary binder | Ensure they are room temp for better foam |
The role of the oil here is fascinating because it doesn't just add fat, it alters how the flour interacts with the liquid. In traditional brownies, butter can sometimes make the batter feel heavy. The oil keeps things light while still providing that decadent mouthfeel we all crave. If you love exploring the "how" behind recipes, you might find that understanding the role of fats helps in other areas of cooking, like when making a dairy-free Ground Beef Stroganoff, where the fat source defines the silkiness of the sauce.
Selecting Premium Elements for a Decadent Chocolate Base
The ingredients list for these halloween brownies dairy-free is short, which means every single item has to work overtime. We aren't hiding behind a ton of frosting or milk solids, so the quality of your cocoa powder and vanilla extract is going to shine through.
- 1/2 cup Neutral Oil (Avocado or Vegetable)Why this? Provides the fat needed for a fudgy texture without adding any competing flavors.
- 1 cup Granulated SugarWhy this? Key for the crinkle top and balancing the bitterness of the cocoa.
- 2 Large EggsWhy this? The main structural support and emulsifier for the batter.
- 1 tbsp Pure Vanilla ExtractWhy this? Deepens the chocolate flavor and adds a beautiful floral aroma.
- 1/2 cup Unsweetened Cocoa Powder (Dutch processed)Why this? Gives that dark, spooky mahogany color and a smooth, mellow chocolate taste.
- 1/2 cup All Purpose FlourWhy this? Just enough to hold everything together without becoming cakey.
- 1/4 tsp SaltWhy this? Enhances the sweetness and cuts through the richness of the chocolate.
- 1/2 cup dairy-free Chocolate ChipsWhy this? Adds pockets of melted chocolate for a multi textured experience.
- 1/4 cup Assorted Candy Eyes (Large and Small)Why this? The essential decoration for that spooky, "eyeball" look.
When you are substituting ingredients, remember that substitutions can change the texture slightly. For example, if you swap the sugar for a liquid sweetener, you will lose that iconic crinkle top entirely. It will still taste good, but it won't have that bakery quality "shatter."
| Original Ingredient | Substitute | Why It Works |
|---|---|---|
| Neutral Oil | Melted Coconut Oil | Similar fat profile. Note: Adds a slight tropical scent to the brownies. |
| All Purpose Flour | 1 to-1 gluten-free Blend | Rice flour bases mimic the structure of AP flour well in fudgy recipes. |
| Dutch Processed Cocoa | Natural Cocoa Powder | Higher acidity. Note: Result will be lighter in color and slightly more tangy. |
Essential Kitchen Tools for Fudgy Brownie Mastery
You don't need a pantry full of gadgets, but a few specific tools make the process of making these brownies dairy-free much smoother. I personally swear by a good silicone spatula. It allows you to fold the flour in without overworking the gluten, which is the number one reason brownies turn out tough.
An 8x8 inch baking pan is the gold standard here. If you use a larger pan, the brownies will be thin and likely overbaked. If you go smaller, the center might stay raw while the edges burn. Also, don't skip the parchment paper.
Creating a "sling" by letting the paper overhang the sides allows you to lift the entire block of brownies out of the pan once they are cool. This prevents you from scratching your pan while trying to dig out that first corner piece.
According to King Arthur Baking, having the right tools for decoration is just as important as the baking itself. While they focus on spider webs, our candy eye application benefits from having a small pair of kitchen tweezers if you want to be precise, though clean fingers work just as well for a more "chaotic" spooky look.
The step-by-step Guide to Fudgy Spooky Treats
- Preheat your oven to 350°F (175°C) and line an 8x8 inch baking pan with parchment paper, leaving an overhang on the sides for easy removal.
- In a large mixing bowl, combine the oil, sugar, eggs, and vanilla extract. Note: This is the foundation of your texture.
- Whisk the wet ingredients vigorously for exactly 2 minutes until the mixture lightens in color and becomes slightly frothy.
- Sift the cocoa powder, all purpose flour, and salt directly into the wet ingredients. Note: Sifting prevents "flour pockets" in the dense batter.
- Use a silicone spatula to gently fold the dry ingredients in until no white streaks remain, being careful not to overmix.
- Fold in the dairy-free chocolate chips until they are evenly distributed throughout the thick batter.
- Spread the batter evenly into the prepared pan.
- Bake for 22–25 minutes until the edges are set and the center has a very slight wobble.
- Remove from the oven and let the brownies cool in the pan for exactly 3 minutes.
- Press the candy eyes into the surface in clusters while the base is still soft enough to grip them.
Solving Common Texture and Decoration Snags Easily
Even the best of us hit a snag sometimes. The most common issue with dairy-free spooky brownies recipe usually involves the "eye" decoration. If you put them on too early, they melt into a sugary puddle. If you wait too long, they just sit on top and roll off when you try to cut them.
Why Your Brownies Are Too Oily
If you notice oil pooling on top of the batter after baking, it usually means the emulsion broke during the mixing phase. This happens if the eggs were too cold or if the sugar didn't get whisked in well enough. Next time, make sure those eggs are room temperature!
Fixing a Lack of Crinkle Top
The crinkle top is a result of the sugar dissolving into the egg whites to create a meringue like layer. If your top is dull, you likely didn't whisk the mixture for the full 2 minutes. Set a timer next time; two minutes feels like an eternity when whisking by hand, but it is necessary.
Keeping Candy Eyes from Melting
Candy eyes are basically just sugar, and they don't like heat. The 3 minute cooling window is your "goldilocks" zone. The brownies are still hot enough that the bottom of the eye will slightly melt and fuse to the brownie, but the top stays crisp and white.
| Problem | Root Cause | Solution |
|---|---|---|
| Dry/Crumbly | Too much flour or overbaked | Measure flour by weight and check oven at 22 mins. |
| Eyes Falling Off | Brownies cooled too much | Use a tiny drop of melted chocolate as "glue." |
| Batter Too Thick | Cocoa powder was clumped | Always sift the cocoa to ensure even hydration. |
Common Mistakes Checklist
- ✓ Whisk the egg and sugar mixture for a full 120 seconds to guarantee that shiny top.
- ✓ Use Dutch processed cocoa rather than natural cocoa for that dark, spooky aesthetic.
- ✓ Don't overbake; the brownies will continue to set as they cool in the pan.
- ✓ Check the "wobble" of the pan before pulling them out; it shouldn't be liquid, just a slight jiggle.
- ✓ Apply the eyes in "clusters" of three or four for a more intentional, creepy look.
Flavor Variations to Personalize Your Spooky Batch
One of the best things about this recipe is how adaptable it is. While the "spooky eyeball" look is a classic, you can easily pivot this into other themes. If you prefer a more "earthy" look, you can add crushed dairy-free sandwich cookies to the top to mimic dirt, and stick a few gummy worms in there.
If you are a fan of that salty sweet combo, try swirling in some dairy-free caramel or adding a sprinkle of flaky sea salt before the eyes go on. The salt actually helps the chocolate flavor pop even more. If you enjoy the process of creating different textures in your bakes, you should definitely look into my Fudgy Crinkle Top Brownies which dive deeper into the science of that perfect top layer.
For those who want a bit of a "kick," adding a half teaspoon of espresso powder to the dry ingredients won't make the brownies taste like coffee, but it will make the chocolate taste twice as dark and intense. It is a little secret many professional bakers use to give their chocolate treats more depth.
Preserving That Fresh Bakery Quality for Days
Brownies are one of the few desserts that actually taste better the next day. The flavors have time to meld, and the texture becomes even more fudgy. You can store these in an airtight container at room temperature for up to 4 days.
If you keep them in the fridge, they will become quite firm, which some people actually prefer for a "fudge bar" experience.
To freeze them, I recommend cutting the brownies into squares first. Wrap each square individually in plastic wrap and then place them all in a freezer bag. They will stay fresh for up to 3 months.
When you are ready for a spooky snack, just let them thaw on the counter for about 30 minutes, or give them a 15 second zap in the microwave if you like them warm.
For zero waste, save any "crumbs" that happen when you are cutting the brownies. These make an incredible topping for dairy-free vanilla ice cream. You can also crumble an entire leftover brownie into a glass of oat milk for a "brownie milk" treat that is basically a meal in itself.
Elevating the Presentation of Your Spooky Dessert Platter
When it comes to serving these halloween brownies dairy-free, presentation is half the fun. I love placing them on a dark slate board or a bright orange platter to make the dark chocolate stand out.
If you want to go all out, you can serve them "a la-mode" with a scoop of dairy-free vanilla bean ice cream and a drizzle of chocolate sauce.
The contrast of the cold ice cream against the rich, room temperature brownie is a sensory delight. The candy eyes staring back at you from the plate always get a laugh from kids and adults alike. It is a simple touch that transforms a standard brownie into a memorable "event" dessert.
If you are looking for other quick treats to fill out your Halloween table, these Deviled Strawberries provide a bright, fruity contrast to the deep chocolate of the brownies. Having a mix of rich chocolate and fresh fruit makes for a much more balanced dessert spread that keeps people coming back for "just one more bite."
Debunking Common Myths About dairy-free Baking
There is a huge misconception that you need butter to get a "real" brownie flavor. The truth is that butter mostly provides fat and a slight dairy note. In a recipe with this much cocoa and vanilla, the oil provides the necessary fat while allowing the chocolate to be the undisputed star of the show.
You aren't losing flavor; you are clearing the stage for the cocoa to shine.
Another myth is that dairy-free brownies are always "cakey." Caking happens because of too much leavening (like baking powder) or too much flour. Since this recipe has no chemical leaveners and a very low flour to fat ratio, it is physically impossible for them to be cakey if you follow the measurements.
They are designed to be dense, fudgy, and absolutely decadent.
Finally,, some people think you have to use expensive "specialty" ingredients to bake without dairy. As you can see from our list, everything here is a pantry staple. Aside from the candy eyes (which you can find at any craft or grocery store during October), these are simple, everyday ingredients that come together to make something extraordinary.
Baking these spooky eyeball brownies is proof that you don't need a massive budget or a professional kitchen to make something that looks and tastes like a masterpiece.

Recipe FAQs
Why is whisking the eggs and sugar for 2 minutes necessary?
Whisking creates aeration. This specific mechanical action lightens the color and creates a frothy consistency, which is the secret to achieving that signature crinkle top.
How to ensure the brownies stay fudgy and not cakey?
Fold the dry ingredients gently until just combined. Overmixing develops the gluten in the flour, which turns the texture from dense and fudgy into a bread like crumb. If you enjoyed mastering this texture control, apply the same light handed folding technique to other dessert batters to maintain their density.
How to tell when the brownies are perfectly baked?
Look for set edges and a slight wobble in the center. Removing them from the oven at the 22 25 minute mark while the middle is still soft ensures the center remains gooey as they finish setting during the cooling process.
Is it true I should let them cool completely before adding the candy eyes?
No, this is a common misconception. You must press the candy eyes into the surface after exactly 3 minutes of cooling while the top is still soft enough for them to grip the brownie base.
How to get the brownies out of the pan without them breaking?
Leave a parchment paper overhang on the sides. This allows you to firmly grasp the edges and lift the entire block out of the pan smoothly after they have rested.
Can I bake these for longer to get a firmer slice?
No, avoid baking past 25 minutes. Exceeding the recommended time will dry out the batter and destroy the velvety interior texture that defines this recipe.
How to store leftovers to maintain the texture?
Keep them in an airtight container at room temperature. Storing them this way for up to 3 days preserves the moisture in the brownie and prevents the candy eyes from absorbing excess humidity.
dairy-free Spooky Brownies

Ingredients:
Instructions:
Nutrition Facts:
| Calories | 238 calories |
|---|---|
| Protein | 2.6g |
| Fat | 12.6g |
| Carbs | 31.4g |
| Fiber | 2.1g |
| Sugar | 23.3g |
| Sodium | 62mg |
