Chili Recipe: the Weekend Warriors Deep-Flavour Beef Bean Dish
- Introducing the Ultimate Deep-Flavour Beef & Bean Chili
- The Science of Depth: Why Our Chili Flavour Explodes
- Essential Components for Authentic Chili Flavour and Substitutions
- Detailed Guide: Mastering the Low and Slow Chili Method
- Troubleshooting and Expert Tips for Your Next Pot of Chili
- Practical Guide to Storing and Freezing Chili
- The Essential Toppings and Perfect Pairings for Chili
- Recipe FAQs
- 📝 Recipe Card
Introducing the Ultimate Deep Flavour Beef & Bean Chili
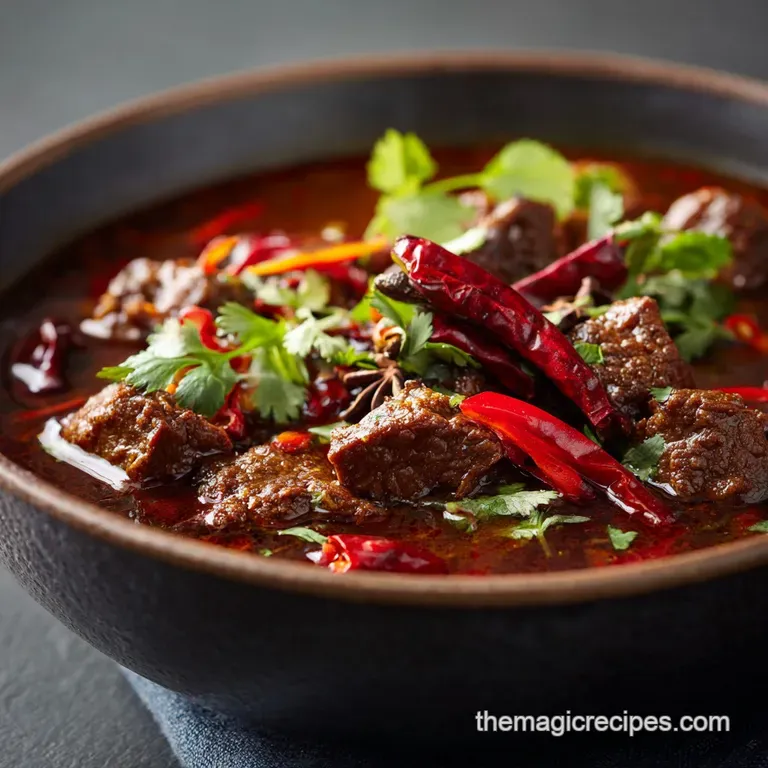
Nothing beats the smell of proper chili simmering on a cold Sunday afternoon. It just clings to the house, warm and complex, pulling you toward the kitchen every time you walk by.
That deep, earthy aroma promises hours of comfort and serious flavour depth, the kind you only achieve through patience and the right foundational ingredients.
I know, I know four hours sounds like a lot, but this is a low and slow recipe, meaning most of that time is completely hands off while the magic happens. It’s cheap to make a massive batch, incredibly freezer friendly, and trust me, having a huge pot of this robust chili recipe ready to go makes every subsequent weeknight dinner effortless.
It’s kitchen magic, really, and perfect for the weekend warrior cook.
We aren't messing around with weak pre-ground powders today; we’re using whole, dried chiles to build an incredible, authentic chili recipe foundation that is rich, smoky, and absolutely unforgettable. Get ready for the best homemade chili you’ve ever made. Let's crack on.
The Science of Depth: Why Our Chili Flavour Explodes
This isn't just a basic slow cooked stew; we are using layered techniques to maximize the umami and smoke factor. The difference between a good chili and a great chili is all about developing depth right from the start, before the liquids even touch the pot.
The Secret to a Truly Smoky Chili: Dried Chiles
If you want a truly smoky chili , you absolutely must use dried chiles, not just the pre-mixed powder. Dried chiles especially the Ancho and Guajillo varieties offer sweet, fruity, and earthy notes that no ground powder can replicate.
We toast them dry to wake up those volatile oils, then rehydrate them into a creamy, vibrant paste that coats every piece of beef.
What Makes This the Best Weekend Warrior’s Chili?
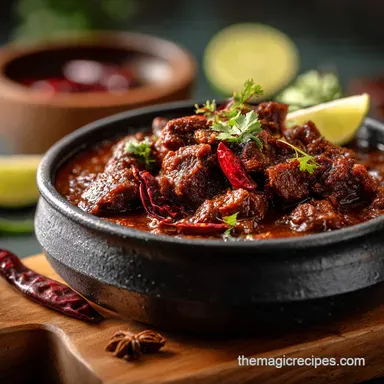
The key here is using high-quality chuck steak cut into generous 1 inch cubes, rather than using ground beef. When you sear those cubes aggressively, you create the deep, savoury Maillard crust that forms the entire backbone of the dish.
Simmering the beef low and slow for three hours ensures that structure breaks down completely, resulting in meltingly tender bites of meat suspended in a thick, dark sauce.
Prep Time vs. Simmer Time: Planning Your Cook
Don't panic about the 4 hour total time estimate. Forty five minutes is dedicated to active prep: chopping onions, toasting chiles, and searing the beef. Once everything is in the pot, you can step away and watch the game, fold laundry, or just enjoy the aroma. This is a glorious hands off cooking experience.
Maximizing Umami: The Role of the Slow Simmer
When the pot is simmering gently for hours, the tough collagen in the beef melts into gelatin, enriching the sauce and creating that luxurious, silky texture. This gelatin is the ultimate secret weapon for a naturally thickened, velvety sauce.
It literally transforms what would be watery broth into a gorgeous, spoon coating sauce.
Building the Essential Chile Paste Base
Before we even add liquid, we bloom the tomato paste and all the dry spices (cumin, cocoa, oregano) in the fat. This quick 60 second step dramatically intensifies their flavour compounds it’s like turning the volume up to 11 on your spices. Never skip this step if you want a deeply flavoured sauce.
Achieving the Perfect, Robust Chili Consistency
A perfect chili shouldn't be thin soup; it should be robust and spoonable. We use the slow simmer to naturally reduce the liquid, and we add the beans only in the final 30 minutes. Why?
Beans added too early can break down into mush, but adding them late allows them to retain their satisfying texture while still absorbing the rich flavour of the sauce.
Essential Components for Authentic Chili Flavour and Substitutions
Building this proper Sunday chili requires specific ingredients to achieve that signature complexity. I swear by these components, but I also know life happens, so here are my reliable substitutions.
Decoding Dried Chiles: Ancho, Guajillo, and Chipotle
These three chiles are the backbone of this deep, dark chili. The Ancho provides mild, fruity sweetness; the Guajillo gives an earthy colour and a deep, wine like flavour; and the Chipotle, which is a smoked jalapeño, delivers that crucial smoky heat.
Chef's Note: If you cannot find dried Mexican oregano, regular dried oregano will work, but Mexican oregano has a more citrusy and less minty profile. Try to track down the real stuff if you can!
The Best Beans for Beef & Bean Chili (Texture and absorption)
I use a mix of kidney and pinto beans because they hold their shape beautifully even after prolonged simmering and offer excellent structural integrity. You need beans that can stand up to that intense, robust chili recipe sauce.
Smart Substitutions for the Aromatic Base
| Main Ingredient | Why We Use It | Viable Substitution |
|---|---|---|
| Beef Chuck Steak | High collagen for meltingly tender texture. | Coarsely ground (85/15) beef; be sure to drain excess fat after searing. |
| Dried Ancho Chiles | Fruity, mild heat, thick body. | high-quality dark chili powder (4 tbsp) + 1 tbsp brown sugar. |
| Apple Cider Vinegar | Essential for brightness and acidity. | Red wine vinegar or a squeeze of fresh lime juice (added at the end). |
| Unsweetened Cocoa | Depth, bitterness to balance acidity. | 1/2 tsp instant coffee granules (use sparingly). |
| Pinto/Kidney Beans | Structure and flavour absorption. | Black beans or cannellini beans work well; avoid large lima beans. |
Detailed Guide: Mastering the Low and Slow Chili Method

This is where the magic happens. Follow these steps for maximum flavour concentration in your homemade chili .
Creating the Signature Smoky Chile Paste
First things first, toast the Ancho and Guajillo chiles in a dry pan over medium heat for less than a minute per side. You’ll know they’re ready when they smell nutty and slightly smoky; don't let them burn, or they become bitter!
Then, soak them in hot stock or boiling water for 30 minutes until they are soft and pliable. Once drained, blend them with the fresh beef stock and the Chipotle peppers until the mixture is unbelievably smooth and dark. This paste is your flavour currency.
Browning the Beef for Maximum Flavour Concentration
Pat your 1 inch chuck cubes super dry and season them heavily with salt and pepper. Heat your Dutch oven until it's screaming hot, then add a splash of oil. Sear the beef in small batches until each piece is deeply brown this ensures a proper Maillard reaction, not sad, grey steamed meat.
Remove the beef and set it aside while you prepare your aromatics.
Integrating Beans and Liquid for the Simmer
After you’ve sautéed your onion and garlic, bloomed the spices and tomato paste, and deglazed the pot with apple cider vinegar, stir in the beautiful chile paste and the diced tomatoes. Return the seared beef to the pot, making sure everything is submerged. Hold off on the beans for now, seriously.
Simmering for Perfection: When is the Chili Ready?
Bring the whole pot to a gentle simmer, cover it partially, and reduce the heat to the lowest possible setting. Now, you wait stirring every 30 minutes for 2.5 to 3 hours total.
The chili is ready when you can easily shred a piece of beef against the side of the pot with a wooden spoon. Stir in the rinsed beans for the final 30 minutes, keeping the pot uncovered to thicken the sauce slightly.
Troubleshooting and Expert Tips for Your Next Pot of Chili
Sometimes things go wrong, but usually, the fix is ridiculously simple.
How to Adjust Heat Levels in a Finished Chili
If you tasted the chili and it's too fiery, don't despair! Acidity and dairy are your friends. Stir in a teaspoon of sugar or a splash of apple cider vinegar to cut the heat. Serving it with a big dollop of sour cream or Greek yogurt also helps instantly neutralize the capsaicin.
Saving Runny Chili: Techniques for Natural Thickening
If your chili is finished but still too thin, you have a couple of options. One, mash about half a cup of the kidney beans against the side of the pot and stir them in the starch acts as a natural thickener.
Two, leave the lid off for the final 30 minutes and increase the heat slightly to encourage evaporation and reduction.
Preventing Bitterness from Dried Chiles
Bitterness usually comes from burning the chiles during the initial toasting phase, or from not removing all the seeds and membranes. If your finished chili tastes bitter, a pinch of sugar (1/2 tsp) and a bit more salt will usually balance it out.
Alternatively, stir in a spoonful of natural, unsweetened peanut butter; it adds fat and earthiness that rounds out the flavour profile perfectly.
Practical Guide to Storing and Freezing Chili
Chili, like most tomato based stews, tastes infinitely better the next day after the flavours have fully married.
Cooling Chili Safely for Refrigeration
You must cool chili quickly before storing it. Leaving a massive pot of hot chili on the counter can keep it in the food danger zone for too long. Divide the hot chili into shallower containers right away, cover them loosely, and let them sit for no more than an hour before sealing and refrigerating.
It will happily keep in the fridge for 3 to 4 days.
The Best Containers for Freezer Storage
For freezing, use heavy duty, quart sized freezer bags or rigid plastic containers, leaving about an inch of headspace for expansion. Label the containers with the date! This best chili recipe freezes beautifully for up to 3 months.
Reheating Frozen Chili Without Losing Texture
The best way to reheat is slowly. Transfer the frozen chili block directly into a pot (or thaw overnight in the fridge first). Reheat gently over low heat, stirring frequently. Avoid blasting it in the microwave; slow reheating maintains the integrity of the beef cubes and prevents the sauce from separating.
The Essential Toppings and Perfect Pairings for Chili
Toppings are non-negotiable, seriously. They offer crucial textural contrast and cooling relief.
The absolute essentials for my ultimate deep flavour chili are grated sharp cheddar (always freshly grated, pre-shredded stuff doesn't melt right!), a dollop of cool sour cream or plain Greek yogurt, and plenty of finely chopped fresh cilantro and red onion.
Don't forget the acid: a fresh lime wedge squeezed over the top makes all the difference.
Serve this alongside warm, fluffy skillet cornbread; the sweetness and crumbly texture are the perfect foil to the intense, savoury chili con carne recipe .

Recipe FAQs
Why does this recipe insist on dried chiles instead of standard chili powder?
Dried chiles (such as Ancho, Guajillo, etc.) provide a complex, smoky, and fruity depth of flavor that pre-ground powder often lacks. Rehydrating and blending them into a paste allows the essential oils to release slowly during cooking, resulting in a much richer, authentic backbone for the chili.
My chili is too thin/soupy. What went wrong, and how can I thicken it quickly?
A thin consistency usually means the chili wasn't simmered long enough to reduce the liquid, or too much stock was added initially. To fix this, you can stir in 2 tablespoons of masa harina (corn flour) dissolved in a bit of cold water, or simply remove the lid and continue simmering for another 30 to 45 minutes.
My chili tastes slightly bitter or acidic. How can I fix the flavor balance?
Bitterness can sometimes come from either improperly blooming dried spices or the acidity of the tomatoes. To quickly balance the flavor, stir in a small amount (about a tablespoon) of brown sugar or honey, tasting after each addition until the harsh notes recede.
Can I omit the beans or substitute them with a different ingredient?
Absolutely, the recipe is highly versatile. You can omit the beans entirely for a traditional Texas style "chili con carne," or substitute kidney beans for pinto or black beans. If omitting them completely, consider adding 1/2 pound of extra browned beef or mushrooms to maintain volume.
How long can I store leftover chili, and does it freeze well?
Properly sealed chili can be refrigerated for 3 to 4 days, and like many stews, the flavor often improves on the second day. Chili freezes exceptionally well; transfer cooled chili into airtight containers, leaving about an inch of headspace, and it will remain high-quality for 4 to 6 months.
Why is a long simmer time (2.5 to 3 hours) necessary for this recipe?
The low-and-slow approach is critical for two main reasons: it ensures the tough beef becomes fork tender, and it allows the complex flavors from the chile paste and spices to fully integrate. This extended simmering naturally reduces the liquid, concentrating the sauce into the desired robust consistency.
If I want to significantly increase the heat, should I just add more cayenne pepper?
While cayenne adds straight heat, relying solely on it can make the chili one-dimensionally spicy without contributing flavor depth. For richer heat, incorporate a spicier dried chile (like an Arbol or a Chipotle Morita) into your initial paste, or use a high-quality chipotle powder towards the end of cooking.
Deep Flavor Beef And Bean Chili
Ingredients:
Instructions:
Nutrition Facts:
| Calories | 475 kcal |
|---|---|
| Fat | 20 g |
| Fiber | 10 g |
