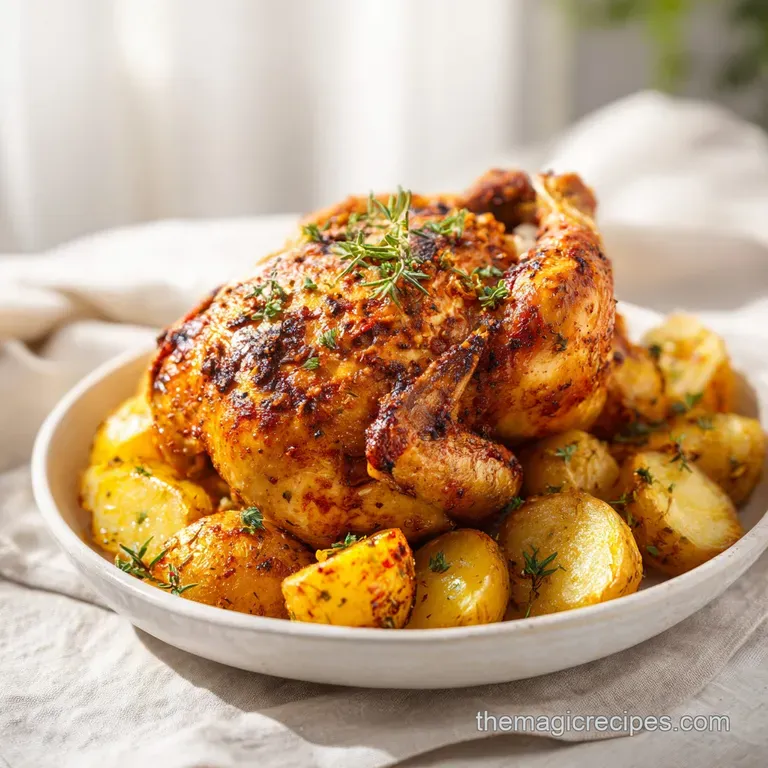
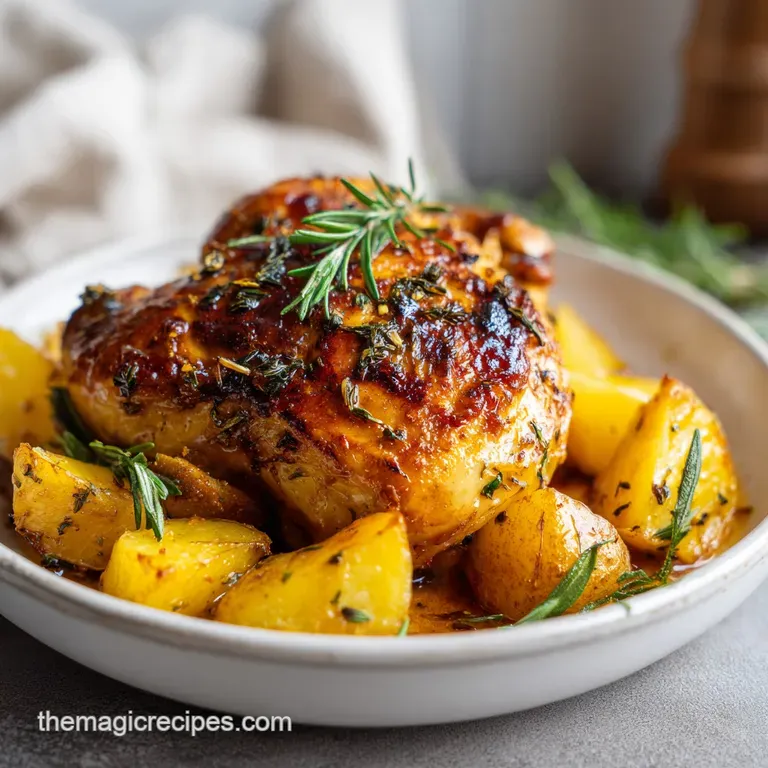
Dutch Oven Chicken with Crispy Skin and Potatoes
- Time: Active 20 minutes, Passive 75 minutes, Total 95 minutes
- Flavor/Texture Hook: Shatter crisp skin with velvety, schmaltz roasted potatoes
- Perfect for: Stress free Sunday family dinners or budget smart meal prep
- Perfect Crispy Dutch Oven Chicken
- Science of the Perfect Crunch
- Analyzing the Component Roles
- Budget Friendly Ingredient Selection
- Best Tools for Roasting
- Step by Step Cooking Guide
- Solving Common Roasting Problems
- Flavor Variations and Swaps
- Scaling the Recipe Size
- Debunking Roasting Misconceptions
- Storing and Using Leftovers
- Carving and Serving Success
- CRITICAL Sodium Level Detected
- Recipe FAQs
- 📝 Recipe Card
Perfect Crispy Dutch Oven Chicken
There is nothing more disappointing than a roast that comes out looking gray and feeling rubbery. I used to think the only way to get that deep, golden brown finish was by deep frying or using a commercial rotisserie, but the truth is usually much simpler.
The biggest mistake most of us make is letting the chicken sit in its own juices, which essentially steams the bottom half of the bird into a soggy mess.
We are going to fix that by building a literal platform of vegetables. This elevates the meat, allowing the 425°F air to hit every square inch of the skin. You'll hear the fat start to sizzle and pop against the cast iron, and that is when you know you're on the right track.
It’s a functional, one pot solution that feeds the whole family without a massive cleanup or a huge grocery bill.
This Dutch Oven Chicken is my go to when I want a healthy, high protein meal that actually works every single time. It's about working with the heat of the heavy pot to create a microclimate that keeps the breast meat juicy while the skin gets that unmistakable crunch.
Let’s get into the mechanics of why this method beats a standard roasting pan every day of the week.
Science of the Perfect Crunch
Dry Heat Circulation: By roasting uncovered at a high temperature, we evaporate surface moisture quickly, which is the only way to trigger the browning process that creates flavor.
Thermal Mass Advantage: The heavy walls of the Dutch oven hold onto heat better than thin sheet pans, preventing the oven temperature from dropping when you open the door.
Fat Conduction Roasting: As the butter and chicken fat render out, they coat the vegetables below, frying them in "schmaltz" for a texture that standard boiling or steaming can't match.
The Trivet Effect: Using carrots and potatoes as a rack prevents the bottom of the chicken from poaching in liquid, ensuring the heat reaches the underside for even cooking.
| Thickness | Internal Temp | Rest Time | Visual Cue |
|---|---|---|---|
| 4.5 lb Bird | 160°F (Breast) | 15 minutes | Clear juices, golden skin |
| 5 lb Bird | 160°F (Breast) | 15 minutes | Leg moves easily in socket |
| 3.5 lb Bird | 160°F (Breast) | 10 minutes | Skin is tight and brown |
When you are looking for other ways to use this heavy duty pot, you might find my Dutch Oven Pot Roast to be a great companion for your weekend meal planning. Both recipes rely on the incredible heat retention of cast iron to transform tough or simple ingredients into something special.
Analyzing the Component Roles
| Ingredient | Science Role | Pro Secret |
|---|---|---|
| Kosher Salt | Protein Denaturation | Season the cavity heavily to flavor the meat from the inside out. |
| Unsalted Butter | Heat Conduction | Slide it directly under the skin to fry the skin from both sides. |
| Yukon Gold Potatoes | Starch Gelatinization | These hold their shape better than Russets when sitting in hot fat for 75 minutes. |
| Yellow Onion | Aromatic Release | The high sugar content helps the pan drippings caramelize into a rich jus. |
Budget Friendly Ingredient Selection
- 4.5 lb whole chicken: Look for a pasture raised bird if it fits the budget, but a standard grocery store chicken works perfectly here. Why this? The 4.5 lb size fits most 5-7 quart Dutch ovens without touching the sides.
- 2 tbsp Kosher salt: Essential for drawing out moisture from the skin. Why this? Coarse grains are easier to distribute evenly than fine table salt.
- 1 tsp cracked black pepper: Provides a mild heat and earthy aroma.
- 4 tbsp unsalted butter: Soften this at room temperature for easy spreading. Why this? Fat is the medium that carries the herb flavors into the meat.
- 1.5 lbs baby Yukon Gold potatoes: Halved to maximize surface area. Why this? They have a creamy interior that absorbs the chicken drippings.
- 3 large carrots: Cut into thick chunks so they don't turn to mush.
- 2 stalks celery: Sliced thick for aromatics.
- 1 large yellow onion: Wedged to create the base of our trivet.
- 1 head garlic: Halved to expose the cloves.
- Fresh herbs: 4 sprigs rosemary and 6 sprigs thyme.
- 1 large lemon: Halved to provide steam and acidity inside the cavity.
| Original Ingredient | Substitute | Why It Works |
|---|---|---|
| Unsalted Butter | Ghee or Avocado Oil | Both have high smoke points; Ghee adds a similar nutty flavor. |
| Yukon Gold Potatoes | Red Bliss Potatoes | Similar waxy texture that won't fall apart during the long roast. |
| Fresh Rosemary | Dried Rosemary (1 tsp) | Concentrated flavor. Note: Crush it between your fingers to release oils. |
| Yellow Onion | Shallots | Adds a more delicate, garlicky sweetness to the vegetable base. |
Best Tools for Roasting
To get the best results for this Oven Chicken, you really need a 5 to 7 quart Dutch oven. Cast iron is the gold standard because it radiates heat so evenly, but an enameled version (like a Le Creuset or Lodge) is even better for cleanup.
Because we are roasting at 425°F, you need a pot that can handle high heat without the finish cracking.
You will also need a reliable instant read thermometer. Relying on "clear juices" can be risky, especially with larger birds. If you're interested in more efficient cooking methods for poultry, you should check out my pan seared chicken which uses a similar over high heat philosophy but on a much faster timeline.
Finally, have some kitchen twine on hand. Tying the legs together known as trussing is not just for looks. It closes the cavity slightly so the breast meat doesn't dry out before the legs are finished cooking. It’s a small step that makes a massive difference in the final texture of the meat.
step-by-step Cooking Guide
- Dry the bird. Pat the chicken extremely dry with paper towels. Note: Moisture is the enemy of crispiness; any water on the skin will turn to steam.
- Season the interior. Season the cavity with salt and pepper, then stuff with lemon halves and half of the fresh herbs.
- Truss the legs. Tie the legs together with kitchen twine until the bird is compact and stable.
- Build the base. Toss potatoes, carrots, celery, onion, and garlic in the Dutch oven with a splash of oil and salt.
- Prepare herb butter. Mix softened butter with minced rosemary and thyme.
- Apply flavor. Gently lift the skin over the breast and thighs and slide the herb butter underneath. Note: This protects the lean breast meat from the direct high heat.
- Coat the exterior. Rub any remaining butter over the exterior skin until every inch is lightly glistening.
- Position the chicken. Place the chicken on top of the vegetables.
- The first roast. Bake uncovered at 425°F (218°C) for approximately 45 minutes until the skin is visibly tightening and turning gold.
- Final cook. Continue roasting until the internal temperature reaches 160°F (71°C).
- The rest. Transfer to a carving board for 15 minutes until the juices settle and the skin hardens.
Solving Common Roasting Problems
Why Your Chicken Skin Is Soggy
The most common culprit for limp skin is trapped steam. If you cover the Dutch oven, the moisture from the vegetables and the meat has nowhere to go. It hits the lid, condenses, and rains back down on your chicken. Always roast uncovered if you want that shatter crisp texture.
Another issue is overcrowding; if the chicken is touching the sides of the pot, those areas will stay pale and soft.
Why Your Potatoes Are Hard
If the chicken reaches 160°F but the potatoes are still firm, they likely weren't cut small enough or they weren't tossed in enough fat. The vegetables rely on the rendered fat from the chicken to cook through. Make sure you use "baby" potatoes or cut larger ones into 1 inch pieces.
If the bird is done first, just pull it out to rest and pop the vegetables back in the oven for another 10 minutes while the meat rests.
| Problem | Root Cause | Solution |
|---|---|---|
| Burnt Skin | Oven rack is too high | Move the rack to the lower middle position for even heat. |
| Dry Breast Meat | No butter under skin | Ensure the butter barrier is applied directly to the meat. |
| Smoking Pot | Fat burning on dry spots | Add 1/4 cup of water to the bottom of the pot if veg are too dry. |
Common Mistakes Checklist
- ✓ Never skip drying the skin; even a little moisture prevents the Maillard reaction.
- ✓ Don't forget to salt the cavity; it seasons the meat from the inside out.
- ✓ Avoid checking the oven too often; every time you open the door, you lose the heat needed for crisping.
- ✓ Let the chicken rest for a full 15 minutes; cutting too early lets all the moisture run out onto the board.
- ✓ Ensure the butter is softened, not melted, so it stays in place under the skin.
Flavor Variations and Swaps
For a Garlic Lemon Punch
Double the amount of garlic and add the zest of two lemons to the herb butter. This creates a much more vibrant, Mediterranean flavor profile. You can also swap the rosemary for oregano. This version is fantastic when served with a side of tzatziki or a fresh cucumber salad.
For a dairy-free Alternative
If you can't use butter, avocado oil or schmaltz (rendered chicken fat) are your best friends. They have higher smoke points than butter, which means you can actually get the skin even crispier without any risk of the milk solids burning.
Rub the oil generously over the skin and use plenty of salt to compensate for the lack of buttery flavor.
- Spiced Version: Add 1 tsp of smoked paprika and 1/2 tsp of cumin to the salt rub for a smoky, deep red finish.
- Wine Infusion: Pour 1/2 cup of dry white wine (like Sauvignon Blanc) into the bottom of the pot with the vegetables for a built in sauce.
- Root Veggie Swap: Replace carrots with parsnips or rutabaga for a more earthy, winter focused meal.
Scaling the Recipe Size
If you are cooking for a larger crowd and need to go up to a 6 or 7 lb bird, you need to adjust your strategy. Larger chickens take longer to cook, which can lead to the breast meat drying out before the legs reach a safe temperature.
I recommend lowering the oven temp to 400°F after the first 30 minutes of over high heat roasting to ensure the interior cooks through without burning the skin.
For a smaller bird (around 3 lbs), you can keep the temperature at 425°F the entire time. The cooking time will likely drop to about 50 to 60 minutes.
Because the smaller bird has less fat to render, you might want to add an extra tablespoon of butter to the vegetables to ensure they don't stick to the bottom of the pot.
When scaling up, remember that the salt and spices should only increase to about 1.5x, not a full double. Over salting a larger bird is a common mistake. If you find yourself with too much chicken, you can always shred the leftovers for my chicken and noodles, which is a brilliant way to use up every last scrap.
| Servings | Chicken Weight | Potato Weight | Cook Time |
|---|---|---|---|
| 2-3 People | 3 lb Bird | 1 lb | 55 minutes |
| 4-6 People | 4.5 lb Bird | 1.5 lbs | 75 minutes |
| 8 People | Two 3 lb Birds | 3 lbs | 85 minutes |
Debunking Roasting Misconceptions
One of the most persistent myths is that you need to baste the chicken every 15 minutes. In reality, basting actually makes the skin soggy. Every time you pour liquid over that skin, you are cooling it down and introducing moisture, which prevents it from becoming crispy.
The butter under the skin is all the "self basting" you need.
Another common belief is that you must sear the chicken in the pot before putting it in the oven. While searing adds flavor, it is incredibly messy with a whole bird and often results in torn skin.
A over high heat oven (425°F) achieves the same browning effect more evenly and with much less effort. Trust the convection of the oven to do the work for you.
Finally, don't believe that you have to cook chicken until it hits 165°F in the oven. Because of carryover cooking, if you pull the bird at 160°F and let it rest, the temperature will naturally climb to 165°F while the juices redistribute.
Pulling it later is the fastest way to end up with dry, stringy meat.
Storing and Using Leftovers
Storage Guidelines Leftover Dutch Oven Chicken stays fresh in the fridge for up to 4 days. Store the meat and the vegetables in separate airtight containers if possible. The vegetables tend to release moisture over time, which can make the meat feel slightly damp if they are packed together.
For the freezer, you can store carved meat for up to 3 months, though the texture of the roasted potatoes doesn't hold up well to freezing and thawing.
Zero Waste Tips Never throw away the carcass. The bones from a roast chicken are gold for making homemade stock. Put the bones back in the Dutch oven with some water, any leftover veggie scraps (like onion skins or celery ends), and simmer for 4 hours.
You can also save the "schmaltz" (the yellow fat) left in the bottom of the pot. Filter it through a fine mesh sieve and keep it in a jar in the fridge to use for frying eggs or sautéing greens later in the week.
Carving and Serving Success
Wait for the full 15 minutes before you even touch the knife. If you carve too early, the internal pressure will push all that beautiful juice out, and you’ll be left with dry meat and a soaked cutting board. Start by removing the legs and thighs first, then the wings.
This gives you a clear path to slice the breast meat into thick, juicy medallions.
Serve the chicken on a large platter surrounded by the roasted vegetables. The potatoes should be dark brown on the bottom and soft in the middle. I like to take the liquid left in the Dutch oven, skim off most of the fat, and pour the remaining "jus" directly over the sliced meat.
It adds a final hit of salt and herb flavor that ties the whole meal together.
If you have leftovers that have lost their crunch, the best way to reheat them is in an air fryer or a 400°F oven for 5 minutes. Avoid the microwave if you can; it will turn that once crispy skin back into the rubbery texture we worked so hard to avoid.
A quick blast of dry heat will bring the sizzle back to life and make it taste like it just came out of the pot.

CRITICAL Sodium Level Detected
1420 mg of sodium per serving (62% of daily value)
The American Heart Association recommends a maximum daily sodium intake of 2,300mg.
Strategies to Significantly Lower Sodium in Your Roasted Chicken
-
Halve the Kosher Salt-25%
Reduce the 2 tablespoons of Kosher salt to 1 tablespoon. This is the most significant contributor to sodium in this recipe.
-
Embrace Fresh Herbs and Spices
Continue to use fresh rosemary, thyme, cracked black pepper, and lemon. These add immense flavor without sodium.
-
Use Unsalted Butter
You are already using unsalted butter, which is excellent. Continue this practice to avoid added sodium.
-
Leverage Citrus and Aromatics
Maximize the use of lemon, garlic, and onion for natural flavor enhancers, reducing the need for salt.
Recipe FAQs
How long does a 5lb chicken take to cook?
Expect approximately 75 minutes of total roasting time. While a 4.5 lb bird cooks through in about 75 minutes at 425°F, you must always cook until the internal temperature reaches 160°F in the thickest part of the breast.
Can a Dutch oven go in the oven at 400 degrees?
Yes, but this recipe requires 425°F for optimal results. Most cast iron Dutch ovens are rated for much higher temperatures, so roasting at 425°F as directed is perfectly safe and necessary to achieve crispy skin.
How do you cook a chicken in a Dutch oven?
Pat the bird dry, season, and roast over a vegetable trivet. After stuffing the cavity with lemon and herbs, truss the legs, slide herb butter under the skin, and roast uncovered at 425°F until the internal temperature hits 160°F.
Is a Dutch oven good for roasting whole chicken?
Yes, it is excellent for keeping the meat moist while roasting. The heavy lid and walls provide even heat distribution, and if you enjoyed mastering this roasting technique, you can apply similar heat control principles when preparing our quick curry soup.
Is it necessary to remove the skin before carving?
No, this is a common misconception. Keeping the skin on during the 15-minute resting period helps retain the moisture inside the meat, and it should remain intact for the best flavor when serving.
How to ensure the skin gets crispy?
Dry the chicken surface extremely well with paper towels before applying the butter. Any residual surface moisture will cause the skin to steam rather than crisp, preventing that golden brown finish.
How to handle leftover potatoes?
Store them in a separate airtight container from the meat. Because the vegetables tend to release moisture over time, separating them prevents the chicken from becoming damp, keeping your leftovers fresh for up to 4 days.
Dutch Oven Whole Chicken

Ingredients:
Instructions:
Nutrition Facts:
| Calories | 618 kcal |
|---|---|
| Protein | 44 g |
| Fat | 39 g |
| Carbs | 23 g |
| Fiber | 4 g |
| Sugar | 4 g |
| Sodium | 1420 mg |
