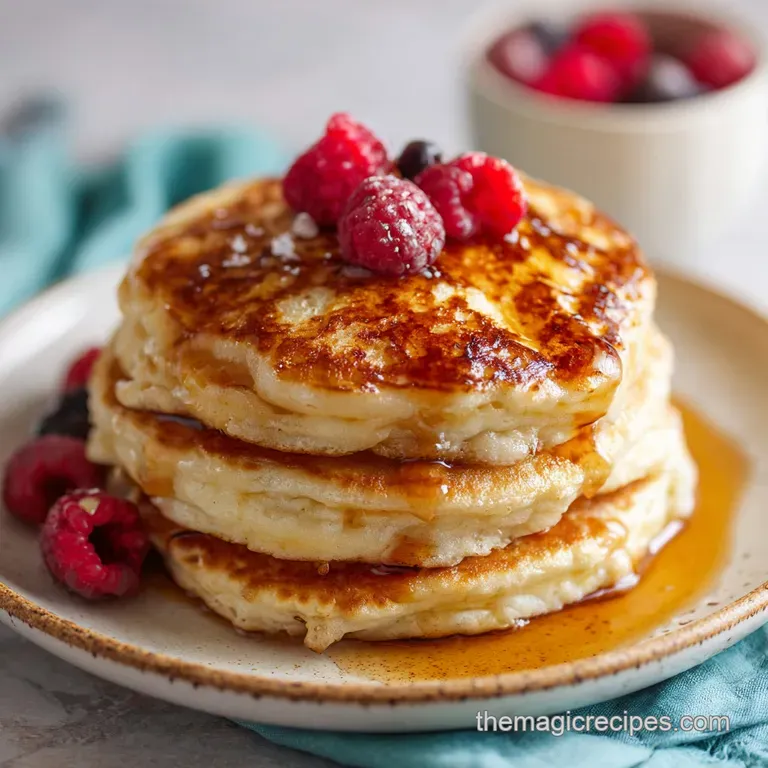
Extra Fluffy Dairy Free Pancakes: Pillowy and Tender
- Time:10 minutes prep + 15 minutes cooking = 25 minutes total
- Flavor/Texture Hook: Velvety crumb with a shatter crisp exterior and deep vanilla notes.
- Perfect for: An indulgent weekend brunch or a decadent slow morning treat.
- The Secret to Extra Fluffy Dairy Free Pancakes Texture
- Why This High Rise Formula Actually Works
- Component Analysis and Ingredient Roles
- Gathering the Components for Decadent Non Dairy Breakfast Success
- The Essential Kitchen Tools for a Flawless Pancake Flip
- Step by Step Mastery of the Sizzle and Flip
- Rescuing Your Stack from Common Breakfast Cooking Pitfalls
- Guidelines for Adjusting Your Batch Size
- Customizing Your Batter with Sweet or Savory Additions
- Debunking Common Flapjack Misconceptions
- Keeping Your Leftover Flapjacks Silky and Fresh for Days
- Indulgent Toppings and Sides for a Complete Brunch Spread
- Recipe FAQs
- 📝 Recipe Card
The Secret to Extra Fluffy dairy-free Pancakes Texture
There is nothing quite like the sound of that first ladle of batter hitting a hot, oiled griddle. It’s a rhythmic, musical sizzle that promises a morning of pure indulgence. I remember the first time I tried to skip the dairy; I expected a sad, flat disc that tasted more like a coaster than a breakfast.
Instead, the kitchen filled with this incredible, warm aroma of toasted vanilla and sweet grains, and I watched as the batter literally grew in the pan, puffing up like a tiny, golden cloud. It was a total revelation in how we think about "free from" baking.
The hero of this story isn't some fancy expensive substitute it's actually apple cider vinegar. When you stir it into the non dairy milk, you aren't just making it sour; you’re changing the protein structure of the milk.
It thickens and curdles, mimicking that thick, decadent tang of traditional buttermilk. This simple trick is what gives the pancakes that signature bakery quality lift. You won't taste the vinegar at all; you’ll only notice how remarkably soft and velvety the interior remains, even after they’ve cooled down slightly on the plate.
We are going for a stack that feels like a luxury, not a compromise. By focusing on the interaction between our acidic "buttermilk" and the leavening agents, we create a network of air pockets that stay trapped in the batter.
The result is a texture that is light enough to float, yet substantial enough to soak up every drop of maple syrup. Honestly, once you see how high these rise, you’ll never go back to the standard boxed mixes. It’s about achieving that perfect mahogany colored crust while keeping the center as light as air.
Why This High Rise Formula Actually Works
Understanding the "how" behind the fluff helps you master the sizzle every time you step to the stove. It isn't magic; it's a series of small, intentional reactions.
- Acid Base Reaction: The apple cider vinegar reacts instantly with the baking soda, creating a flurry of carbon dioxide bubbles that expand under heat.
- Starch Hydration: Resting the batter for 5 minutes allows the flour to fully absorb the liquid, which prevents a grainy texture and strengthens the bubble walls.
- The "Buttermilk" Effect: Curdling the almond or oat milk creates a thicker consistency that clings to the air bubbles rather than letting them escape.
- Steam Pockets: The high moisture content in the non dairy milk turns into steam the moment it hits the pan, pushing the batter upward for maximum height.
- Fat Distribution: Using neutral oil instead of melted butter ensures the crumb stays soft even at room temperature, as oil remains liquid unlike dairy fats.
| Cook Method | Time | Texture | Best For |
|---|---|---|---|
| Non Stick Stovetop | 15 minutes | Shatter crisp edges with soft centers | Traditional textures and golden rings |
| Sheet Pan Oven | 20 minutes | Uniformly soft and cake like | Serving a large crowd all at once |
| Cast Iron Skillet | 18 minutes | Deeply charred, rustic exterior | Extra crispy edges and smoky aroma |
Deciding between methods depends on your morning mood. If you're craving that classic, decadent experience with the perfect flip, the stovetop is your best friend. However, if you're hosting a brunch, you might want to try a sheet pan pancakes approach to save yourself from standing over the stove for an hour. Both methods benefit from the same high rise science we’ve built into this batter.
Component Analysis and Ingredient Roles
| Ingredient | Science Role | Pro Secret |
|---|---|---|
| Apple Cider Vinegar | Acidic catalyst | Use it to "curdle" the milk first for a thicker batter. |
| Baking Powder & Soda | Dual phase lifting | The soda hits early, while the powder kicks in when the pan gets hot. |
| Neutral Oil | Moisture retention | Keeps the pancakes from feeling dry or "bready" the next day. |
| Fine Sea Salt | Flavor enhancer | It cuts through the sugar to make the vanilla taste more "expensive." |
Gathering the Components for Decadent Non Dairy Breakfast Success
The ingredients here are simple, but their quality matters. We are building a foundation of flavor that doesn't rely on butter, so each element has to pull its weight.
- 250g all purpose flour: Why this? Provides the structural gluten needed to hold onto all those air bubbles.
- 25g granulated sugar: Why this? Aids in caramelization, giving you those beautiful mahogany colored edges.
- 12g baking powder: Why this? The primary engine for that sky high, bakery quality lift.
- 3g baking soda: Why this? Reacts with the vinegar for an immediate initial puff.
- 2g fine sea salt: Why this? Balances the sweetness and wakes up the vanilla notes.
- 300ml unsweetened almond or oat milk: Why this? Provides the liquid base; oat milk offers a slightly richer, creamier finish.
- 15ml apple cider vinegar: Why this? The "secret" acid that transforms regular milk into a lifting machine.
- 45ml neutral oil: Why this? Ensures a velvety crumb that stays moist longer than butter based recipes.
- 1 large egg: Why this? Acts as the "glue" that keeps your fluffy stack from crumbling apart.
- 5ml pure vanilla extract: Why this? Adds that essential "bakery" aroma that makes the whole house smell divine.
The Essential Kitchen Tools for a Flawless Pancake Flip
You don't need a professional kitchen, but a few specific tools make the process much more enjoyable. A heavy bottomed non stick griddle is the gold standard here. It distributes heat evenly, so you don't end up with one burnt pancake and three raw ones.
I personally love using a wide, thin offset spatula it slides right under the delicate batter without deflating all those precious bubbles you worked so hard to create.
A liquid measuring cup is also a sneaky essential. You’ll use it to mix your "buttermilk" and then whisk the wet ingredients right in there, saving you an extra bowl to wash. If you have a kitchen scale, use it for the flour.
Measuring by weight is the only way to ensure your batter isn't too thick, which is the number one reason for "bready" pancakes. Finally, a wire cooling rack is great if you're making a big batch; it keeps the bottoms from getting soggy while the rest of the stack finishes cooking.
step-by-step Mastery of the Sizzle and Flip

- Combine 300ml non dairy milk and 15ml apple cider vinegar in a measuring cup. Note: This creates the "buttermilk" that drives the fluffiness.
- Wait 3–5 minutes until the liquid looks slightly thick and curdled.
- Whisk 1 egg, 45ml neutral oil, and 5ml vanilla extract into the milk mixture.
- Whisk 250g flour, 25g sugar, 12g baking powder, 3g baking soda, and 2g salt in a large bowl.
- Pour the wet ingredients into the dry ingredients.
- Fold gently with a spatula until no large flour streaks remain but lumps are still visible. Note: Overmixing will pop the air bubbles.
- Let the batter rest for 5 minutes until you see small bubbles appearing on the surface.
- Heat a non stick pan over medium heat with a tiny drop of oil.
- Pour 60ml of batter per pancake and cook until the edges look set and bubbles burst on top.
- Flip carefully and cook for 1–2 minutes until the bottom is a deep mahogany brown.
Rescuing Your Stack from Common Breakfast Cooking Pitfalls
Why Your Pancakes Are Flat and Dense
The most common culprit is over enthusiastic mixing. When you stir the batter until it's perfectly smooth, you’re developing too much gluten and popping the carbon dioxide bubbles created by the vinegar and soda.
This turns your "cloud" into a "brick." Another reason could be expired baking powder; if that tin has been in your pantry for two years, it won't have the strength to lift the heavy flour.
| Problem | Root Cause | Solution |
|---|---|---|
| Burnt outside, raw inside | Heat is too high | Lower the flame and use a heavier pan for even distribution. |
| Rubbery texture | Overmixing the batter | Stir until "just combined" lumps are your best friends here. |
| No bubbles forming | Pan is too cold | Let the pan preheat for 3 full minutes before adding batter. |
Common Mistakes Checklist
- ✓ Never skip the 5 minute rest; it’s essential for the starch to hydrate and the bubbles to stabilize.
- ✓ Don't press down on the pancake with your spatula after flipping; you'll squeeze out all the air.
- ✓ Use a neutral oil like grapeseed or sunflower; olive oil can be too heavy and savory for this recipe.
- ✓ Wipe the pan between batches to prevent burnt bits of oil from sticking to your fresh pancakes.
- ✓ Check that your baking powder "fizzes" in a bit of hot water before you start.
Guidelines for Adjusting Your Batch Size
If you are cooking for a crowd, doubling this recipe is straightforward, but you should be careful with the leavening agents. For a double batch, I usually only use 1.5x the amount of salt and vanilla to keep the flavors balanced.
If you are scaling down to just one or two servings, beat the egg in a small cup first and then use exactly half of it. It sounds tedious, but using a whole egg for a half batch will make the pancakes taste "eggy" and tough.
When scaling up, remember that the batter will continue to react as it sits. If you're making 20 pancakes, the last few might not rise as much as the first few. To combat this, keep your dry and wet ingredients separate and mix them in smaller batches as you go.
This ensures every single person at the table gets that sky high, bakery quality experience.
Customizing Your Batter with Sweet or Savory Additions
While these are incredible plain, sometimes you want a little more decadence. For a chocolate version, fold in a handful of dairy-free semi sweet chips just before cooking. If you're feeling fancy, you can even serve these with a dollop of whipped butter — just use a vegan butter stick and follow the same whipping method for a light as-air topping.
1. The "Buttery" Upgrade
To get that rich, buttery flavor without the dairy, try adding a half teaspoon of "butter extract" or using a high-quality vegan butter to grease the pan. The way the vegan butter browns against the batter creates a nutty, toasted aroma that is absolutely intoxicating.
2. Flour Substitutions
If you want to go gluten-free, a 1:1 gluten-free flour blend works reasonably well here. However, be aware that the texture will be slightly denser and the "shatter" of the edges won't be as pronounced. You might need an extra tablespoon of milk as GF flours tend to be thirstier.
3. Seasonal Infusions
In the autumn, I love adding a teaspoon of cinnamon and a pinch of nutmeg. The aroma while they cook is like a warm hug. In the summer, folding in fresh blueberries (tossed in a little flour so they don't sink) adds a bright, velvety pop of juice to every bite.
Debunking Common Flapjack Misconceptions
One major myth is that the pan needs to be smoking hot. If you see smoke, your pan is too hot, and you’ll end up with a mahogany exterior and a liquid center. Medium heat is the sweet spot. Another myth is that you should flip the pancake as soon as you see a single bubble.
You actually want to wait until the bubbles on the surface pop and stay open, and the edges look matte instead of shiny.
Finally,, many people think you can't get a good sear without butter. In reality, oil has a higher smoke point and actually helps create a more consistent, golden brown crust. You get all the "shatter" without the risk of the milk solids in butter burning and tasting bitter.
Keeping Your Leftover Flapjacks Silky and Fresh for Days
Storage: These keep beautifully in the fridge for up to 4 days. Store them in an airtight container with a piece of parchment paper between each pancake to prevent them from sticking together.
Freezing: This is my favorite meal prep hack. Freeze them in a single layer on a baking sheet for an hour, then toss them into a freezer bag. They’ll stay fresh for up to 2 months. You can pop them straight into the toaster from the freezer for a quick, decadent breakfast on a Tuesday morning.
Zero Waste: If you have leftover batter that you don't want to cook right away, don't throw it out! It makes a great base for a "pancake mug cake" in the microwave.
Or, if you have extra non dairy milk that's nearing its end, use it to make a big batch of the "buttermilk" mixture and freeze it in ice cube trays to use in your next baking project.
Indulgent Toppings and Sides for a Complete Brunch Spread
To truly make this a "masterclass" breakfast, the toppings need to be as thoughtful as the batter. A warm berry compote is my go to just simmer frozen berries with a splash of maple syrup until they break down into a velvety sauce.
It soaks into the fluffy layers of the extra fluffy dairy-free pancakes in the most delightful way.
If you want a savory contrast, some crispy tempeh bacon or maple glazed vegan sausages provide that salty sweet balance that makes a brunch feel complete. And don't forget the drink! A strong, dark roast coffee or a bright orange mimosa cuts through the richness of the stack perfectly.
Whatever you choose, the goal is to create a plate that feels like a celebration of flavor, proving that dairy-free can be the most indulgent choice of all.

Recipe FAQs
What is the secret to extra fluffy pancakes?
The secret is avoiding over mixing the batter. You should fold the wet and dry ingredients together only until the flour streaks disappear, leaving small lumps that ensure a light, airy structure rather than a dense one.
What is the best non dairy milk for pancakes?
Unsweetened almond or oat milk work best. These milks react reliably with the apple cider vinegar to create a vegan buttermilk, which provides the necessary acidity for the baking soda to lift your batter.
What is the secret ingredient in fluffy pancakes?
The combination of apple cider vinegar and baking soda is key. This chemical reaction creates carbon dioxide bubbles immediately, which expand during cooking to produce the signature height. If you enjoy mastering this kind of silky texture control, you will find similar principles applied in our other dessert recipes.
How to make 3 ingredient fluffy pancakes?
Start by combining the milk and vinegar to create a homemade buttermilk. Whisk in your egg, oil, and vanilla before folding in the flour, sugar, leavening agents, and salt to create a cohesive, lump filled batter.
Is it true I can substitute the neutral oil with melted butter?
No, this is a common misconception. This recipe is specifically formulated for dairy-free neutral oils like grapeseed or sunflower; using butter would change the intended dairy-free profile and may alter the final texture.
How to troubleshoot flat or dense pancakes?
Check the freshness of your baking powder by testing a small amount in hot water. If it does not fizz immediately, it is expired and will fail to lift your batter, resulting in dense, heavy pancakes.
How to handle the batter for the best rise?
Rest the batter for exactly 5 minutes before cooking. This pause allows the starch in the flour to hydrate fully and the leavening bubbles to stabilize, which is critical for achieving the perfect mahogany colored exterior.
Extra Fluffy dairy-free Pancakes
Ingredients:
Instructions:
Nutrition Facts:
| Calories | 358 kcal |
|---|---|
| Protein | 8.1 g |
| Fat | 13.2 g |
| Carbs | 53.6 g |
| Fiber | 1.8 g |
| Sugar | 6.4 g |
| Sodium | 785 mg |
