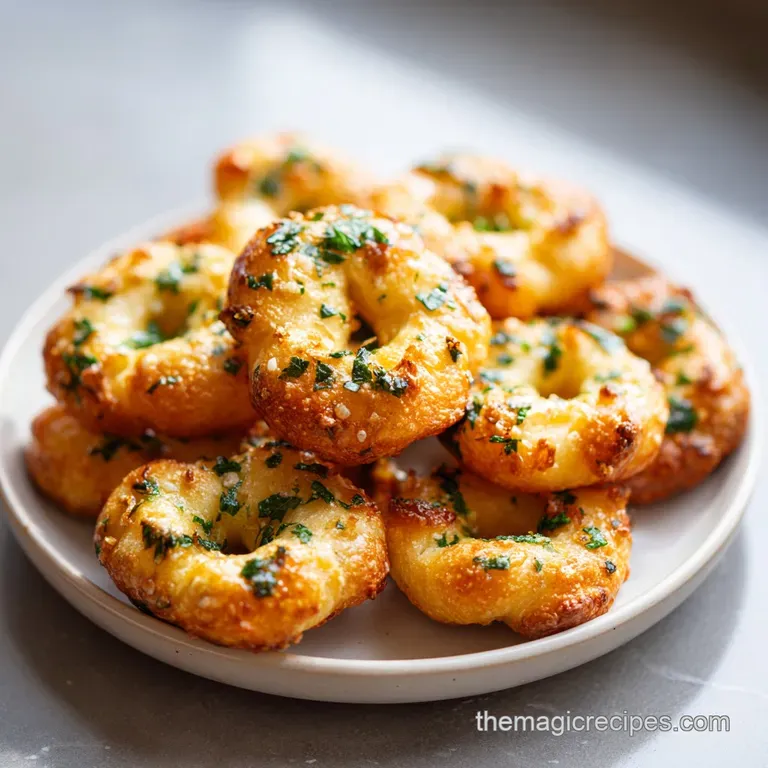
Crispy Mini Bagel Bite Snack with Garlic and Herbs
- Time: Active 10 minutes, Passive 20 minutes, Total 30 minutes
- Flavor/Texture Hook: A brittle, shattered crunch with a lingering garlic and herb warmth.
- Perfect for: Quick afternoon snacks, school lunches, or a low stress appetizer for casual hosting.
- Make the Best Crispy Mini Bagel Bite Snack with Garlic and Herbs
- The Honest Truth Why Most Bagel Chip Recipes Fail
- Preparation Logistics and Key Timing for This Snack
- Analyzing the Role of Fats and Aromatic Spices
- Necessary Gear for Consistent Slicing and Even Heat
- A Detailed Guide to Achieving the Golden Shatter
- Practical Fixes for Your Most Common Baking Mistakes
- Adjusting the Batch Size for Any Crowd Size
- Debunking the Biggest Myths About Homemade Bagel Chips
- Keeping Your Garlic and Herb Snacks Fresh and Crispy
- Presentation Tips for the Best Snack Platter
- Recipe FAQs
- 📝 Recipe Card
Make the Best Crispy Mini Bagel Bite Snack with Garlic and Herbs
Imagine the sound of a perfectly toasted bagel, but amplified ten times until it becomes a brittle, satisfying snap. That is exactly what happens when you take a simple mini bagel and treat it with a little respect, some good olive oil, and a heavy hand with the aromatics.
I remember the first time I tried to make these at home. I basically just chopped up a bagel and threw it in a hot oven, hoping for the best. What I got was a burnt, bitter mess on the outside and a weirdly chewy center that nearly took out a filling.
It was a total disaster, but it taught me that the secret isn't just the heat, it's the prep.
Discover our single, sensational recipe for Crispy Mini Bagel Bite Snacks with Garlic and Herbs. This isn't just about using up leftovers, though it's great for that. It is about creating a snack that actually holds up to a thick hummus or a creamy dip without falling apart.
When you pull these out of the oven, the smell of toasted garlic and smoked paprika fills the kitchen in a way that makes everyone wander in asking, "What are you making?" It's that warm, savory aroma that reminds you why homemade always beats a bag of store-bought chips that are 40 percent air.
We are going for a texture that I call the "golden shatter." It’s that moment when the bagel slice is so dehydrated that it doesn't just bend, it explodes into crispy shards the moment you bite down. By using mini bagels, we get these cute, bite sized rounds that are naturally the perfect shape for snacking.
You don't need any fancy equipment, just a sharp knife and about 30 minutes of your time. Let's get into the details of why this works and how you can avoid the soggy center trap that ruins most homemade bagel chips.
The Honest Truth Why Most Bagel Chip Recipes Fail
Most people treat bagel chips like toast, but they are actually more like a cracker. If you crank the heat too high, the exterior browns before the moisture in the center of the dough has a chance to escape. You end up with a chip that looks done but feels like leather.
We use a lower temperature of 325°F (165°C) to slowly draw out that water, which allows the starches to set in a rigid, crispy structure. It's the difference between a "crisp" and a "crunch."
- Fat Saturation
- Olive oil seeps into the porous crumb of the bagel, creating a barrier that prevents the chip from absorbing humidity later.
- Starch Retrogradation
- Using slightly stale bagels means the starches have already begun to crystallize, which leads to a far more brittle texture once baked.
- Emulsified Coating
- Whisking the spices into the oil ensures that every millimeter of the bagel gets equal flavor coverage, preventing "naked" spots.
- Uniform Slicing
- Keeping everything at 1/8 inch thickness ensures that the entire batch finishes at the exact same moment, avoiding burnt edges.
| Method | Time | Texture | Best For |
|---|---|---|---|
| Oven Baking | 20 minutes | Brittle, shattered snap | Large batches and even browning |
| Stovetop Searing | 12 minutes | Golden edges, softer core | Quick single servings |
| Air Fryer | 15 minutes | Extremely dry and light | Small batches with max airflow |
The stovetop method is great if you're in a massive rush, but you lose that deep, structural crunch that the oven provides. When you bake them, the heat surrounds the slice, drying it from the inside out.
On a pan, you're mostly just frying the surface, which is why the oven remains the gold standard for this specific recipe.
Preparation Logistics and Key Timing for This Snack
Before you even touch a knife, you need to look at your bagels. If they are fresh out of the bag and squishy, they won't slice as cleanly. I actually prefer to leave my bagels out on the counter for a few hours before I start. This makes the dough firmer and allows for much thinner slices.
If you’re working with very soft bread, you’ll find the knife "drags" through the dough, creating uneven chunks rather than clean rounds.
| Component | Science Role | Pro Secret |
|---|---|---|
| Extra Virgin Olive Oil | Conducts heat into the crumb | Use a high-quality oil for a peppery finish |
| Smoked Paprika | Adds depth and color | A tiny bit goes a long way for a "toasted" look |
| Sea Salt | Enhances savory notes | Fine grain salt sticks better than large flakes |
When we talk about the spices, the garlic and onion powder are the heavy hitters here. Unlike fresh garlic, which would burn and turn bitter at 325°F (165°C), the powder dehydrates into the oil, creating a savory crust that stays sweet. If you've ever tried my crouton recipes, you know that the ratio of fat to starch is what determines how long the crunch lasts on the shelf.
Analyzing the Role of Fats and Aromatic Spices
The ingredients for this Garlic Herb Bagel Chips Recipe are simple, but their quality matters. We are using 6 mini plain bagels, which should weigh roughly 240g. This is the foundation. Plain bagels work best because they are a blank canvas for the herbs.
If you use "everything" bagels, be careful with the added salt, as those are already quite seasoned.
- 6 mini plain bagels (240g): Slightly stale is better for clean slicing.
- 60ml extra virgin olive oil: This provides the "sizzle" and the fat for the crunch.
- 5g garlic powder: Gives that classic, pungent kick without the risk of burning. Why this? Powder coats the uneven surface of the bagel crumb much better than fresh minced garlic.
- 3g dried Italian seasoning: A blend of oregano, basil, and thyme for herbal depth.
- 2g onion powder: Adds a subtle sweetness and savory "umami" base.
- 3g sea salt: Vital for popping the flavors.
- 1g smoked paprika: For a hint of woodsy flavor and a beautiful mahogany hue.
For a substitute, you can swap the olive oil for melted salted butter if you want a richer, more "theatre popcorn" vibe. Just know that butter contains water, so you might need to add 2 or 3 minutes to the cook time to ensure they stay crispy.
If you are looking for a Low Carb Bagel Bites Recipe, you can use keto friendly bagels, though they tend to brown much faster due to the different protein structures, so watch them like a hawk!
| Original Ingredient | Substitute | Why It Works |
|---|---|---|
| Extra Virgin Olive Oil | Avocado Oil | Higher smoke point and very neutral flavor profile |
| Italian Seasoning | Dried Za'atar | Adds a nutty, earthy twist with sesame seeds |
| Smoked Paprika | Cayenne Pepper | Use only a pinch; adds heat instead of smokiness |
If you're out of garlic powder, don't just skip it. Garlic is the soul of this snack. You could use garlic salt in a pinch, but remember to cut the sea salt out of the recipe entirely so you don't end up with a salt bomb that’s inedible.
Necessary Gear for Consistent Slicing and Even Heat
You don't need a pantry full of gadgets, but two things will make your life significantly easier: a sharp serrated knife and a large rimmed baking sheet. The serrated knife is non negotiable. Because bagels are dense, a straight edge chef’s knife will often squash the bread before it cuts it.
The "teeth" of a serrated blade saw through the crust without deforming the shape of your mini rounds.
Next,, a heavy duty baking sheet helps prevent hot spots. If you use a very thin, cheap tray, you might find that the bagel bites in the corners burn while the ones in the middle are still soft. If you find your oven is uneven, the pro move is to rotate the pan 180 degrees at the same time you flip the chips.
This ensures every single piece of this recipe gets the same love from the heating elements.
A Detailed Guide to Achieving the Golden Shatter

- Preheat your oven to 325°F (165°C). This temperature is low enough to dry the bagels without scorching the delicate herbs.
- Slice each of the 6 mini bagels into uniform 1/8 inch thick rounds using a serrated knife. Note: Keep them thin; thicker slices will stay chewy in the middle.
- Pour 60ml of extra virgin olive oil into a large mixing bowl.
- Add 5g garlic powder, 3g Italian seasoning, 2g onion powder, 3g sea salt, and 1g smoked paprika to the oil.
- Whisk the oil and spices vigorously until the mixture looks like a dark, speckled slurry.
- Toss the bagel slices into the bowl and use a spatula to gently fold them. Wait until every slice is glistening with oil.
- Spread the slices onto a parchment lined baking sheet in a single layer. Ensure they are not overlapping or they will steam instead of crisp.
- Bake for 18-22 minutes. Flip the slices at the 10 minute mark to ensure even browning on both sides.
- Remove from the oven when they are a deep mahogany color and feel firm to the touch.
- Let them cool completely on the pan. Listen for the "pinging" sound as they dry and harden during the cooling process.
Chef's Tip: If you want an extra layer of flavor, grate a tiny bit of fresh Parmesan over the chips the second they come out of the oven. The residual heat will melt the cheese just enough to make it stick without making the chips soggy.
Practical Fixes for Your Most Common Baking Mistakes
The most common issue people have with homemade garlic bagel chips is uneven browning. This usually happens because the oven has a "hot corner." If you notice one side of the tray is getting dark while the other is pale, don't just wait. Move the tray!
Why Your Bagel Bites Are Chewy
If your chips aren't crunchy after cooling, it's almost always a moisture issue. Either the slices were too thick, or the oven temperature was too high, causing the outside to seal before the inside dried out.
You can actually fix this by popping them back into a 300°F (150°C) oven for another 5 minutes. They are very forgiving as long as they aren't already burnt.
| Problem | Root Cause | Solution |
|---|---|---|
| Bitter Aftertaste | Burnt garlic powder | Reduce oven temp to 315°F and bake longer |
| Soggy Centers | Slices too thick | Slice to 1/8 inch or extend bake time |
| Greasy Texture | Too much oil/Low heat | Ensure oil is fully whisked and oven is preheated |
Another frequent mistake is overcrowding the pan. I know it’s tempting to shove all the slices onto one tray to save time, but if they touch, the moisture escaping from one slice gets trapped by the next one. This creates steam. Steam is the enemy of the crunch. Give them space to breathe!
Common Mistakes Checklist
- ✓ Using fresh, soft bagels (they are much harder to slice thinly).
- ✓ Skipping the parchment paper (the oil can make the chips stick to the metal).
- ✓ Forgetting to flip halfway through (you'll end up with one pale side).
- ✓ Not whisking the spices into the oil first (this leads to "spice clumps").
- ✓ Eating them while they are still warm (the crunch fully develops once they are stone cold).
Adjusting the Batch Size for Any Crowd Size
If you are hosting a party and need to double this recipe, the math is simple, but the technique changes slightly. When doubling to 12 mini bagels, you should use two separate baking sheets rather than trying to pile them onto one large one. This maintains the airflow necessary for that "shattered" texture we want.
When scaling up, I recommend only increasing the salt and spices by 1.5x rather than a full 2x initially. You can always sprinkle a little extra sea salt over the finished chips, but you can't take it away. For a smaller snack, you can easily halve the recipe.
If you find yourself with half an egg from another recipe, don't use it here; it will make the bagels puffy and bread like rather than crispy.
If you are trying to make these into a sweet and salty snack mix, you can add these bagel bites to a bowl with pretzels and nuts. The garlic and herb profile pairs surprisingly well with the sweetness of a honey roasted nut or a bit of dried fruit.
Debunking the Biggest Myths About Homemade Bagel Chips
One of the biggest myths is that you need a lot of oil to make things crispy. In reality, too much oil will actually weigh the dough down and make it greasy. The oil's job is to conduct heat and carry the flavor of the herbs into the crevices of the bread. You only need enough to coat the surface.
The heat of the oven does the actual work of crisping.
Another misconception is that "toasted" is the same as "dehydrated." Toasting happens at high heat and affects the surface sugars. Dehydrating happens at lower heat and removes internal water. For a true Crispy Mini Bagel Bite Snack with Garlic and Herbs, you want dehydration.
If you just toast them at 400°F (200°C), they will be hard on the outside and soft on the inside, which isn't a chip it’s just weird toast.
Finally,, people think you have to use "bagel" seasoning. While "everything" seasoning is popular, making your own blend of garlic, onion, and Italian herbs allows you to control the salt and the "burnt" flavor of the dried onion bits, which can often become bitter in a hot oven.
Keeping Your Garlic and Herb Snacks Fresh and Crispy
Once your batch is cooled, storage is king. These will stay perfectly crunchy for up to 7 days if kept in an airtight container at room temperature. Do not put them in the fridge! The humidity in a refrigerator will turn your beautiful crispy chips into rubber in a matter of hours.
If you live in a very humid climate, you might want to toss a small food safe silica packet into the container to absorb any stray moisture.
For zero waste cooking, don't throw away the "crumbs" at the bottom of the bowl or the baking sheet. Those little bits of toasted bagel, garlic, and herbs are essentially gold. I like to save them in a small jar and use them as a savory topping for salads or even over a bowl of pasta.
They add a massive punch of flavor and a nice little texture contrast to softer dishes. If the chips do happen to lose their snap after a few days, just spread them on a tray and bake at 300°F (150°C) for 3-4 minutes to "refresh" them. It works every time.
Presentation Tips for the Best Snack Platter
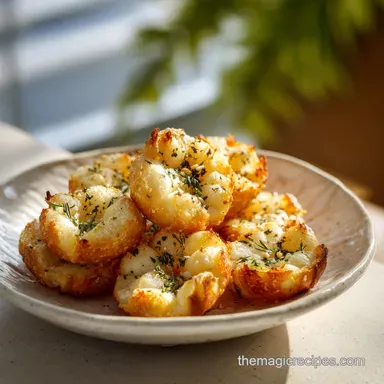
When you’re serving these, think about color. The deep mahogany of the smoked paprika and the green flecks of the Italian herbs look beautiful against a light colored dip. I usually serve mine in a wooden bowl to lean into that rustic, homemade feel.
They are sturdy enough to be the "hero" of a charcuterie board, standing up to heavy cheeses like aged cheddar or a thick spread of goat cheese.
If you want to go the Mediterranean route, pair these with a bowl of high-quality olive oil mixed with a splash of balsamic vinegar. The crunch of the bagel bite soaking up that vinegar is a total win. Because they are mini, they also fit perfectly into small snack bags for school or work.
Just make sure they are 100 percent cool before you bag them, or the residual steam will ruin all your hard work! Enjoy that crunch it's the best part.

Recipe FAQs
Have bagel bites been discontinued?
No, these are homemade snacks. Commercial frozen versions may fluctuate in availability, but you can always make these crispy garlic and herb rounds from scratch using plain mini bagels.
How to use a crisping tray for this recipe?
Place the slices directly on a parchment lined baking sheet instead. A standard crisping tray is not necessary; simply ensure the bagels are in a single layer to achieve that brittle, shattered texture without overlapping.
What to eat with garlic and herb bagel chips?
Serve them with savory dips or soft cheeses. They pair exceptionally well with our creamy baked brie, which provides a rich contrast to the crunch of the chips.
Are bagel chips healthier than potato chips?
They can be, depending on your portion control. Because you control the quality of the olive oil and the amount of sea salt used, you avoid the heavy processing and high sodium additives found in many store-bought potato chips.
Is it true that I should use fresh, soft bagels for the best results?
No, this is a common misconception. You actually want slightly stale, firm bagels; fresh, squishy bread is difficult to slice into thin 1/8 inch rounds and tends to drag under the knife.
How to ensure the garlic and herb coating sticks evenly?
Whisk your oil and spices until fully emulsified before adding the bagel slices. Using a gentle folding motion with your hands or a spatula ensures the liquid coats the crumb of every slice thoroughly.
How to tell when the bagel chips are finished baking?
Watch for a deep mahogany color and a brittle, shattered texture. Bake them at 325°F for 18-22 minutes, making sure to flip the slices halfway through for even browning.
Garlic Herb Bagel Chips
Ingredients:
Instructions:
Nutrition Facts:
| Calories | 229 kcal |
|---|---|
| Protein | 4.8 g |
| Fat | 11.4 g |
| Carbs | 25.6 g |
| Fiber | 1.5 g |
| Sugar | 3.1 g |
| Sodium | 442 mg |
