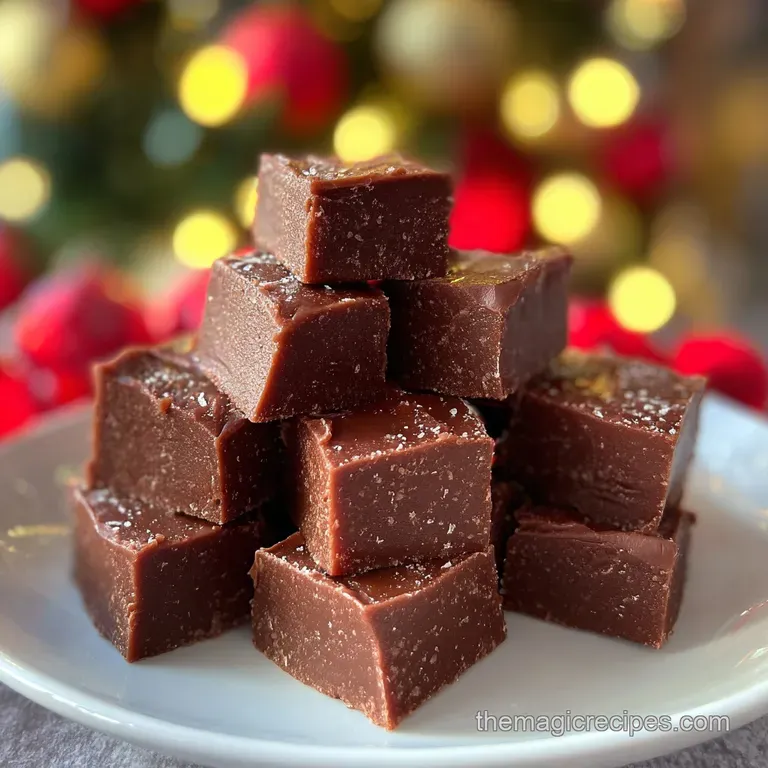
Holiday Fudge: Velvety Texture
- Time: Active 10 minutes, Passive 3 hours, Total 3 hours 10 mins
- Flavor/Texture Hook: Deeply indulgent with a velvety, shatter proof bite
- Perfect for: Holiday gifting, dessert platters, or late night cravings
- The Hidden Science of Creamy Candy
- Component Analysis of the Perfect Batch
- Shopping List Breakdown and Strategic Substitutions
- Vital Tools for Candy Making
- The Cooking Process Step by Step
- Avoiding Kitchen Disasters and Common Errors
- Adjusting the Batch for Any Crowd
- Debunking Candy Making Myths
- Storage Guidelines and Zero Waste Tips
- Recipe FAQs
- 📝 Recipe Card
The Hidden Science of Creamy Candy
To understand why this recipe is so reliable, we have to look at how the molecules play together. It isn’t just about melting things; it’s about creating a stable structure that won’t collapse or turn into a gritty mess the moment it hits the air.
- Saturated Emulsification: The high protein content in condensed milk acts as a stabilizer, preventing the cocoa butter from separating and creating a greasy film.
- Sucrose Interference: Using condensed milk means the sugar is already dissolved, which significantly reduces the risk of large crystal formation that causes graininess.
- Fat Plasticity: Adding cubed butter at the end introduces un melted milk fats that provide a "short" texture, allowing the fudge to break cleanly rather than stretching.
- Temperature Control: Keeping the heat low prevents the vanilla’s volatile aromatics from evaporating, ensuring the scent hits you before the taste does.
| Method | Total Time | Final Texture | Best For |
|---|---|---|---|
| Stovetop | 15 minutes | Ultra glossy and perfectly smooth | Total texture control |
| Microwave | 5 minutes | Slightly firmer and denser | Speed and convenience |
| Slow Cooker | 2 hours | Deeply caramelized notes | Large batches for gifting |
Right then, before we get our hands messy, let’s talk about the method. I personally swear by the stovetop because you can see the exact moment the chocolate loses its individual shape and becomes one with the milk. It’s a sensory cue you just can't get through a microwave door. This Holiday Fudge depends on that visual transition. If you’re looking to round out your seasonal spread, this recipe pairs beautifully with a New Years Desserts recipe to keep the celebration going.
Component Analysis of the Perfect Batch
| Ingredient | Science Role | Pro Secret |
|---|---|---|
| Semi sweet Chips | Provides the primary structure through cocoa solids | Use 60% cacao for a sophisticated, less cloying finish |
| Condensed Milk | Acts as the "glue" and primary sweetener | Ensure it is full fat; "light" versions will fail to set |
| Unsalted Butter | Adds a silky mouthfeel and "shine" | Cube it small so it melts instantly without overcooking |
Shopping List Breakdown and Strategic Substitutions
Getting the right ingredients is half the battle. Don't grab the first bag of chocolate you see; the quality of the fat matters here. I always look for chips that list cocoa butter high up on the label rather than palm oil. It makes the difference between a "waxy" feel and a "velvety" one.
- 3 cups (510g) semi sweet chocolate chips (60% cacao)
- Substitute: Bittersweet chocolate bars, chopped finely.
- Why this? Chips contain stabilizers that help the fudge hold its shape perfectly.
- 1 can (14 oz / 397g) sweetened condensed milk
- Substitute: Coconut condensed milk for a dairy-free twist.
- Why this? It provides the sugar and liquid in a pre emulsified state.
- 1/4 cup (55g) unsalted butter, cubed
- Substitute: Refined coconut oil (solid state).
- Why this? Adds a rich, creamy finish and prevents the fudge from being too hard.
- 1 tsp (5ml) pure vanilla extract
- Substitute: Almond extract (use only 1/4 tsp).
- Why this? Rounds out the sharp edges of the cocoa for a fuller flavor.
- 1/4 tsp (1.5g) fine sea salt
- Substitute: Kosher salt (double the volume).
- Why this? Salt is essential to cut through the heavy sugar and highlight the chocolate.
Vital Tools for Candy Making
You don't need a lab, but a heavy bottomed saucepan is non negotiable. Thin pans create "hot spots" that will scorch the condensed milk before the chocolate even thinks about melting. I also highly recommend a silicone spatula.
It lets you scrape every single bit of that liquid gold off the sides, ensuring no stray sugar crystals ruin the batch.
If you’re planning a larger celebration, maybe serving this after a hearty Christmas Eve Dinner recipe, you might want to double up your equipment. You'll also need a 20x20 cm square baking pan and some high-quality parchment paper. Don't skip the parchment trying to pry fudge out of a bare pan is a heartbreak I wouldn't wish on anyone.
The Cooking Process step-by-step

- Prepare the pan. Line your square pan with parchment paper, leaving an overhang on two sides for easy removal later. Note: This acts as a sling so you don't damage the edges.
- Combine the basics. Place the 510g of chocolate chips and the 397g can of condensed milk into your saucepan.
- Apply gentle heat. Set the burner to low medium until the chips start to lose their shape.
- Introduce the fat. Add the 55g of cubed butter into the warm mixture.
- Stir continuously. Use your spatula to fold the mixture until it becomes glossy and completely uniform.
- Season the blend. Remove from the heat and stir in the vanilla and sea salt.
- Transfer the mass. Pour the thick mixture into your prepared pan.
- Level the surface. Use an offset spatula or the back of a spoon to smooth the top until it looks like a calm, dark lake.
- Chill for stability. Refrigerate for at least 3 hours until the center is firm to the touch.
- Slice and serve. Lift the parchment sling, place on a board, and cut into 36 even squares.
Avoiding Kitchen Disasters and Common Errors
Fudge is sensitive to moisture. Even a single drop of water in your melting chocolate can cause it to "seize," turning it from a smooth liquid into a gritty, clumpy mess. This is why I always dry my spatula and pan thoroughly before I even open the chocolate bag.
Fixing Seized or Grainy Chocolate
If your mixture looks like wet sand, don't panic. This usually happens if a bit of steam got into the pot or if the heat was too high. The sugar has crystallized or the fats have separated.
Preventing a Soft Set
Sometimes you pull the pan out and it’s more like ganache than fudge. This is almost always a measurement issue with the condensed milk or simply not giving it enough time in the cold. It needs that full 3 hours to let the fats recrystallize into a solid structure.
| Problem | Root Cause | Solution |
|---|---|---|
| Grainy Texture | Sugar crystallization or overheating | Stir in a teaspoon of warm milk and whisk vigorously |
| Oil on Surface | Fat separation from high heat | Let it cool slightly and stir gently to re incorporate |
| Sticky to Cut | Not chilled long enough | Return to the fridge for an additional hour before slicing |
Common Mistakes Checklist ✓ Never use a wet spoon or spatula; even a drop of water seizes chocolate. ✓ Keep the heat on the lowest setting possible to avoid scorching the milk.
✓ Don't skip the salt; it’s the bridge between "sweet" and "complex." ✓ Use parchment paper with an overhang; "greasing the pan" isn't enough for fudge. ✓ Be patient with the chill time; room temperature "setting" is never as clean.
Adjusting the Batch for Any Crowd
Scaling Down
If you're just making a treat for yourself, you can halve this. Use a smaller loaf pan instead of a square pan. Reduce the chilling time by about 30 minutes, but keep the over low heat melting process exactly the same.
Scaling Up
Double batches are great for holiday markets. Use a 23x33 cm pan (9x13 inch). When doubling, I suggest adding the vanilla and salt at 1.5x the amount first, then tasting. Sometimes 2x the salt can become a bit overwhelming in large candy batches.
Work in a larger pot to ensure you can stir effectively without splashing.
| Goal | Adjustment Strategy | Outcome Note |
|---|---|---|
| Ultra Rich | Swap 1/2 cup chips for bittersweet | Less sweet, more intense cocoa flavor |
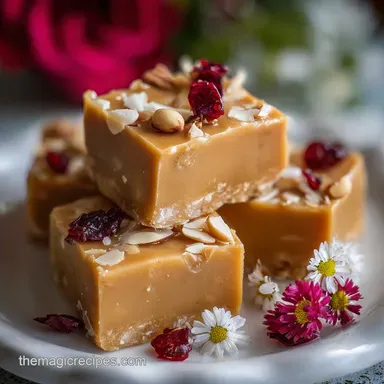
| Crunchy Bite | Fold in 1 cup toasted walnuts | Adds texture and cuts the sweetness |
| Holiday Flare | Top with crushed candy canes | Adds a festive "snap" and minty aroma |
Debunking Candy Making Myths
"You must stir constantly or it won't set." That’s not quite true. While you need to stir to prevent burning, over stirring can actually incorporate too much air, leading to a duller finish. Stir enough to keep it moving, but you don't need to be a human whisk.
"Real fudge must be boiled to the soft ball stage." This is only true for old-fashioned recipes using granulated sugar. By using condensed milk, we are essentially using a "shortcut" that bypasses the need for over high heat boiling, making the process much more forgiving for home cooks.
Storage Guidelines and Zero Waste Tips
To keep your Holiday Fudge in peak condition, keep it in an airtight container. If you leave it out on a plate, the edges will start to dry out and get a bit "crusty."
- Fridge: Store in an airtight container for up to 2 weeks. Use parchment paper between layers to prevent sticking.
- Freezer: This fudge freezes beautifully! Wrap the whole block or individual squares in plastic wrap, then place in a freezer bag. It stays perfect for up to 3 months.
- Zero Waste: If you have "scraps" from trimming the edges, don't throw them away. Chop them up and toss them into your next batch of cookies or melt them down with a little heavy cream to make an incredible hot fudge sauce for ice cream.
If you’re looking for more gifting ideas, I love including a few squares of this along with my Puff Corn Christmas recipe. The salty sweet combo of the popcorn and the dense, dark chocolate of the fudge is a winner every single time. Honestly, just put it in a pretty box with a ribbon, and people will think you spent all day over a hot stove. Let them think that it’ll be our little secret.

Recipe FAQs
What is the best way to store holiday fudge?
In an airtight container in the refrigerator. This keeps it from drying out and maintains its perfect texture for up to two weeks.
Can I freeze holiday fudge?
Yes, holiday fudge freezes exceptionally well. Wrap it tightly in plastic wrap, then place in a freezer safe bag for up to three months.
My fudge turned out grainy, what went wrong?
This is likely due to sugar crystallization or overheating. Ensure your heat is low and constant, and avoid introducing any moisture into the pan.
How do I prevent my fudge from becoming oily?
Avoid high heat during the melting process. Gentle, low heat allows the fats to incorporate smoothly without separating.
Is it true that I must use specific candy making equipment for fudge?
No, this is a common misconception. A heavy bottomed saucepan and a silicone spatula are sufficient, as this recipe uses a stabilized emulsion technique.
What if my fudge doesn't set properly?
Ensure it's chilled for the full recommended time, usually at least 3 hours. Insufficient chilling prevents the fats from recrystallizing properly, leading to a softer set.
What's the secret to that perfectly smooth, dense texture?
It's all about the stabilized emulsion. By using condensed milk and controlling fat ratios, we create a dense, creamy texture that holds its shape, similar to the technique used in Christmas Cracker Toffee: Shattering Mahogany Brittle.
Holiday Fudge
Ingredients:
Instructions:
Nutrition Facts:
| Calories | 114 kcal |
|---|---|
| Protein | 1.5 g |
| Fat | 6.2 g |
| Carbs | 14.9 g |
| Fiber | 0.8 g |
| Sugar | 13.6 g |
| Sodium | 21 mg |
