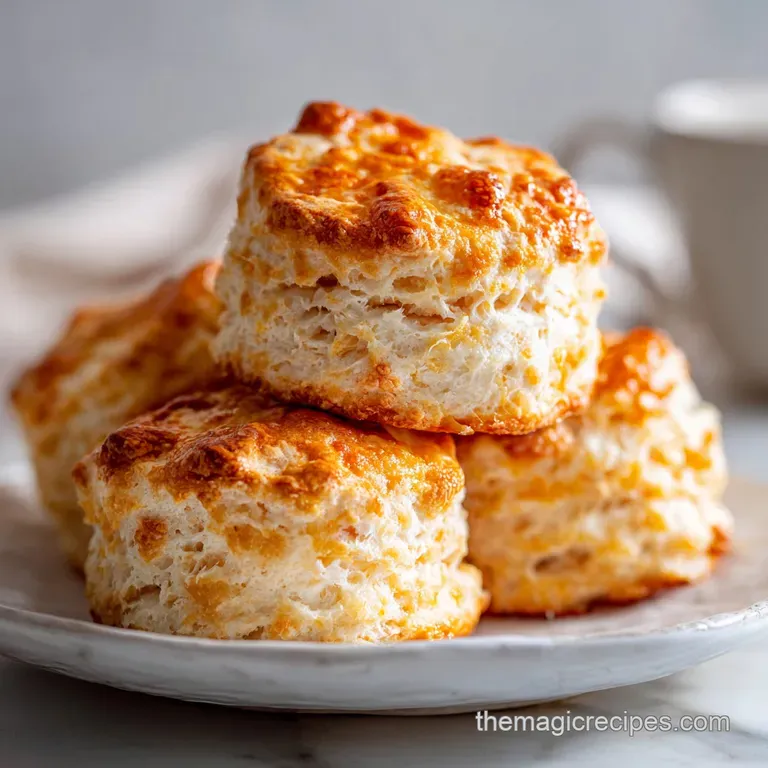
Butter Swim Biscuits: Crispy and Airy
- Time: Active 10 minutes, Passive 25 minutes, Total 35 minutes
- Flavor/Texture Hook: A shatter crisp golden crust with a velvety, moist crumb
- Perfect for: Lazy weekend brunches or quick weeknight dinner sides
- Mastering This Easy Butter Swim Biscuits Recipe
- The Logic Behind the Butter Pool
- Key Recipe Specs and Timeframes
- Picking the Right Pantry Staples
- Essential Equipment for Perfect Baking
- Clear Instructions for Better Biscuits
- Solving Common Biscuit Baking Problems
- Simple Swaps and Creative Ideas
- Proper Storage and Reheating Tips
- Best Foods for Biscuit Pairings
- Biscuit Myths Debunked
- Recipe FAQs
- 📝 Recipe Card
Mastering This Easy Butter Swim Biscuits Recipe
The smell of bubbling, nutty butter hitting a hot metal pan is one of those kitchen sounds that immediately brings everyone to the table. I remember the first time I tried a butter swim biscuits recipe; I was skeptical that just "pouring" dough into melted fat would work.
I expected a greasy mess, but instead, I pulled out a tray of the most towering, golden squares I had ever seen. The edges had that distinct crunch you usually only get from a cast iron skillet, while the middle stayed incredibly soft because of the high hydration from the buttermilk.
It's the perfect solution for when you want homemade bread but don't want to spend 20 minutes rubbing butter into flour with your fingertips. We’ve all been there, standing over a bowl of flour, trying to keep everything cold while our hands are warm. This method flips the script.
You melt the butter first, let it get hot and happy in the oven, and then drop the dough right on top. It’s functional, fast, and honestly, a bit of a magic trick.
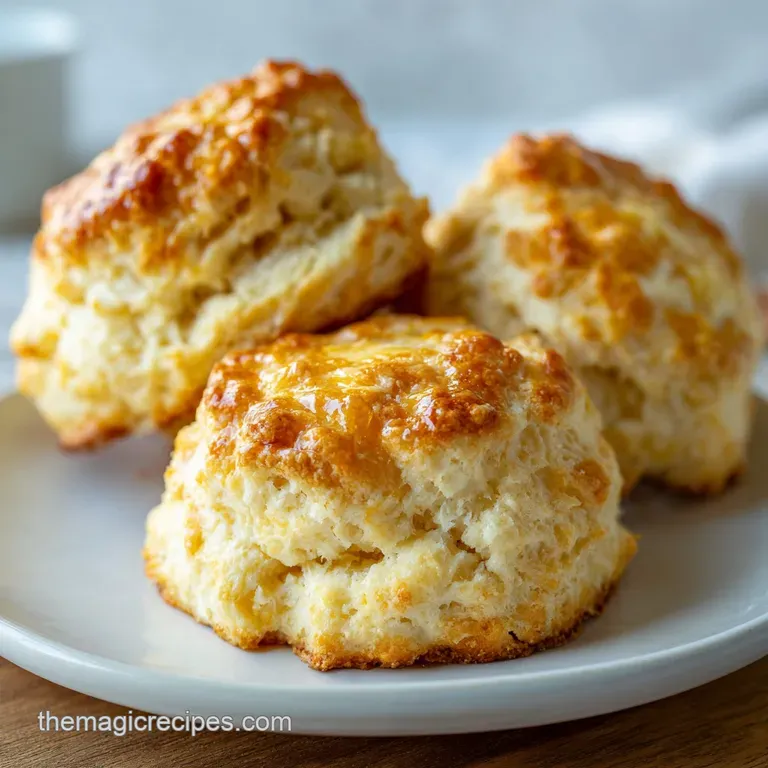
Whether you are hosting a big family breakfast or just need something to soak up the gravy from a roast, this is the dish that delivers. It’s a family friendly bake that feels like you spent hours on it, but the total active work is barely ten minutes.
Trust me, once you see how that dough rises up and absorbs all that flavor, you’ll never go back to the "dry" way of making biscuits again. Let's get into what actually happens inside that oven to make these so special.
The Logic Behind the Butter Pool
- Steam Expansion: The cold buttermilk hits the hot, melted butter, creating an immediate burst of steam that pushes the dough upward for a massive rise.
- Bottom Frying Effect: Because the dough sits in a pool of fat, the bottom and sides essentially fry in the oven, creating a "shatter" texture that mimics fried chicken skin.
- Leavening Punch: A full tablespoon of baking powder reacts with the lactic acid in the buttermilk, creating thousands of tiny air bubbles for a velvety crumb.
- Hydration Level: This dough is much wetter than traditional biscuits, which allows the starch to gelatinize fully, keeping the interior moist for days.
| Cooking Method | Prep Time | Resulting Texture | Best Use Case |
|---|---|---|---|
| Traditional Oven | 35 mins | Even rise, crispy edges | Standard family meals |
| Cast Iron Skillet | 35 mins | Extra thick bottom crust | Rustic, country style feel |
| Toaster Oven | 40 mins | Intense top browning | Small batches (half recipe) |
Using the oven is the standard because it provides the most consistent heat distribution for that 9x9 pan. The heavy glass or metal dish holds the heat, ensuring the butter stays liquid and bubbling throughout the entire 25 minutes of baking.
If you try to do this on a stovetop, you'll end up with a pancake biscuit hybrid that lacks the airy lift.
| Component | Science Role | Pro Secret |
|---|---|---|
| All purpose Flour | Provides structure via gluten | Weigh it (312g) to avoid dense biscuits |
| Baking Powder | Primary leavening agent | Ensure it's fresh (less than 6 months old) |
| Cold Buttermilk | Provides acid and moisture | Use full fat for a richer, tangier flavor |
| Unsalted Butter | Fat for frying and flavor | Melt until bubbling before adding dough |
Key Recipe Specs and Timeframes
When we talk about "quick and easy," we mean it. This whole process takes 35 minutes from the moment you turn on the oven to the moment you’re pulling these out. You only have 10 minutes of hands on time, which involves whisking dry ingredients and a quick stir.
The rest is just waiting for the heat to do its work.
For a successful bake, your oven must be fully preheated to 450°F (232°C). Don't rush this part. If the butter isn't bubbling when the dough hits it, you won't get that signature crispy base. The cold buttermilk is also non negotiable.
The temperature difference between the icy milk and the hot butter is what creates that dramatic steam powered lift.
I’ve found that using a metal pan results in a slightly crispier edge than glass, though both work well. If you’re using a dark metal pan, you might want to check them at 22 minutes to make sure the bottoms don't over brown.
The goal is a deep golden hue on top and a crackling, buttery crust on the bottom.
Picking the Right Pantry Staples
- 2.5 cups (312g) All purpose flour: This provides the perfect balance of protein for a tender but sturdy biscuit.
- 1 tbsp Granulated sugar: Why this? It aids in browning and balances the tangy buttermilk.
- 1 tbsp Baking powder: Why this? Provides the lift needed to make these massive.
- 2 tsp Kosher salt: Why this? Necessary to sharpen the buttery flavors.
- 2 cups (475ml) Buttermilk, cold: Why this? The acid reacts with the powder for a light crumb.
- 6 tbsp (85g) Unsalted butter, melted: Why this? The "swim" medium that flavors and fries the dough.
| Original Ingredient | Substitute | Why It Works |
|---|---|---|
| Buttermilk | Milk + 1 tbsp Lemon Juice | Acidifies the milk to mimic buttermilk's reaction. |
| Unsalted Butter | Salted Butter | Works fine, just reduce added salt by 1/2 tsp. |
| All purpose Flour | Self rising Flour | Contains leavening; omit baking powder and salt. |
If you are looking for a different style of quick bread, you might also enjoy my 3 Ingredient Biscuit recipe which is even faster if you're in a real pinch. But for the ultimate texture, sticking with the buttermilk and butter pool method is the way to go.
Essential Equipment for Perfect Baking
You don't need a lot of fancy gear for this. A standard 9x9-inch baking dish is the classic choice. I prefer a metal brownie pan because it conducts heat faster, giving you those super crispy edges that everyone fights over. A large mixing bowl and a sturdy silicone spatula are all you need for the dough.
Avoid using a whisk for the wet ingredients once you add the buttermilk. A whisk will overwork the gluten and make the biscuits tough. You want a "shaggy" dough, not a smooth batter. A bench scraper is also incredibly helpful for scoring the dough into squares before it goes into the oven.
Clear Instructions for Better Biscuits
- Preheat and Melt: Set your oven to 450°F (232°C). Place the 6 tablespoons of butter into your 9x9-inch dish and slide it into the oven for 2–3 minutes until the butter is completely melted and bubbling.
- Whisk Dry: In a large bowl, combine the flour, sugar, baking powder, and salt. Whisk vigorously until no lumps remain.
- Combine: Pour the cold buttermilk into the dry mix. Note: Using cold liquid is vital for the steam reaction.
- Mix Gently: Stir with a spatula until a wet, shaggy dough forms and the flour streaks are gone. Don't overmix.
- The Swim: Pour the dough directly into the center of the hot butter pool.
- Spread: Use your spatula to gently push the dough toward the corners. It will look like it's drowning, but that's the goal!
- Score: Use a knife or bench scraper to cut the dough into a 3x3 grid, making 9 squares. Note: This helps the heat penetrate the center.
- Bake: Place in the center rack for 25 minutes until the top is golden and the butter is absorbed.
- Rest: Let the dish sit for 5 minutes. This allows the remaining butter to soak into the crumb for extra moisture.
Solving Common Biscuit Baking Problems
Reasons for Dense Biscuits
If your biscuits didn't rise and feel like bricks, you likely overmixed the dough. When you stir flour and liquid, gluten starts to develop. Too much stirring makes that gluten tough and elastic, which prevents the baking powder from lifting the dough. Another culprit is expired baking powder.
Why the Center is Doughy
A doughy center usually means the oven temperature wasn't accurate or the dough wasn't scored deeply enough. Scoring creates channels for the hot butter to boil up through the dough, cooking it from the inside out. If your oven runs cool, the outside will brown before the middle sets.
| Problem | Root Cause | Solution |
|---|---|---|
| Greasy Bottom | Butter wasn't hot enough | Melt butter until it's actively bubbling before adding dough. |
| No Rise | Dead baking powder | Test powder in hot water; it should fizz immediately. |
| Tough Texture | Overworking dough | Stop mixing as soon as the flour disappears. |
Common Mistakes Checklist - ✓ Ensure your buttermilk is pulled straight from the fridge (cold is key). - ✓ Never skip the scoring step; it’s what allows the "swim" to work. - ✓ Use a 9x9 pan; a larger pan will make the biscuits too thin and dry.
- ✓ Don't substitute oil for butter; you need the milk solids in butter for flavor. - ✓ Preheat the pan with the butter inside to get that "sizzle" on contact.
Simple Swaps and Creative Ideas
The Pantry Shortcut: Butter Swim Biscuits with Bisquick
If you want to use a mix, you can use butter swim biscuits with bisquick by replacing the flour, baking powder, and salt with 2.5 cups of the mix. Keep the sugar, buttermilk, and butter the same. It’s a great hack when you’re low on staples.
The DIY Buttermilk Fix
If you find yourself making butter swim biscuits without buttermilk, simply add 1 tablespoon of white vinegar or lemon juice to 2 cups of regular milk. Let it sit for 10 minutes until it curdles slightly. It won't be quite as thick, but it provides the necessary acid.
The Self Rising Swap
To make butter swim biscuits with self rising flour, just swap the AP flour for self rising and omit the baking powder and salt. This is the ultimate "3 ingredient" version that many Southern cooks swear by for a quick breakfast.
| Variation | Change | Outcome |
|---|---|---|
| Cheesy | Add 1 cup sharp cheddar | Richer, savory biscuit with lacy cheese edges. |
| Herbed | Add 2 tsp dried rosemary | Great for serving with stews or roasted meats. |
| Sweet | Increase sugar to 3 tbsp | More like a shortcake, perfect for berries and cream. |
Proper Storage and Reheating Tips
These biscuits are best eaten fresh while the crust is still shatter crisp. However, if you have leftovers, they keep well in the fridge for up to 4 days. Store them in an airtight container once they have cooled completely.
To reheat, I highly recommend using a toaster oven at 350°F (180°C) for about 5 minutes. This brings back that fried crust texture that a microwave will totally ruin.
For long term storage, these freeze beautifully. Wrap individual squares in plastic wrap and place them in a freezer bag for up to 2 months. You don't even need to thaw them; just pop them in the oven at 350°F (180°C) for 12-15 minutes until they are heated through and the edges are crispy again.
Zero Waste Tip: If you have leftover biscuits that have gone a bit stale, don't throw them out! Tear them into chunks and toast them in a pan to make the best buttery croutons for a salad, or use them as a base for a savory breakfast strata.
The high butter content makes them incredible when re toasted.
Best Foods for Biscuit Pairings
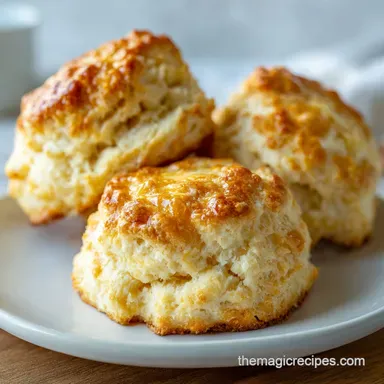
These biscuits are so rich that they can almost be a meal on their own, but they really shine when paired with salty or savory components. A classic choice is sausage gravy, as the fluffy interior of the biscuit is built to soak up all that creamy sauce.
If you're going for a simpler vibe, honey or jam is the way to go.
For a real treat, try serving these alongside my Whipped Butter to add even more light, airy fat to the experience. They also make a fantastic base for a breakfast sandwich just split one open and stack it with a fried egg and some crispy bacon.
Biscuit Myths Debunked
Many people believe you must use a pastry cutter to get flaky layers. With this recipe, that's a myth. The "flakiness" here comes from the steam created by the liquid fat and the high hydration, not from layers of solid butter. You get a different kind of lift, but it’s just as impressive.
Another common misconception is that you shouldn't use sugar in biscuits. While some purists disagree, that single tablespoon of sugar doesn't make the biscuits sweet; it simply acts as a catalyst for the Maillard reaction, ensuring you get that deep golden brown color on the crust without overcooking the center.
Finally,, don't believe the myth that you can't use a glass pan. While metal is faster, glass works perfectly fine as long as you give it an extra minute or two to preheat. The result will still be a beautiful, buttery biscuit that your family will ask for every single weekend.

Recipe FAQs
What are swim butter biscuits?
They are a no-knead, high hydration biscuit baked directly in a pool of hot, melted butter. This method creates a deep, shatter crisp golden crust on the bottom and sides while keeping the interior cloud like and airy.
Can you use regular milk instead of buttermilk in butter swim biscuits?
No, you should stick with cold buttermilk. The acidity in buttermilk reacts with the baking powder to provide the essential lift and light texture that regular milk cannot replicate.
Do you use salted butter for butter swim biscuits?
This recipe officially calls for 6 tablespoons of unsalted butter. Since the recipe already includes 2 teaspoons of kosher salt for the dough, using unsalted butter gives you total control over the final saltiness of the biscuits.
How long do butter swim biscuits last?
They are best consumed within 24 hours of baking. Because they are so moist, they stay fresh in an airtight container at room temperature for one day, but you can revive the crispy edges by popping them in a 450°F oven for a few minutes.
How to ensure the bottom gets crispy?
Place the baking dish in the oven for 2 3 minutes while the oven preheats to 450°F so the butter is bubbling before the dough is added. If you enjoyed learning how heat conduction creates crust here, see how we use the same principle in our crispy oven fried chicken to achieve a similar golden finish.
Is it true I should knead the dough to get more layers?
No, this is a common misconception. You must stir gently just until the flour streaks disappear to keep the dough light; overworking the batter will result in tough, dense biscuits instead of an airy crumb.
How to get 9 equal squares?
Use a bench scraper or sharp knife to score the dough into a 3x3 grid immediately after spreading it into the pan. Scoring before baking creates defined edges that allow the heat to penetrate evenly, ensuring all nine portions cook at the same rate.
Homemade Butter Swim Biscuits
Ingredients:
Instructions:
Nutrition Facts:
| Calories | 233 kcal |
|---|---|
| Protein | 5.3 g |
| Fat | 9.8 g |
| Carbs | 30.4 g |
| Fiber | 0.9 g |
| Sugar | 1.4 g |
| Sodium | 678 mg |
