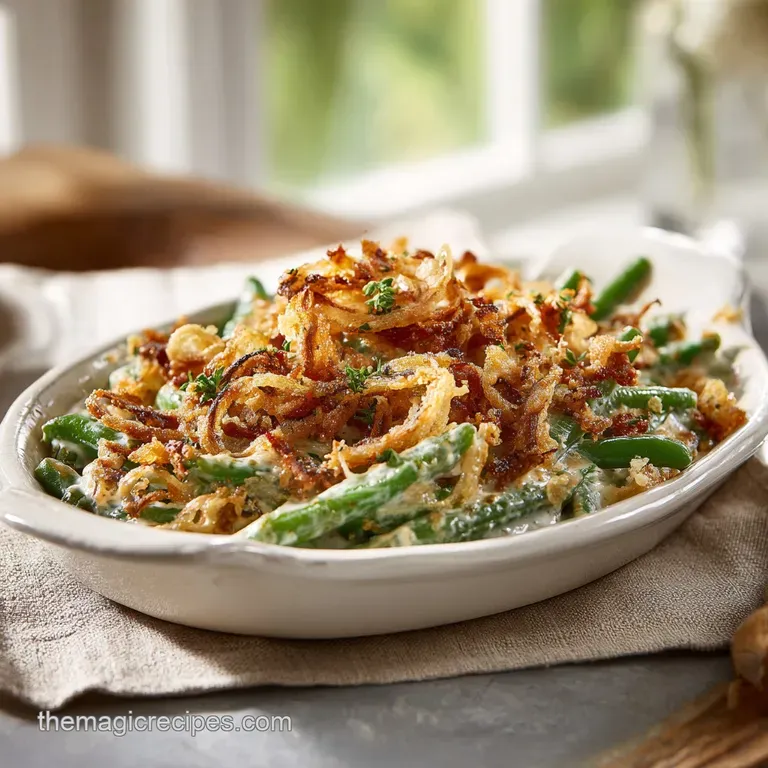
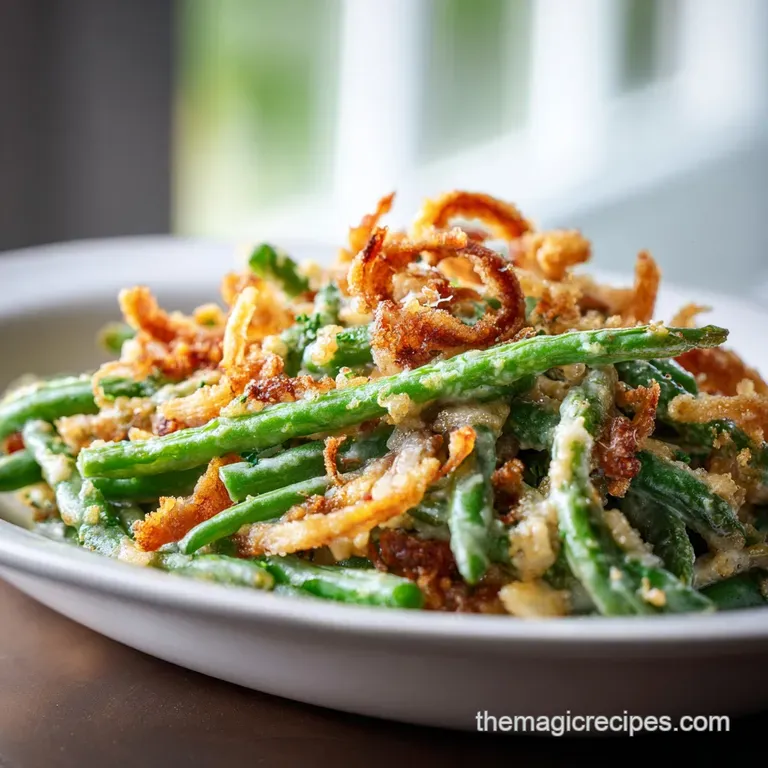
Loaded Green Bean Casserole: Smoky, Cheesy, and Crispy
- Time: Active 20 minutes, Passive 30 minutes, Total 50 minutes
- Flavor/Texture Hook: Smoky bacon meets a shattering onion crust and tender crisp beans
- Perfect for: Holiday gatherings, Budget-Friendly family dinners, or potluck wins
- Master the Best Loaded Green Bean Casserole with Smoky Bacon
- Why the Cream Sauce Stays Velvety and Perfectly Thick
- Selecting Quality Ingredients for Maximum Flavor on a Budget
- Essential Kitchen Tools for a Flawless Golden Casserole Bake
- Simple Instructions for a Bubbly and Crispy Side Dish
- Fixing Common Problems and Avoiding a Soggy Vegetable Base
- Smart Dietary Adaptations for Every Guest at Your Table
- Storing Your Leftovers and Reducing Kitchen Food Waste Daily
- Myths About Making Casseroles from Scratch
- Beautiful Presentation Tips for a Stunning Holiday Table Setting
- Recipe FAQs
- 📝 Recipe Card
Master the Best Loaded Green Bean Casserole with Smoky Bacon
The air in my kitchen currently smells like a dream, a mix of rendering bacon fat, earthy mushrooms, and the sharp tang of cheddar. I remember the first time I tried to make a green bean casserole from scratch without just opening a few cans.
I was so worried it wouldn't have that "classic" taste, but the moment the bacon hit the pan and the garlic started to soften, I knew I was onto something much better. There is a specific sound, a gentle sizzle, when the mushrooms finally release their moisture and start to brown that tells you the base of your sauce is going to be incredibly savory.
I used to think that the grey, mushy beans from my childhood were just the way this dish had to be. But once you see the vibrant, neon green of fresh beans hitting an ice bath, you can never go back. This version is "loaded" because we aren't holding back on the textures.
We have the snap of the beans, the chew of the bacon, the silkiness of the sour cream sauce, and that iconic, shattering crunch from the fried onions on top. It is a humble dish made with simple, Budget Friendly ingredients that somehow feels like a luxury when it hits the table.
We are going to focus on getting that sauce exactly right. No one wants a runny casserole that bleeds into the mashed potatoes. By building a proper roux and adding a bit of sharp cheddar and sour cream, we create a stable, thick coating that clings to every single bean.
It is a functional, straightforward process that works every time, whether you are feeding a family of four or a crowd of ten. Let's get into why this method actually holds up under the heat of the oven.
Why the Cream Sauce Stays Velvety and Perfectly Thick
Starch Hydration: Whisking the flour into the fat for two full minutes allows the starch granules to coat evenly, preventing clumps when the liquid hits.
Fat Stabilization: Using sour cream provides a hit of lactic acid that helps keep the cheese from separating into an oily mess.
Chlorophyll Fixation: The quick salt water blanching sets the green color and softens the tough fibers so they don't turn grey during the final bake.
Moisture Control: Sautéing the mushrooms until they are deeply browned removes their excess water, ensuring the sauce stays thick and concentrated.
| Feature | Fresh Beans | Canned Beans | Frozen Beans |
|---|---|---|---|
| Texture | Firm and snappy | Very soft/mushy | Tender but can be squeaky |
| Flavor | Bright and earthy | Salty and metallic | Neutral and mild |
| Prep Time | 10 minutes trimming | 1 minute draining | 0 minutes |
| Best For | Premium holiday results | Emergency quick meals | Reliable weeknight bakes |
The secret to a great sauce isn't just about the cream; it's about how you manage the water content in your vegetables. If you don't blanch your beans first, they will release their own water into your sauce while baking, which is the main reason why many homemade versions end up watery. By pre cooking them for just a few minutes and then drying them well, you ensure the sauce stays exactly as thick as it was when it left the skillet. If you are looking for another veggie side that uses a similar cream base logic, my Cheesy Squash Casserole recipe is a great option for a Sunday dinner.
Selecting Quality Ingredients for Maximum Flavor on a Budget
Choosing the right components for your loaded green bean casserole doesn't mean spending a fortune. In fact, many of the best flavors come from the most basic pantry staples. I find that cremini mushrooms, which are just baby portobellos, offer a much deeper, meatier flavor than white button mushrooms for only a few cents more.
They hold their shape better and don't disappear into the sauce.
| Component | Science Role | Pro Secret |
|---|---|---|
| Fresh Green Beans | Structural Base | Blanch in heavily salted water to season the inside of the bean. |
| All Purpose Flour | Thickening Agent | Cook the roux until it smells like toasted nuts to avoid a raw taste. |
| Sour Cream | Emulsifier | Adds tang and prevents the cheddar from becoming stringy or greasy. |
| Sharp Cheddar | Flavor Depth | Grate your own from a block for a smoother melt than pre shredded bags. |
For the green beans, 900g (2 lbs) of fresh ones are the gold standard. Look for beans that snap cleanly when bent. If you're on a tight budget, the "broken" beans or bulk bags often found at warehouse stores work perfectly here since we are halving them anyway. The bacon is another area where a little goes a long way.
Using 6 slices of thick cut bacon gives you both the crispy bits for the topping and the rendered fat to sauté your vegetables, which adds a layer of smoky flavor you just can't get from butter alone.
| Original Ingredient | Substitute | Why It Works |
|---|---|---|
| Heavy Cream (120ml) | Whole Milk + 1 tbsp Butter | Maintains the fat content required for a rich, stable sauce. |
| Cremini Mushrooms (225g) | White Button Mushrooms | Similar texture, though the flavor is slightly more mild and earthy. |
| Thick cut Bacon (6 slices) | Smoked Turkey Bacon | Provides a similar smoky profile with less rendered fat. Note: Add 1 tbsp extra butter. |
If you can't find fresh thyme, a teaspoon of dried thyme or even a bit of sage works wonders. The key is to have an herb that cuts through the richness of the cheese and cream. And don't feel like you need the most expensive brand of fried onions.
The store brand versions are often just as crispy and salty, which is exactly what we need for that iconic shattering crust.
Essential Kitchen Tools for a Flawless Golden Casserole Bake
You don't need a lot of fancy gear to make a great loaded green bean casserole, but a few specific items make the job much easier. A large, oven safe skillet (like a 30cm cast iron or a deep stainless steel pan) is my favorite tool because it allows you to go from the stovetop to the oven without dirtying another dish.
This keeps all those brown bits of bacon and mushroom flavor right where they belong - in the casserole.
You'll also need a large pot for blanching the beans. Make sure it's big enough that the water doesn't stop boiling the second the beans hit the pot. A slotted spoon is your best friend here, both for moving the beans to the ice bath and for fishing the crispy bacon out of the rendered fat.
If you don't have an oven safe skillet, a standard 9x13 inch (23x33cm) baking dish works perfectly. Just make sure you scrape every bit of the sauce out of your pan with a rubber spatula.
Finally,, a sturdy whisk is essential for the sauce. You want to be able to get into the corners of the pan to ensure the flour and milk are fully incorporated. This prevents those little "flour dumplings" that can ruin the texture of an otherwise silky sauce.
Simple Instructions for a Bubbly and Crispy Side Dish
1. Par Boiling for Texture
Bring a large pot of water to a rolling boil and add 2 tablespoons (30g) of kosher salt. Submerge the 900g (2 lbs) of trimmed green beans and blanch for 3 to 5 minutes until they are bright green and tender crisp.
Note: This step "shocks" the beans, ensuring they don't turn into mush during the long bake.
2. The Ice Bath Shock
Immediately transfer the beans to a large bowl filled with ice water to stop the cooking process. Once cooled, drain them thoroughly and pat them very dry with a kitchen towel. Note: Excess water on the beans will thin out your sauce later.
3. Rendering the Bacon
In a large oven safe skillet over medium heat, cook the 6 slices of chopped bacon until golden brown and crispy. Remove the bacon with a slotted spoon and set it aside on a paper towel, but leave all that liquid gold (the rendered fat) in the pan.
4. Sautéing the Aromatics
Add 28g (2 tbsp) of butter to the bacon fat if the pan looks a bit dry. Toss in the 225g (8 oz) of sliced mushrooms and the diced yellow onion. Cook for about 8 minutes until the mushrooms have shrunk and turned a deep brown.
Stir in the 3 cloves of minced garlic and cook for just 1 minute until fragrant.
5. Crafting the Cheesy Mornay
Sprinkle 30g (1/4 cup) of flour over the vegetables and whisk constantly for 2 minutes to cook out the raw flour flavor. Slowly pour in the 355ml (1.5 cups) of whole milk and 120ml (1/2 cup) of heavy cream, whisking until the sauce begins to bubble and thicken.
6. The Loaded Finish
Remove the pan from the heat. Fold in the 120g (1/2 cup) of sour cream, 1 cup of the shredded cheddar, smoked paprika, and black pepper. Stir until the cheese is completely melted and the sauce looks like liquid silk.
7. Final Assembly
Gently fold the dried green beans and half of your crispy bacon into the sauce. If you aren't using an oven safe skillet, transfer the mixture to your baking dish now. Top with the remaining cheddar, the 2 cups of crispy fried onions, the rest of the bacon, and the fresh thyme.
8. The Golden Bake
Slide the dish into an oven preheated to 175°C (350°F). Bake for 15 to 20 minutes until the sauce is vigorously bubbling at the edges and the onions are deeply golden.
Let it sit for 5 minutes before serving to allow the sauce to set.
Fixing Common Problems and Avoiding a Soggy Vegetable Base
One of the most frequent complaints about green bean casserole is that it turns into a watery soup. This usually happens because the beans weren't dried properly after blanching or the mushrooms weren't cooked long enough to release their moisture.
If you find your sauce is looking a bit thin before it goes into the oven, let it simmer on the stove for another minute or two. It should be thick enough to coat the back of a spoon heavily.
Why Your Sauce Broke
If your sauce looks curdled or oily, it usually means the heat was too high when you added the cheese or sour cream. Always remove the pan from the burner before stirring in the dairy. The residual heat is more than enough to melt the cheddar without breaking the emulsion. If you want to master the basics of handling fresh produce, check out my guide on How to Cook Green Beans for more tips on vegetable prep.
| Problem | Root Cause | Solution |
|---|---|---|
| Runny Sauce | Watery beans or undercooked roux | Dry beans better; simmer sauce longer before adding beans. |
| Bland Flavor | Not enough salt in blanching water | Add a pinch of salt to the cream sauce before assembly. |
| Soggy Topping | Onions added too early or overbaked | Add onions only for the last 15-20 mins of baking. |
Common Mistakes Checklist
- ✓ Don't skip the ice bath; it's the only way to keep the beans from turning olive grey.
- ✓ Pat the beans bone dry before mixing; even a tablespoon of water can thin the sauce.
- ✓ Avoid pre shredded cheese; the potato starch coating prevents it from melting smoothly into the sauce.
- ✓ Cook the mushrooms until they sizzle and brown; this is where the "meaty" flavor comes from.
- ✓ Let the casserole rest for 5 minutes after baking; this allows the starches to firm up for a perfect scoop.
Smart Dietary Adaptations for Every Guest at Your Table
This dish is surprisingly easy to modify for different needs. If you're looking to save a bit of money or make it a bit lighter, you can swap the heavy cream for more whole milk and just add an extra tablespoon of flour to the roux. It won't be quite as rich, but the sour cream still provides plenty of body and flavor.
Making it gluten-free
For my friends who can't do gluten, you can easily swap the all purpose flour for a 1:1 gluten-free flour blend. The sauce might take an extra minute to thicken, so be patient. For the topping, look for gluten-free fried onions (many brands now offer these) or use crushed gluten-free crackers mixed with a little butter and dried herbs.
The Vegetarian Twist
To make this vegetarian, simply omit the bacon. To keep that smoky depth, use 1 tablespoon of smoked paprika instead of half a teaspoon, and sauté the mushrooms in 3 tablespoons of butter. You can also add a splash of soy sauce or Worcestershire sauce (the vegetarian kind) to the mushrooms to boost the umami.
Low Carb/Keto Adjustment
To keep this keto friendly, skip the flour roux. Instead, simmer the heavy cream and sour cream until reduced by a third, then stir in the cheese to thicken. For the topping, use crushed pork rinds mixed with a little Parmesan cheese instead of the fried onions. It provides a phenomenal crunch without the carbs.
Budget Friendly Scaling
- Scaling Down (1/2 batch): Use a smaller 20cm skillet. Reduce the bake time to 12-15 minutes.
- Scaling Up (2x batch): Use two 9x13 dishes. Do not crowd a single pan or the onions won't crisp.
- Liquid Adjustments: When doubling, reduce the total milk/cream by 10% to ensure the sauce stays thick.
- Spice Rules: Keep the salt and pepper at 1.5x the original amount when doubling to avoid over seasoning.
Storing Your Leftovers and Reducing Kitchen Food Waste Daily
If you have leftovers of this loaded green bean casserole, count yourself lucky. It actually tastes quite good the next day as the flavors have more time to meld. Store it in an airtight container in the fridge for up to 3 days. When reheating, the oven is your best friend.
Microwave reheating tends to make the fried onions soggy and sad. Instead, put a portion in a small oven safe dish, cover with foil, and bake at 150°C (300°F) until warmed through.
Remove the foil for the last 5 minutes to help the onions regain some of their crunch.
I don't recommend freezing the fully assembled casserole, as the sour cream and mushrooms can release water upon thawing, leading to a grainy texture. However, you can freeze the blanched and dried green beans for up to 3 months. This is a great way to use up a bulk buy of beans before they go bad.
To reduce waste, don't toss those mushroom stems! While they can be a bit woody for the casserole, you can throw them into a bag in the freezer to make vegetable stock later. The same goes for the onion ends.
If you have leftover fried onions that have gone a bit soft, toss them in a dry pan over medium heat for 2 minutes to bring them back to life before using them as a salad topper.
Myths About Making Casseroles from Scratch
One common myth is that fresh beans take too long to cook in a casserole. People think you have to use canned because they are already soft. In reality, a 4 minute blanching step is all it takes to get fresh beans to the perfect consistency.
Another myth is that you need "Cream of Mushroom" soup to get that classic flavor. The truth is that a homemade roux with fresh mushrooms and garlic actually produces a much cleaner, more vibrant flavor that isn't masked by excessive sodium.
There is also a misconception that you can't make this dish ahead of time. You absolutely can! You can prepare the entire vegetable and sauce mixture, put it in the baking dish, and keep it in the fridge for 24 hours.
Just wait to add the fried onions and the final bacon topping until right before you put it in the oven. This prevents the topping from absorbing moisture and becoming chewy.
Finally, some people believe that more cream always equals a better sauce. Actually, too much cream can make the dish feel heavy and greasy. The addition of sour cream is the real secret here, it provides the necessary fat but with a bright acidity that keeps you coming back for another bite without feeling overwhelmed.
It's about balance, not just decadence.
Beautiful Presentation Tips for a Stunning Holiday Table Setting
While a casserole is inherently a "rustic" dish, you can make it look incredible with just a few small touches. I love serving this in a well seasoned cast iron skillet. The dark metal makes the vibrant green of the beans and the golden brown of the onions really pop.
If you're using a ceramic dish, go for something white or a deep blue to contrast with the warm tones of the food.
Don't just dump the fried onions on top. Reserve a handful of the crispy bacon bits and some fresh thyme leaves to sprinkle over the very top after the bake. This adds a layer of "freshness" that tells your guests this didn't come out of a can.
If you want to get really fancy, you can serve these in individual ramekins. It takes a bit more time to assemble, but it makes for a very sophisticated presentation at a dinner party.
Another tip is to wipe the edges of your baking dish before it goes into the oven. Any sauce drips on the rim will burn and turn dark brown, which can look messy. A clean rim makes the whole dish look professional and intentional.
Pair this with a simple roast chicken or a holiday turkey, and you've got a meal that looks as good as it tastes. The contrast of the bubbling sauce and the dry, crispy topping is visually appealing and signals to everyone that dinner is going to be fantastic.

Recipe FAQs
How to keep green beans from turning grey?
Submerge the blanched beans in an ice water bath immediately. This rapid cooling stops the cooking process instantly, locking in that bright green color before you combine them with the other ingredients.
Is it true I can use pre-shredded cheese for the sauce?
No, this is a common misconception. Pre-shredded cheese contains potato starch to prevent clumping, which ruins the texture of your sauce; always grate your own sharp white cheddar for a smooth, velvety melt.
How to avoid a watery casserole?
Pat your blanched green beans bone dry before mixing them into the sauce. Even a small amount of residual moisture will thin your cream sauce, so ensure the beans are thoroughly drained after their ice bath.
How to reheat leftovers without making the onions soggy?
Bake individual portions in an oven at 300°F (150°C). Cover the dish with foil initially, then remove it for the final 5 minutes to allow the fried onions to regain their signature crunch.
How to achieve the perfect scoop?
Let the casserole rest for 5 minutes after removing it from the oven. This short rest allows the sauce to firm up, ensuring you get a clean scoop rather than a messy, runny serving on your plate.
How to develop the best flavor in the base?
Brown the mushrooms until they sizzle and release their moisture. Deepening the color of your mushrooms is essential for building a rich, meaty flavor profile that anchors the entire dish. If you enjoy mastering this kind of depth, see how we apply similar browning logic in our hashbrown casserole.
How long does this casserole keep in the fridge?
Store it in an airtight container for up to 3 days. The flavors often meld and improve overnight, making this an excellent dish to prepare in advance if you need to manage your kitchen time efficiently.
Loaded Green Bean Casserole

Ingredients:
Instructions:
Nutrition Facts:
| Calories | 367 kcal |
|---|---|
| Protein | 10.2 g |
| Fat | 26.4 g |
| Carbs | 17.8 g |
| Fiber | 3.8 g |
| Sugar | 5.2 g |
| Sodium | 785 mg |
