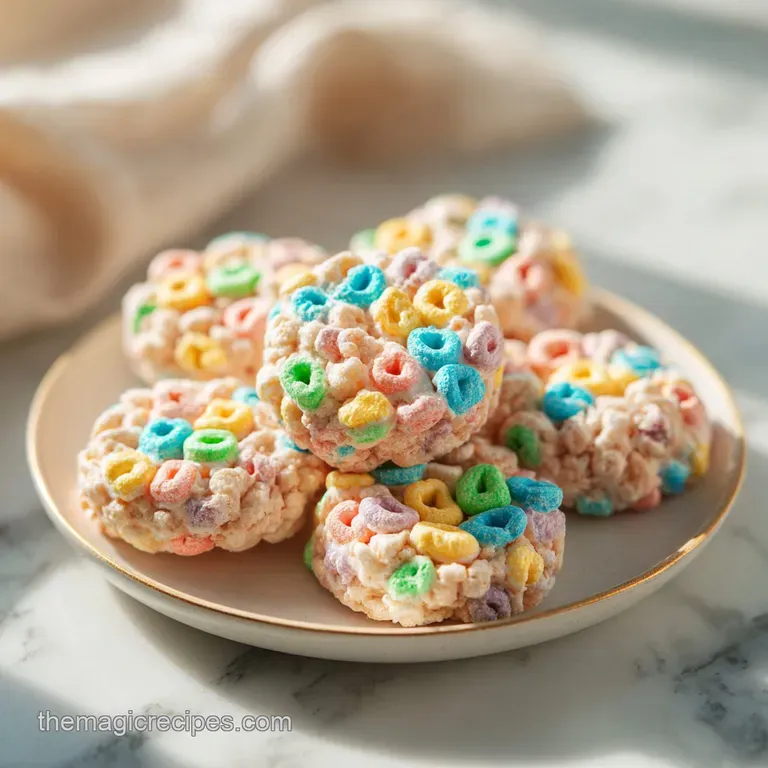
Lucky Charms Cookies: Toasted Oat and Marshmallow Treats
- Time:15 minutes active + 30 minutes chilling = 55 minutes total
- Flavor/Texture Hook: Toasted oat flavor with a shatter crisp edge and buttery, marshmallow loaded center.
- Perfect for: St. Patrick’s Day parties, nostalgia themed bake sales, or weekend family treats.
- Secret To Toasted Oat Flavor
- Official Recipe Details And Metrics
- Quality Ingredients For Best Results
- Best Tools For Successful Baking
- Follow These Exact Baking Steps
- Fix Common Cookie Texture Issues
- Fun Variations And Ingredient Swaps
- Storing Your Leftover Sweet Treats
- Ideas For Serving Your Cookies
- Debunking Common Kitchen Myths
- Recipe FAQs
- 📝 Recipe Card
Secret To Toasted Oat Flavor
Most people just toss cereal on top of a cookie and call it a day, but that is a missed opportunity for real flavor depth. By pulsing the oat pieces into a fine powder, we are essentially creating a custom "cereal flour" that replaces a portion of the all purpose flour.
This infuses the entire crumb with that specific toasted grain taste that defines the cereal, rather than just having it as a garnish.
The addition of cornstarch is my favorite bakery style trick for keeping the texture extremely tender. It softens the proteins in the flour, ensuring the cookies stay soft for days instead of turning into hockey pucks by the next morning.
It works in tandem with the brown sugar to create a moist, almost fudgy environment inside the cookie that contrasts beautifully with the crispy white chocolate chips.
- Cereal Pulverization: Milling the oat pieces creates a flour that mimics the malted flavor of the original cereal throughout the entire dough.
- Starch Softening: Cornstarch interferes with gluten development, resulting in a velvety, melt in-your mouth texture.
- Moisture Retention: Using a high ratio of light brown sugar ensures the cookies stay chewy due to the molasses content.
- Temperature Control: Chilling the dough for exactly 30 minutes allows the butter to solidify, preventing the cookies from spreading into flat puddles.
| Thickness | Internal Temp | Rest Time | Visual Cue |
|---|---|---|---|
| 1.5 cm | 175°F (80°C) | 5 mins | Edges are golden; center looks slightly under baked |
| 2 cm | 180°F (82°C) | 10 mins | Firm edges; marshmallows are slightly puffed |
| 2.5 cm | 185°F (85°C) | 15 mins | Matte surface; no longer shiny in the middle |
When you are deciding how long to leave these in, remember that carryover cooking is your best friend. A cookie that looks fully "done" in the oven will likely be overcooked and crunchy once it cools down on the counter.
Official Recipe Details And Metrics
We are aiming for exactly 24 cookies with this batch, which is the perfect amount for a standard baking sheet rotation. If you try to bake them all at once on one tray, they'll likely merge into one giant "mega cookie," so stick to the 2 tablespoon scoop size.
This ensures the heat circulates evenly around each portion, giving you those beautiful ruffled edges we're looking for.
Consistency is everything in baking, so I highly recommend using a kitchen scale for the flour and butter if you have one. If not, just make sure you aren't packing your flour into the measuring cups. Fluff it up with a spoon first so the cookies don't end up dry and heavy.
We want light, airy, and decadent, not dense and crumbly.
| Ingredient | Role | Pro Secret |
|---|---|---|
| Unsalted Butter | Fat & Structure | Use room temperature butter (not melted) to hold air during creaming. |
| Light Brown Sugar | Moisture & Chewy Texture | Pack it tightly in the cup to ensure you get the full molasses hit. |
| Cornstarch | Texture Tenderizer | This is the secret to getting that "bakery style" soft bite finish. |
| Baking Soda | Leavening & Browning | Helps the cookies spread just enough and promotes a golden brown hue. |
The butter should be soft enough that your finger leaves a clean indentation without sliding through. If it's too cold, it won't trap the air bubbles needed for a lift; if it's too warm, the cookies will spread immediately and lose their shape.
Quality Ingredients For Best Results
To get the most out of these Lucky Charms Cookies, you really need to separate your components correctly. This is the only tedious part, but it makes a world of difference. You'll need 1.5 cups of the oat cereal pieces (approx. 60g) and another 1.5 cups of just the marshmallows.
I usually just pour a big bowl of cereal and pick out the "charms" while I’m watching a show the night before.
- 1.5 cups Lucky Charms Cereal Why this? The oat pieces provide the base flavor for our specialized flour. (Substitute: Toasted oat flour)
- 1.75 cups All Purpose Flour (210g) Why this? Provides the necessary protein for structure. (Substitute: 1:1 gluten-free baking flour)
- 1 tsp Baking Soda Why this? Reacts with brown sugar for lift. (Substitute: 3 tsp Baking powder)
- 1 tsp Cornstarch Why this? Keeps the center soft. (Substitute: Arrowroot powder)
- 0.75 tsp Fine Sea Salt Why this? Balances the intense sugar sweetness. (Substitute: Kosher salt)
- 0.75 cup Unsalted Butter, room temperature (170g) Why this? Allows for proper aeration during creaming. (Substitute: Vegan butter sticks)
- 0.75 cup Light Brown Sugar (150g) Why this? For chewiness and caramel notes. (Substitute: Dark brown sugar)
- 0.25 cup Granulated Sugar (50g) Why this? For crisp edges. (Substitute: Coconut sugar)
- 1 Large Egg, room temperature Why this? Binds the dough together. (Substitute: Flax egg)
- 2 tsp Pure Vanilla Extract Why this? Enhances the marshmallow flavor. (Substitute: Vanilla bean paste)
- 1.5 cups Lucky Charms Marshmallows Why this? The star of the show. (Substitute: Dehydrated cereal marshmallows)
- 0.5 cup White Chocolate Chips Why this? Adds a creamy, milky contrast. (Substitute: Milk chocolate chips)
Best Tools For Successful Baking
You don't need a professional kitchen to pull these off, but a food processor is pretty much non negotiable for the cereal flour. If you don't have one, you can put the cereal in a heavy duty freezer bag and go at it with a rolling pin, but you really want that fine, sandy texture for the best results.
A chunky cereal piece might make the cookie feel gritty rather than flavorful.
Chef's Note: I always use parchment paper instead of greasing the pan. It prevents the bottoms from browning too quickly and makes cleanup a breeze. Plus, if a marshmallow melts and sticks, it peels right off the paper but would be a nightmare on a naked baking sheet.
A standard cookie scoop (about 2 tablespoons) is also a life saver here. It ensures all 24 cookies are the same size, which means they all finish baking at the exact same time. No one wants half a tray of burnt cookies and half a tray of raw ones!
Follow These Exact Baking Steps

- Place the 1.5 cups of oat cereal pieces into a food processor and pulse until they reach a fine, sandy powder consistency. Note: This creates the "cereal flour" that flavors the entire dough.
- In a medium bowl, whisk the 1.5 cups cereal flour together with the 1.75 cups all purpose flour, 1 tsp baking soda, 1 tsp cornstarch, and 0.75 tsp fine sea salt.
- In a stand mixer or using an electric hand mixer, beat the 0.75 cup softened butter, 0.75 cup light brown sugar, and 0.25 cup granulated sugar together until light and fluffy. Wait for the mixture to smell like sweet buttercream.
- Add the 1 egg and 2 tsp vanilla extract to the butter mixture, beating until fully incorporated.
- Gradually add the dry ingredient mixture to the wet ingredients, mixing on low speed until just combined. Stop as soon as the last streak of flour disappears.
- Fold in half of the 1.5 cups Lucky Charms marshmallows and the 0.5 cup white chocolate chips using a spatula.
- Chill the dough in the refrigerator for 30 minutes. This prevents the cookies from spreading too thin.
- Preheat your oven to 350°F (175°C) and scoop 2 tablespoon portions of dough onto parchment lined baking sheets.
- Bake for 10 minutes, pressing the remaining marshmallows onto the tops of the cookies halfway through. Bake until the edges are just set and the kitchen smells like toasted vanilla.
- Remove from the oven and let them rest on the baking sheet for at least 5 minutes to firm up before moving to a wire rack.
Fix Common Cookie Texture Issues
Why Your Marshmallows Disappeared
If you find that your "charms" are melting into sticky puddles and leaving holes in your cookies, it is usually because they were mixed too deeply into the dough. Those tiny marshmallows are mostly sugar and air, so they dissolve quickly under high heat.
To fix this, always save half of your marshmallows to press into the top of the cookie after they have been in the oven for about 5 minutes, or even immediately after they come out.
Why Your Cookies Are Flat
Spreading is the enemy of a thick, chewy cookie. This usually happens if the butter was too warm when you started, or if you skipped the 30 minute chilling step. Cold dough hits the hot oven and takes longer for the fat to melt, allowing the edges to set before the center collapses.
| Problem | Root Cause | Solution |
|---|---|---|
| Cookies are dry/crumbly | Too much flour | Use the "spoon and level" method or a scale. |
| Bottoms are burnt | Oven rack too low | Move the tray to the middle or top third of the oven. |
| Marshmallows are gooey | Overmixed dough | Fold the marshmallows in gently by hand at the very end. |
- ✓ Always use room temperature eggs to prevent the butter from curdling.
- ✓ Don't over process the cereal; stop when it looks like coarse sand.
- ✓ Space cookies at least 2 inches apart on the tray.
- ✓ Check your baking soda freshness by dropping a pinch in vinegar; it should fizz instantly.
- ✓ Let the baking sheet cool completely between batches so the dough doesn't start melting before it hits the oven.
Fun Variations And Ingredient Swaps
If you want to take these to another level of decadence, try browning the butter before you start. It adds a nutty, toasted flavor that complements the cereal perfectly. Just make sure you let the browned butter solidify back to a soft room temperature state before creaming it with the sugars, or the texture will be off. For another twist on a cereal based treat, you might also enjoy my Oats Cocoa Cookies which offer a similar chewy satisfaction.
You can also play around with the chocolate. While white chocolate chips are traditional for that "milk and cereal" vibe, semi sweet chips provide a nice bitterness that cuts through the sugar.
If you are baking for someone with a gluten sensitivity, a high-quality 1:1 gluten-free flour blend works surprisingly well here because the cereal flour is already naturally gluten-free (just check the box to ensure the brand is certified).
| Original | Alternative | Texture/Flavor Change |
|---|---|---|
| White Chocolate | Butterscotch Chips | Adds a deep, salty sweet caramel finish. |
| Light Brown Sugar | Dark Brown Sugar | Results in a deeper color and much chewier center. |
| Lucky Charms | Generic Oat Cereal | Very little difference; just ensure the marshmallows are colorful! |
Storing Your Leftover Sweet Treats
These cookies stay remarkably fresh for about 3-4 days if kept in an airtight container at room temperature. The cornstarch we added really helps maintain that "just baked" softness. If they do start to get a bit firm, toss a single slice of white bread into the container with them.
The cookies will absorb the moisture from the bread and soften right back up it’s a classic baker’s trick that works every time.
For long term storage, these cookies freeze beautifully. You can freeze the baked cookies for up to 2 months; just let them thaw on the counter for an hour before eating. Even better, freeze the raw dough balls!
When you're ready for a treat, you can bake them straight from the freezer just add an extra 1-2 minutes to the baking time.
To reduce waste, don't throw away the "cereal dust" at the bottom of the bag. You can sprinkle that extra powder over vanilla ice cream or mix it into a glaze for a double dose of cereal flavor. It's concentrated deliciousness that shouldn't go to the bin!
Ideas For Serving Your Cookies
The obvious choice here is a tall, cold glass of milk. It completes the "cereal" experience and helps wash down the richness of the white chocolate. If you're serving these at a party, they look stunning on a platter next to other festive treats like my Queens Spiced Shortbread Cookies, providing a colorful contrast to more traditional bakes.
For a truly indulgent dessert, use two of these cookies to make an ice cream sandwich. Fill them with a scoop of cereal milk flavored ice cream or just plain high-quality vanilla. The chewiness of the cookie holds up well against the frozen center, making it a "bakery quality" dessert that will impress anyone.
Debunking Common Kitchen Myths
One big myth is that "marshmallows will always melt in the oven." While they do soften, the dehydrated "marbits" found in cereal are actually much more heat resistant than standard large marshmallows. They hold their shape remarkably well if they aren't overworked into the dough.
Another myth is that you can't over cream butter and sugar. Actually, you can! If you beat them for more than 5 minutes, you might incorporate too much air, which causes the cookies to puff up and then collapse, leading to a wrinkled, flat appearance.
Aim for about 2-3 minutes until the mixture is just pale and fluffy. Finally, many people think "chilling dough doesn't matter for small cookies." In this recipe, it's the difference between a thick, gourmet cookie and a thin, greasy one. Don't skip the fridge time!

Recipe FAQs
Why do I need to chill the cookie dough for 30 minutes?
Chilling solidifies the butter, which prevents the cookies from spreading too thin in the oven. This step ensures a thicker, chewier center. If you enjoy mastering these structural changes, you can apply the same chewy texture principles to other classic cookie doughs.
Can I bake the marshmallows directly in the oven with the dough?
Yes, but they may melt or burn if exposed to heat for too long. For the best visual appeal, press the marshmallows onto the tops of the cookies halfway through the 10-minute bake time or immediately after removing them from the oven.
What should I do if my cookies turn out too crispy?
Place a slice of white bread in an airtight container with the cookies overnight. The cookies will reabsorb moisture from the bread, returning them to a soft, chewy state within hours.
How to ensure the cereal flour is fine enough?
Pulse the oat pieces in a food processor until they resemble a sandy powder. Large chunks of unground cereal will change the moisture balance and prevent the dough from binding properly.
Is it necessary to use a stand mixer for the dough?
No, an electric hand mixer works perfectly fine for this recipe. The goal is simply to beat the butter and sugars until the mixture is light and fluffy before adding the egg and vanilla.
Can I use milk chocolate chips instead of white chocolate?
Yes, you can swap them, though the flavor profile will be richer and less sweet. Stick to the 0.5 cup measurement to maintain the proper ratio of wet to dry ingredients in the dough.
How long can I keep the baked cookies?
They will stay fresh for 3 to 4 days in an airtight container at room temperature. If you need to keep them longer, freeze the baked cookies for up to 2 months and thaw them on the counter before serving.
Lucky Charms Cookies Recipe
Ingredients:
Instructions:
Nutrition Facts:
| Calories | 153 kcal |
|---|---|
| Protein | 1.5 g |
| Fat | 7.3 g |
| Carbs | 20.6 g |
| Fiber | 0.4 g |
| Sugar | 12.5 g |
| Sodium | 128 mg |
