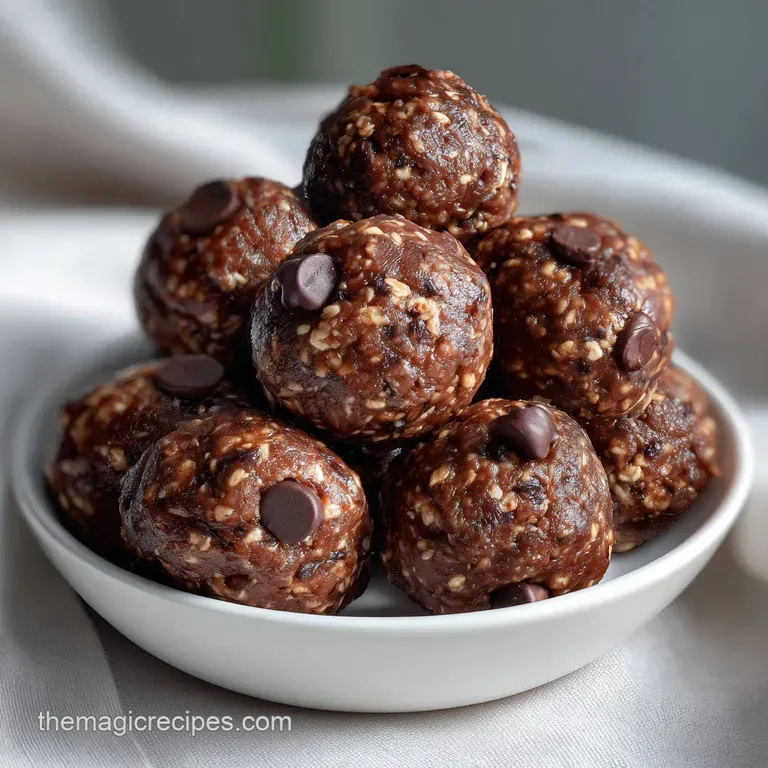
Energy Balls: the Chefs Go-To No-Bake Bites
- The Ultimate No-Bake Power Snack: Why These Bites Win
- The Alchemy of Texture and Taste: Why These Bites Satisfy
- Essential Building Blocks: Ingredients and Smart Swaps
- Mastering the Mix: The Simple No-Bake Method
- Expert Trouble Shooting: Achieving the Perfect Energy Ball Consistency
- Maximizing Shelf Life: Storage and Meal Prep Tips
- Elevated Snacking: The Best Pairings for Your Bites
- Recipe FAQs
- 📝 Recipe Card
The Ultimate No-Bake Power Snack: Why These Bites Win
Does your afternoon slump hit you like a rogue wave? Mine used to, right around 3 PM, requiring immediate, sugary intervention. These Energy Balls smell like pure comfort a hint of toasted oats mingling with rich, melted chocolate. They are simply magic in your pantry.
Seriously, if you need fuel fast without turning on the stove, these are your jam. They are dirt cheap to make, require about fifteen minutes of active work, and they taste unbelievably good, like sophisticated cookie dough.
Making a huge batch of these Energy Balls saves me tons of money compared to buying those sad, dusty protein bars.
So, forget complicated baking rituals. Today, we are unlocking the secret to perfect, grab and go power. This Energy Balls recipe is the only one you will ever need, trust me on this one.
The Alchemy of Texture and Taste: Why These Bites Satisfy
This isn't some weird, overly healthy chalk ball you choke down. Nope. The secret to truly great Energy Balls lies in balancing the dry, fibrous ingredients with the right amount of sticky fat. We want something chewy, rich, and dense enough to keep you full until dinner.
Chef’s Note: Most recipes fail because they under chill the mix. You must let the oats hydrate a bit, or you end up with sandy, crumbly little disappointments. Don't rush this critical step when making Energy Balls .
The 5 Minute Prep Promise
We are talking 15 minutes total active time, max. That includes measuring everything out! It’s ridiculously fast. You mix the dry stuff, dump in the wet stuff, mash it together, throw in the chocolate chips, and boom you’re rolling.
It’s the fastest snack turnaround time known to home cooks.
Perfect Fuel for Any Time of Day
I toss a few of these Energy Balls into my gym bag every Monday morning. They are perfect for pre-hike fuel or that essential mid-morning coffee break. They are custom built for busy people who refuse to compromise on real food.
For those needing something easy for little ones, these are also fantastic energy balls for kids lunches.
The Nutritional Edge of Oats and Peanut Butter
Oats are the backbone here; they provide sustained energy release, not a sugar spike. When combined with the healthy fats from the peanut butter, these Energy Balls become slow burning fuel. It’s the definition of smart snacking.
Achieving the Perfect 'Cookie Dough' Mouthfeel
When you squeeze a portion, it should feel firm enough to hold its shape without oozing. It should be reminiscent of rich, chilled peanut butter cookie dough, just before it hits the oven. That’s the goal we are aiming for with this peanut butter chocolate energy balls approach.
The Science Behind Peanut Butter’s Binding Power
Peanut butter is doing heavy lifting here; it’s the primary glue. Since we aren't baking, the fats and proteins in the PB solidify slightly in the fridge, creating a sturdy structure that prevents the Energy Balls from crumbling the second you pick them up.
Use creamy, natural styles for best results.
Balancing Sweetness and Salty Notes
Don't skimp on the tiny bit of salt! It seems weird, but that small pinch elevates the sweetness of the maple syrup and makes the chocolate taste richer. It stops your Energy Balls from tasting flat or overly sweet.
Essential Building Blocks: Ingredients and Smart Swaps
Getting the right ratio of binder to dry filler is what separates elite Energy Balls from beginner batches. We stick close to the required measurements here, but substitutions are your friend if you have allergies or just need to clean out the pantry.
Dry Ingredients: Getting the Oats Right
The oats are non-negotiable. You absolutely must use Old-Fashioned Rolled Oats (1 ½ cups). Why? Instant oats break down too much, creating a paste rather than a textured chewiness. If you're looking for a simple oatmeal energy balls base, stick to rolled.
- Flaxseed Magic: The ¼ cup of ground flaxseed is key for binding and fibre. If you don't have flax, Chia Seeds work equally well as a replacement in this specific application.
- Coconut Consideration: The desiccated coconut adds texture. If you hate coconut, you can skip it, but you might need to add a teaspoon of milk to compensate for the lost bulk in your Energy Balls mix.
Wet Binders: Selecting Your Peanut Butter and Sweetener
This is where the flavour profile locks in. We use creamy peanut butter because its smooth texture disperses perfectly. If you want a fully vegan energy balls recipe , just ensure your honey is substituted, as maple syrup is inherently vegan friendly.
- Peanut Butter Swap: If nuts are off the menu, use a quality Sunflower Seed Butter or Tahini, but be warned: Tahini tends to be more bitter, so you might need an extra splash of sweetener.
- Maple vs. Honey: Both work perfectly well as your ¼ cup sweetener. Maple syrup gives a slightly more complex, earthy flavour profile to the final Energy Balls .
Allergy and Dietary Modifications (Gluten/dairy-free)
These are inherently almost dairy-free (unless your chocolate chips contain milk, obviously!). For gluten-free makers, simply ensure you source certified gluten-free Rolled Oats . That's it! Quickest conversion ever.
Optional Boosts: Adding Protein Powder or Seeds
If you want to transition this into a true protein balls recipe , go for it. Add up to ½ cup of vanilla or unflavored whey or plant based protein powder during Step 1 when mixing the dry ingredients.
You will definitely need to increase your liquid binder (maple syrup) by 1 2 tablespoons to re-establish that doughy consistency.
Mastering the Mix: The Simple No-Bake Method
This is where you put on some music and zone out. Don't overthink it; just follow the order. The final product will be superior no bake energy balls recipe you’ll want to make weekly.
Preparing the Base Mixture (Mixing Order Matters)
First, get those dry components oats, flax, coconut, salt fully acquainted in your big bowl. Then, measure and dollop in the wet elements (PB, syrup, vanilla). Start mixing gently with a sturdy spatula. Stir until everything looks evenly coated , like wet sand.
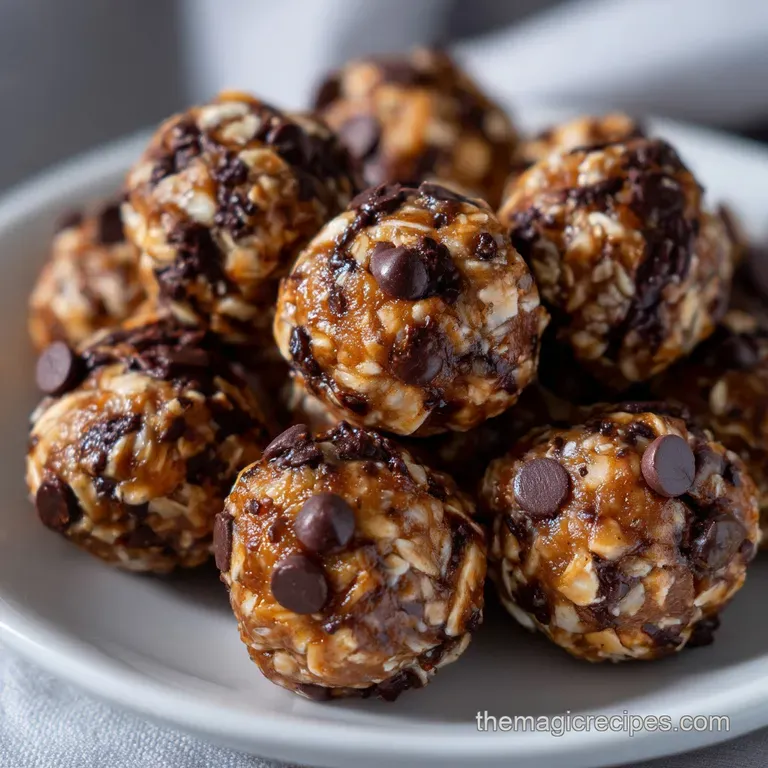
Finally, fold in the chocolate chips gently; we don't want them pulverized.
The Crucial Chill Time
Once mixed, the dough will look soft and slightly tacky that’s normal. Cover the bowl tightly and place it in the fridge for 30 minutes .
I cannot stress this enough: this chilling time allows the flax and oats to absorb the moisture, firming the structure of your Energy Balls . Seriously, walk away!
Uniform Rolling Techniques for Consistent Bites
After chilling, the dough will be much easier to handle. I highly recommend using a small cookie scoop (about 1.5 tablespoons). Scoop out the dough, roll it firmly between your palms until smooth, about 1.5 inches wide. If your hands feel greasy or sticky, wipe them clean, but don't add oil to the mix!
Keep rolling these perfect little Energy Balls until you run out of dough.
Expert Trouble Shooting: Achieving the Perfect Energy Ball Consistency
Even I mess these up sometimes, especially if my peanut butter jar was sitting in a warm cupboard. Don't panic if your dough is misbehaving when you go to roll it out.
My Mixture Is Too Sticky: Quick Fixes
If the mixture is clinging to your hands like glue after the 30 minute chill, it means there’s excess surface moisture. You have two options: either return the entire bowl to the fridge for another 15 minutes (the best fix), or mix in one tablespoon of quick oats or protein powder to absorb that surface stickiness.
This prevents your final Energy Balls from sticking together in storage.
My Mixture Is Too Crumbly: Adding Moisture
If the mixture won't hold together when you squeeze a handful, it’s too dry. Add your binding liquid water, milk (dairy or non-dairy), or a little extra maple syrup one teaspoon at a time. Mix well after each addition. You only want enough liquid for the mass to just barely hold together.
Remember, these are dense Energy Balls , not cake batter.
Shaping Tips: Preventing Misshapen Snacks
If you struggle to get a perfect sphere, try rolling the dough between two sheets of plastic wrap, pressing slightly to compact it, and then rolling the compacted layer between your palms. This forces a tight bind. Consistent shapes mean consistent flavour in every one of these Energy Balls .
Maximizing Shelf Life: Storage and Meal Prep Tips
One of the best things about making these bites is that they are built for meal prep. They last ages, which makes the initial effort totally worthwhile. I always make a double batch!
Optimal Refrigerated Storage Times
When stored in a truly airtight container in the main body of your refrigerator, these fantastic Energy Balls will stay fresh and firm for up to two full weeks . Storing them in the door shelves is generally not recommended as the temperature fluctuates too much.
Flash Freezing for Long Term Readiness
If you know you won't eat them within two weeks, freezing is your best friend. Arrange the finished Energy Balls on a baking sheet lined with parchment paper, making sure they aren't touching. Freeze them flat for about two hours until solid.
Then, transfer them to a heavy duty freezer bag, squeezing out all the air. They last wonderfully for up to three months this way.
Thawing and Refreshing Frozen Energy Bites
Need one right now? Pop 3 or 4 frozen bites onto a small plate and let them thaw on the counter for about 15 minutes. They come back to that perfect, chewy texture almost instantly. Don't microwave them; the chocolate will melt awkwardly.
We want these cold, firm Energy Balls .
Elevated Snacking: The Best Pairings for Your Bites
While they are fantastic solo, pairing them correctly maximizes the satisfaction factor. If you're tired of plain ones, check out my recipe for Oreo Balls Recipe: The Ultimate Easy No Bake Oreo Truffles for a dessert style treat!
My Mixture Is Too Sticky: Quick Fixes
(See Troubleshooting section above, but the key takeaway is chilling!)
My Mixture Is Too Crumbly: Adding Moisture
(See Troubleshooting section above add liquid 1 tsp at a time.)
Shaping Tips: Preventing Misshapen Snacks
Use your scoop! Uniformity is the hallmark of professional looking Energy Balls .
Optimal Refrigerated Storage Times
Keep them cold, keep them sealed, and they last ages easily two weeks.
Flash Freezing for Long Term Readiness
Flash freeze first on a tray to prevent clumping.
Thawing and Refreshing Frozen Energy Bites
Countertop thawing for 15 minutes is the gold standard for enjoying these perfectly textured Energy Balls .
Seriously, get mixing. These Energy Balls are a lifesaver, and once you nail the texture, you’ll be addicted. Enjoy making this simple, powerful snack!

Recipe FAQs
Why is my energy ball mixture too dry and crumbly?
This issue usually means your dry ingredients (oats) absorbed the liquid too quickly, or your nut butter was too stiff. Add a small amount (1 tablespoon at a time) of your primary wet binder such as honey, maple syrup, or milk until the mixture holds together easily when pressed firmly in your palm.
Ensure you let the mixture sit for about 5 minutes before rolling, as oats continue to absorb moisture even after mixing.
My mixture is too sticky and hard to roll. What should I do?
If the mixture is excessively sticky, it likely has too much wet binder or the nut butter was too runny due to high temperatures. Try chilling the entire mixture in the refrigerator for 20-30 minutes, which firms up the fats and makes handling much easier.
If chilling doesn't completely fix it, mix in an additional tablespoon of ground flaxseed or finely chopped oats to absorb the excess moisture without drastically changing the flavor.
How long do these energy bites last, and where is the best place to store them?
When stored correctly, these no-bake bites can last 1-2 weeks. Keep them in an airtight container in the refrigerator, as the cool temperature helps them retain their shape and prevents the nut butter and chocolate from becoming oily or spoiling.
They can be stored at cool room temperature for 3-4 days, but refrigeration is highly recommended for maximum shelf life.
Can I substitute peanut butter with a different nut or seed butter?
Absolutely. Almond butter, cashew butter, or even sunbutter are excellent 1:1 substitutes that maintain the necessary creamy texture and fat content for binding the oats. Note that if using sunflower seed butter (sunbutter), the citric acid in the binder sometimes reacts with baking soda or certain cocoa powders, causing a harmless green tint over time.
Are quick oats suitable for this recipe, or must I use rolled oats?
While both are edible, rolled oats (old-fashioned oats) are strongly preferred because their larger, thicker flakes provide essential texture, chewiness, and binding structure to the bites.
Quick oats are processed thinner and may result in a mushier, less defined texture that resembles cookie dough rather than a traditional energy bite.
How can I ensure these energy bites are 100% vegan?
To make this recipe vegan, you must substitute any non-vegan binder (like honey) 1:1 with maple syrup, agave nectar, or brown rice syrup. It is also crucial to verify that your chocolate chips or cocoa powder are certified vegan, as many standard brands contain dairy ingredients like milk fat or whey.
Ensure your nut butter contains no added dairy binders.
Can I freeze these energy balls for long term storage?
Yes, these energy bites freeze exceptionally well and maintain quality for up to 3 months. Once rolled, place them on a parchment lined tray in the freezer until they are completely solid (about 2 hours), then transfer them into a heavy duty, freezer safe bag or airtight container.
Thaw them overnight in the refrigerator, or enjoy them straight from the freezer for a denser snack.
No Bake Peanut Butter Energy Balls

Ingredients:
Instructions:
Nutrition Facts:
| Calories | 760 kcal |
|---|---|
| Protein | 22.9 g |
| Fat | 37.9 g |
| Carbs | 88.8 g |
