Chicken Breast Recipes: Perfect Pan-Seared Lemon Thyme Sauce
- Master the Pan-Sear: Your New Favorite Chicken Breast Recipe
- The Science of Sizzle: Achieving the Juiciest Chicken Breast
- Essential Components for the Pan-Seared Chicken Breast Dinner
- How to Execute the Perfect Pan-Sear (Detailed Instructions)
- Troubleshooting & Expert Tips for Chicken Breast Recipes
- What to Serve with Pan-Seared Chicken and Lemon Sauce
- Handling Leftovers: Storage and Reheating Guidelines
- Recipe FAQs
- 📝 Recipe Card
Master the Pan-Sear: Your New Favorite Chicken Breast Recipe
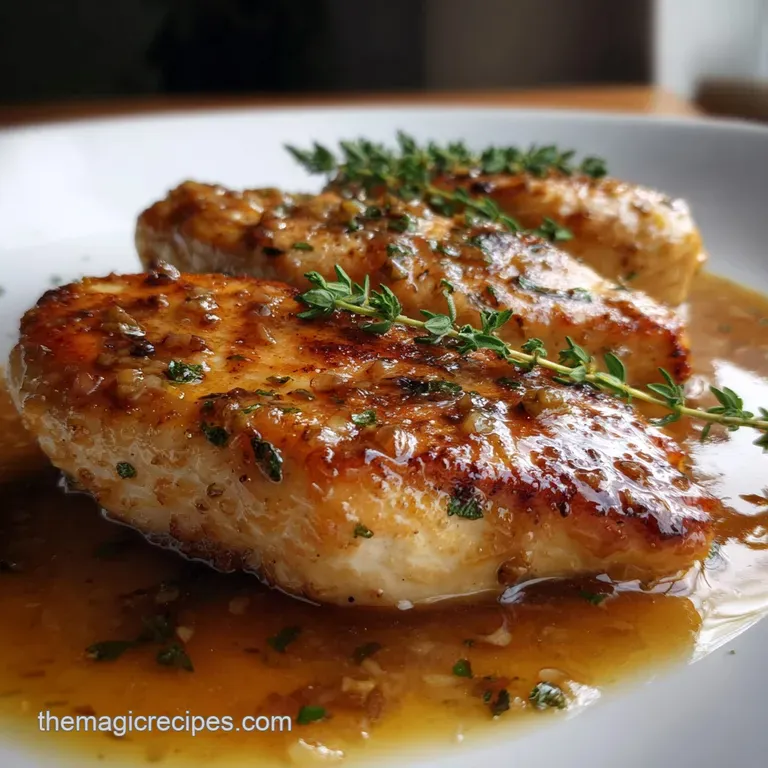
You know that amazing smell that floods the kitchen when garlic hits butter and thyme? That perfect, savory scent promises dinner success, and that’s exactly what this Pan-Seared Chicken Breast Recipe delivers.
It’s crispy on the outside, ridiculously juicy inside, and coated in the most vibrant, zesty pan sauce you could imagine.
This isn’t just another set of Chicken Breast Recipes you scroll past; this is the one you print and stick on the fridge. It’s fast seriously, 27 minutes start to finish making it the ultimate lifesaver when you need a high-quality, healthy chicken breast dinner without the fuss.
I used to dread cooking chicken breasts because they always came out dry, but I finally cracked the code. We’re using a technique here that locks in all the moisture while building a flavor base right in the pan. Let’s crack on and elevate your weeknight cooking game.
The Science of Sizzle: Achieving the Juiciest Chicken Breast
Why Pan-Seared Chicken is a Weeknight Hero
The speed, my friends, is the biggest win. Since we pound the chicken to a uniform thickness (more on that trick later!), it cooks incredibly quickly, often in under eight minutes total.
This fast and hot method means less time on the stove and a much shorter journey to the table, proving that sophisticated Chicken Breast Recipes don't have to take hours.
Overview of the Sizzling Lemon, Thyme & Garlic Pan Sauce
The sauce is why this specific pan-fried Chicken Breast Recipe is a revelation. It’s built directly from the browned bits left after searing the chicken (the fond), ensuring every drop of flavor stays right where it belongs.
The zingy lemon and aromatic thyme cut beautifully through the richness of the butter, leaving you with a light, glossy, and luxurious finish.
Total Time Commitment: From Prep to Plate
Seriously, you can manage this even on your most frantic evenings. We're looking at about 10 minutes of active prep mostly just pounding and seasoning and then 17 minutes of cooking and resting. Total time?
27 minutes. That’s quicker than ordering takeout.
Building the Fond: Flavor Foundation for the Pan Sauce
The 'fond' is the secret MVP of this dish. When proteins brown in the hot pan, they leave behind these flavorful little dark bits stuck to the bottom. Don't scrape your pan clean before the sauce! When you deglaze with the stock, those bits dissolve, adding incredible depth and complexity.
Never throw away your fond.
Why Pounding Ensures Tenderness in Quick Chicken Breast Recipes
While some recipes call for brining, we are prioritizing speed here, and that means pounding. Because the chicken breasts often start thick and tapered, pounding them to a uniform 1/2 to 3/4 inch ensures every piece finishes cooking at the exact same moment. No more dry edges and raw centers!
This is fundamental for any great Easy Chicken Breast Recipes .
The Perfect Internal Temperature for Ensuring Juicy Results
Overcooked chicken is a crime, so ditch the guesswork. The safe internal temperature for poultry is 165°F (74° C) . Pull the chicken off the heat when it hits 160°F, knowing it will coast up to the perfect temperature during the mandatory resting period.
Trust me, an instant read thermometer is your best friend.
Essential Components for the Pan-Seared Chicken Breast Dinner
Selecting the Best Cut: Thickness and Uniformity
We’re starting with four average sized skinless, boneless chicken breasts. If you have massive ones, consider slicing them horizontally first (butterfly them) before pounding them. The goal is to get that thickness consistent so the sear time is predictable.
Fresh Thyme vs. Dried: Adjusting the Herb Profile
Fresh herbs make a difference, especially in a quick sauce where their oil shines immediately. The recipe calls for two sprigs of fresh thyme, which release beautifully potent oils during the quick sauté.
Substitution Alert: If you only have dried thyme, use 1 teaspoon. If you want a different flavor profile entirely, swap the thyme for 1 teaspoon of dried sage or 1 sprig of fresh rosemary, but remember rosemary is much stronger!
Substituting Fats: Butter vs. Oil in the Sear
We use both for a reason. Olive oil has a higher smoke point than butter, which means it helps prevent the butter solids from burning immediately. The butter is there purely for flavor; it provides that gorgeous nuttiness we associate with a perfect sear.
| Component | Role in the Pan | Substitution |
|---|---|---|
| Olive Oil | High heat stability, initial sizzle. | Canola, rapeseed, or other high smoke point oil. |
| Unsalted Butter | Deep golden color and nutty flavor. | Ghee (clarified butter) for higher heat tolerance, or quality vegan block butter. |
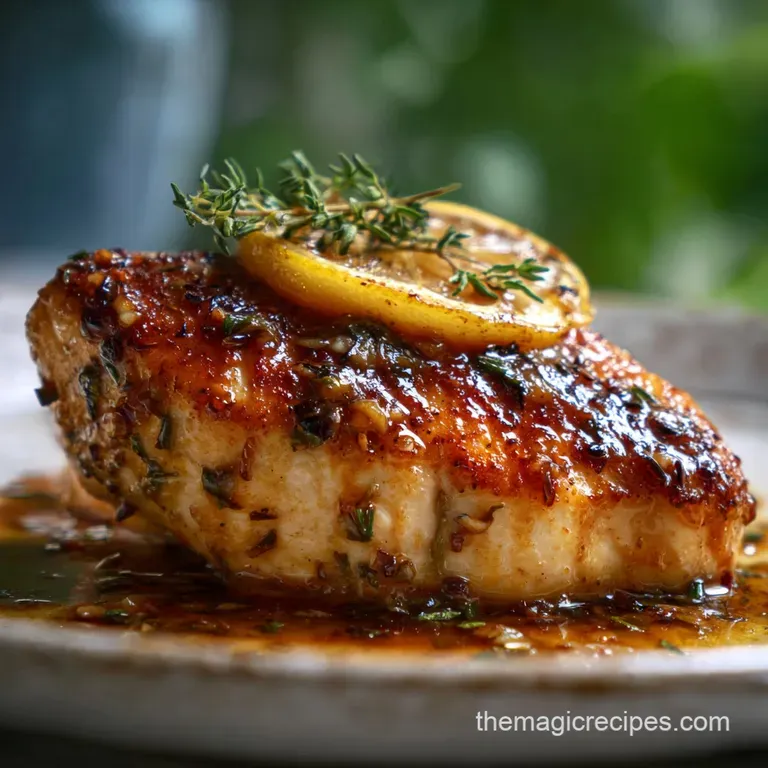
Acidity Check: Maximizing the Lemon Zest Brightness
The recipe specifically calls for fresh lemon juice, which is non-negotiable for that bright finish. If you want even more zing, you can grate a little lemon zest into the cold butter before mixing it into the sauce.
If you’re truly out of lemons, a splash of white wine vinegar can provide the necessary tartness, but it won’t have the same floral aroma.
How to Execute the Perfect Pan-Sear (Detailed Instructions)
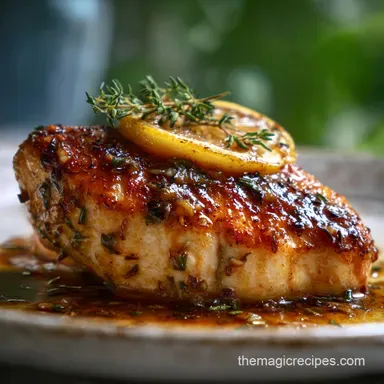
This is how we get those juicy results. Follow these steps for the perfect Lemon Thyme Chicken Breast every single time.
Prep Stage: Pounding and Seasoning the Chicken Breast
First, enclose the chicken breast in plastic wrap or parchment paper. Use a meat mallet to gently pound the thickest part until the whole breast is about 3/4 inch thick. Next, rub the chicken with a tablespoon of olive oil, salt, and pepper; this initial fat layer helps create the perfect crust.
The Searing Technique: Heat Management and Crust Development
You need a good, heavy pan cast iron or stainless steel is ideal for retaining heat. Get the pan shimmering hot over medium high heat for about 2 minutes. Add your butter and oil, wait for the foaming to subside slightly, then place the chicken in the pan.
Do not touch it for 4 minutes! We are building a crust. Listen for a confident, continuous sizzle, not a frantic roar.
Creating the Sizzling Lemon Garlic Pan Sauce in Under Three Minutes
Once the chicken is resting, reduce the heat to medium low. Add your minced garlic and fresh thyme sprigs. Sauté for only 30 seconds; your kitchen should immediately smell glorious and sweet, but don't let the garlic burn.
Pour in the 1/2 cup of chicken stock (or wine!) and scrape up that beautiful fond vigorously. Reduce the liquid until it's halved.
Chef's Note: When using wine instead of stock, ensure you let it simmer for two minutes to completely boil off the alcohol before proceeding.
Next, remove the pan from the heat entirely. Whisk in the cold butter, one small piece at a time. The cold fat emulsifies into the liquid as it melts, creating a rich, luxurious, and glossy sauce without any flour. Finish it off with the lemon juice and fresh parsley.
Resting the Meat: Locking in the Juices Before Serving
This is the most critical 5 minutes of your entire cook time. Seriously, I once skipped the rest, excited to eat, and watched all the beautiful juices run onto the cutting board instead of staying in the meat.
Tent the chicken loosely with foil on a clean board and let those muscle fibers relax and reabsorb all that moisture. If you want the best healthy chicken breast recipes result, you must rest it.
Troubleshooting & Expert Tips for Chicken Breast Recipes
Mistake: Overcrowding the Pan (The Temperature Drop Effect)
This is the number one blunder I see home cooks make. If you’re cooking four breasts, you might need to do it in two batches. Crowding the pan causes the temperature to plummet, and instead of searing, the chicken begins to stew in its own released moisture.
You end up with sad, grey chicken instead of glorious gold. Always leave space between the fillets.
Ensuring Uniform Thickness: The Pounding Technique Refined
If you don't have a meat mallet, don't worry! Use the bottom of a heavy skillet or a sturdy rolling pin. Place the chicken between parchment paper, not just plastic wrap, as the plastic can tear. Focus your pounding effort on the thickest, center portion until it matches the thin ends.
Rescuing a Broken or Oily Pan Sauce
If your sauce breaks (separates into clear fat and watery liquid) because you kept it on heat too long, don’t panic. This happens. Remove the pan from the heat immediately and try whisking in one more piece of ice-cold butter .
If that fails, whisk in a tablespoon of cold stock or water while shaking the pan vigorously; the sudden temperature change often forces the sauce back into emulsion.
What to Serve with Pan-Seared Chicken and Lemon Sauce
When preparing Chicken Breast Recipes Dinner style, you need sides that can handle this bright, bold sauce.
Ideal Starchy Sides (Rice and Potatoes)
Creamy mashed potatoes are the classic choice, perfect for soaking up every drop of that lemon garlic sauce. For something different, try serving it alongside a simple pilaf. If you want a contrast of texture for comfort food, check out my recipe for Easy Chicken Casserole with Ritz Crackers: Ultimate Crispy Bake — it’s a different vibe, but equally satisfying.
Green Pairings: Quick Vegetable Options
You need something quick and green. Asparagus, steamed broccoli, or French green beans sautéed with a pinch of salt are perfect. The flavor profile is also stunning when served over simple buttered pasta, like the kind I use in my Spring Meals: Lemon Kissed Chicken Asparagus Tagliatelle — the lemon element really ties it all together.
Handling Leftovers: Storage and Reheating Guidelines
Safe Refrigeration and Shelf Life of Cooked Chicken
Leftovers from these Chicken Breast Recipes store beautifully. Once cooled, place the chicken and the remaining sauce in an airtight container and refrigerate for up to 3 days. Since this is a lean cut, remember that reheating can easily dry it out.
Reheating to Maintain Moisture
The best way to reheat this pan-seared chicken is gently. Slice the chicken before reheating, place it in an oven safe dish, and spoon the sauce over it. Cover tightly with foil and heat in a 300°F (150°C) oven until just warmed through (about 10– 12 minutes).
Alternatively, microwave it in short, 30 second bursts with a splash of extra stock or water to generate steam and keep the meat moist. This guarantees juicy slices, even the next day! This is truly one of the most reliable healthy chicken breast recipes for meal prepping.

Recipe FAQs
Why did my pan-seared chicken breast turn out dry or tough?
Dryness is nearly always caused by overcooking; chicken breast is very lean and unforgiving when cooked past its prime. Use an instant read thermometer to ensure the chicken reaches exactly 165°F (74°C) and remove it from the heat immediately, allowing for a 5-minute rest.
To ensure even cooking, try pounding the thicker parts of the breast slightly so they are a uniform thickness before searing.
How do I get a good golden crust without burning the herbs or garlic?
Achieving a crust requires high initial heat and minimizing movement; ensure the chicken is patted bone dry before seasoning. The herbs and garlic are delicate, so they are added during the final minutes of searing or, preferably, only after the chicken has been flipped and the main crust has formed.
Once the chicken is resting, the garlic and thyme are added to the hot fat to infuse the pan sauce base.
Can I use dried herbs instead of fresh thyme for the pan sauce?
Yes, you can substitute dried thyme, but use approximately one-third of the amount specified for fresh herbs, as dried flavors are much more concentrated. Add the dried thyme early to the pan sauce, alongside the garlic and lemon zest, allowing their flavor to "bloom" slightly in the hot butter or oil before the liquid is added for deglazing.
How can I tell exactly when the chicken is fully cooked?
The most reliable method is using a meat thermometer inserted into the thickest part of the breast; it is safe and fully cooked when it registers 165°F (74°C). If you are testing without a thermometer, cut into the thickest part; the juices should run perfectly clear, and the flesh should be opaque white with absolutely no hint of pink.
Always allow adequate resting time for the juices to redistribute.
Can I prepare or brine the chicken ahead of time?
Absolutely, seasoning the chicken with salt up to 24 hours in advance and storing it in the refrigerator acts as a beneficial dry brine, leading to a much juicier and more flavorful end product.
Ensure you pat the seasoned chicken extremely dry with paper towels right before you start searing to guarantee a perfect crust. Do not slice or marinate ahead of time, as this can impede the sear.
My pan sauce didn't thicken properly. What went wrong?
The thickening of this simple pan sauce relies heavily on reducing the liquid and incorporating the flavorful 'fond' (the browned bits left after searing). Ensure you scrape the bottom vigorously during deglazing to release all the sticky bits, and then bring the sauce to a rapid boil for 2 3 minutes to allow it to reduce adequately.
For a richer finish, you can stir in a small pat of cold butter off the heat.
Can I use chicken thighs instead of breasts for this recipe?
Yes, chicken thighs work beautifully with this sauce, often resulting in a richer flavor profile due to their higher fat content. However, the cooking time will be longer, typically requiring 6 8 minutes per side to reach an internal temperature of 175°F (80°C), as thighs benefit from slightly higher cooking temperatures.
Ensure you use boneless, skinless thighs for similar pan-searing results.
Pan Seared Chicken Breast Recipe
Ingredients:
Instructions:
Nutrition Facts:
| Calories | 465 kcal |
|---|---|
| Protein | 38.7 g |
| Fat | 31.2 g |
| Carbs | 4.0 g |
