Asian Chicken Thighs: Sticky Glazed Honey-Ginger (Better Than Takeaway)
- The Secret to Superior Sticky Glazed Asian Chicken
- Decoding the Deliciousness: The Science Behind the Sticky Glaze
- Everything You Need for This Asian Chicken Masterpiece
- How to Make Sticky Glazed Honey-Ginger Chicken: A Step-by-Step Guide
- Elevate Your Dish: Pro Chef Tips and Troubleshooting
- Practical Kitchen Guide: Storing and Reheating
- What to Serve Alongside Your Sticky Asian Chicken
- Recipe FAQs
- 📝 Recipe Card
The Secret to Superior Sticky Glazed Asian Chicken
The moment those sweet, sharp, caramelized aromas start hitting you from the kitchen, you know you’ve won. That sticky, slightly charred honey ginger scent is pure comfort food magic, and it signals that the glaze on this Asian Chicken is setting up perfectly.
You will get a deeply flavorful, glossy coating that looks exactly like the best takeout but tastes infinitely fresher.
Seriously, this recipe is my weeknight superhero, especially when I’m craving something intensely savory and satisfying. It relies entirely on basic pantry staples, needs almost no fussy prep, and honestly, the total active cooking time is less than 20 minutes.
Forget the delivery app, because you can make this quicker and cheaper.
I’ve tweaked this specific Asian Chicken recipe dozens of times to find that exact balance of sweet, sour, and sticky. We are using a foolproof cornstarch technique and aggressively searing chicken thighs to guarantee success. Trust me on this one; let’s get that pan heating up right now.
Decoding the Deliciousness: The Science Behind the Sticky Glaze
Why 'Better Than Takeaway' Isn't an Overstatement
I'm pretty opinionated about quality: fresh aromatics make the entire difference here. Takeaway places often use powdered ginger or garlic to save time, but we are grating fresh ginger and mincing garlic cloves for maximum impact. That fresh vibrancy gives the sauce an incredible, clean bite.
Plus, we fully control the amount of honey and soy sauce, ensuring the flavor profile is perfectly balanced and never too salty.
What Defines This Classic Honey Ginger Flavor Profile?
The magic lies in the classic push and pull between sweet and savory elements. The honey brings that deep, golden sweetness, while the rice vinegar adds the absolutely crucial tangy lift, stopping the dish from becoming heavy or cloying.
We round it out with a dash of sesame oil, which injects a necessary nutty depth into the whole beautiful mess.
Recipe Quick Stats: Prep Time, Cook Time, and Servings
Okay, quick housekeeping before we crack on with the cooking. You’re looking at minimal hands-on time, which is exactly what we need on a Tuesday night. The total cooking process is rapid once the chicken is prepped.
| Stage | Time (Approximate) |
|---|---|
| Prep Time | 15 minutes (plus 30 minutes optional resting) |
| Cook Time | 15– 20 minutes |
| Total Time | 35– 50 minutes |
| Serves | 4 hearty servings |
Achieving the Perfect Caramelisation and Gloss
This recipe uses the power of reduction mixed with a cornstarch slurry. When you reduce the honey and soy, the natural sugars caramelize, deepening the color and flavor of the glaze. But to get that gravity defying, clingy gloss, we use the slurry.
This ensures the sauce thickens almost instantly right at the end, coating every piece of sticky chicken like candy.
The Role of Fresh Ginger and Garlic in Flavor Depth
When you briefly sauté the aromatics, you are building the fundamental flavor layer of the entire dish. You must keep a close eye on the pan here. You only want 30 seconds of cooking until you smell that incredible fragrance, or you risk burning the garlic and giving the entire sauce a bitter undertone.
Low and slow is not the game when cooking ginger and garlic.
Mastering the Sauce Reduction Technique
The trick is making sure your sauce base is simmering hard before you add the slurry. If the temperature isn't hot enough, the cornstarch won't activate, and your sauce will stay watery a total tragedy! Add the slurry, whisk aggressively for 60 seconds, and watch it turn thick and glossy.
It should be thick enough to leave a trail when you run your whisk through it.
Everything You Need for This Asian Chicken Masterpiece
I always use boneless, skinless chicken thighs for this recipe. They are incredibly forgiving and stay tender and juicy, even after searing and tossing in that hot glaze. We cut them into roughly 1 inch pieces to maximize the surface area for the stickiness factor.
Pantry Essentials: Soy, Honey, and Vinegar Breakdown
| Ingredient | Amount | Essential Substitution | Why it works |
|---|---|---|---|
| Chicken Thighs | 1.5 lbs (700g) | Chicken Breast (cut into larger pieces) | High fat content ensures moisture. |
| Low-Sodium Soy Sauce | 1/2 cup total | Tamari (for gluten-free) or Coconut Aminos | Provides salty, umami base. |
| Honey | 1/4 cup | Maple Syrup or Brown Rice Syrup | Offers thick, golden sweetness. |
| Rice Vinegar | 3 Tbsp total | White Wine Vinegar or Apple Cider Vinegar | Necessary acidic balance. |
| Cornstarch | 3 Tbsp total | Potato Starch or Arrowroot Powder | Creates the crunchy coating and the final gloss. |
Prepping the Chicken for Optimal Tenderness
The initial steps are crucial for the texture. We coat the chicken pieces in cornstarch after a light soak in soy sauce and vinegar. This creates a thin, protective shell around the chicken.
That shell crisps up when it hits the hot oil, locking in the thigh’s moisture, guaranteeing the juiciest possible interior. Always pat the chicken dry before cutting it.
Swaps and Variations for the Glaze Ingredients
Need a little flavor boost? Try adding 1/2 teaspoon of Chinese Five Spice powder to the simmering glaze for a really complex, warming flavor. If you want more heat, whisk in a teaspoon of Gochujang (Korean chili paste) when you add the honey.
My personal favorite is swapping the water in the slurry for a few tablespoons of fresh orange juice for a Mandarin Chicken twist!
Essential Kitchen Tools for Searing and Glazing
You don’t need any fancy gadgets for this dish. I highly recommend using a large wok or a heavy bottomed, non-stick skillet. The wide surface area is key because it allows the chicken to sear quickly rather than steam, and it lets the sauce evaporate rapidly, which is essential for achieving the perfect reduction.
How to Make Sticky Glazed Honey Ginger Chicken: A step-by-step Guide
Step 1: Preparing and Searing the Chicken Pieces
Toss your prepared chicken pieces with the initial tablespoon of soy and vinegar, letting it sit for five minutes. Now, sprinkle over the cornstarch and toss until every single piece is lightly coated. Heat your oil in the large skillet over medium high heat until it shimmers.
Now, listen closely: cook in small batches! Overcrowding cools the pan and causes steaming. Sear the pieces for 3– 4 minutes per side until they are golden brown and almost cooked through, then remove them to a clean plate.
Step 2: Building the Aromatic Glaze Base
Reduce the heat to medium. Add the minced garlic and grated ginger right into the residual oil and chicken fond left in the pan that’s where the flavor lives! Cook until you get that wonderfully pungent, nutty aroma, which should only take about 30 seconds.
Quickly pour in the soy sauce, honey, rice vinegar, sesame oil, and chili flakes. Bring that mixture to a rapid simmer.
Chef’s Note: Use the residual oil left after searing the chicken to sauté the ginger and garlic. This step infuses the remaining fat with flavor, ensuring your glaze base is deeply savory from the start.
Step 3: The Final Glaze Reduction and Toss
While the sauce simmers, whisk your final teaspoon of cornstarch into the cold water or stock (this is your slurry). Pour the slurry into the simmering sauce and immediately whisk like a person possessed. The sauce will thicken instantly and become incredibly glossy. Return all the seared chicken pieces to the pan.
Toss gently but thoroughly, coating every piece in that beautiful, syrupy glaze. Cook for 90 seconds, stirring constantly, until the glaze is deeply caramelized and sticky.
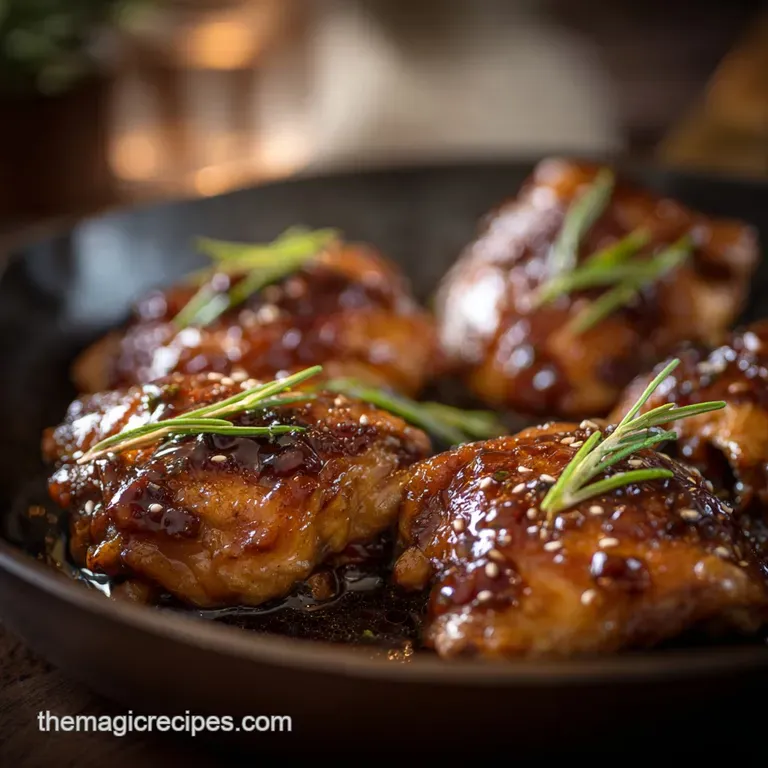
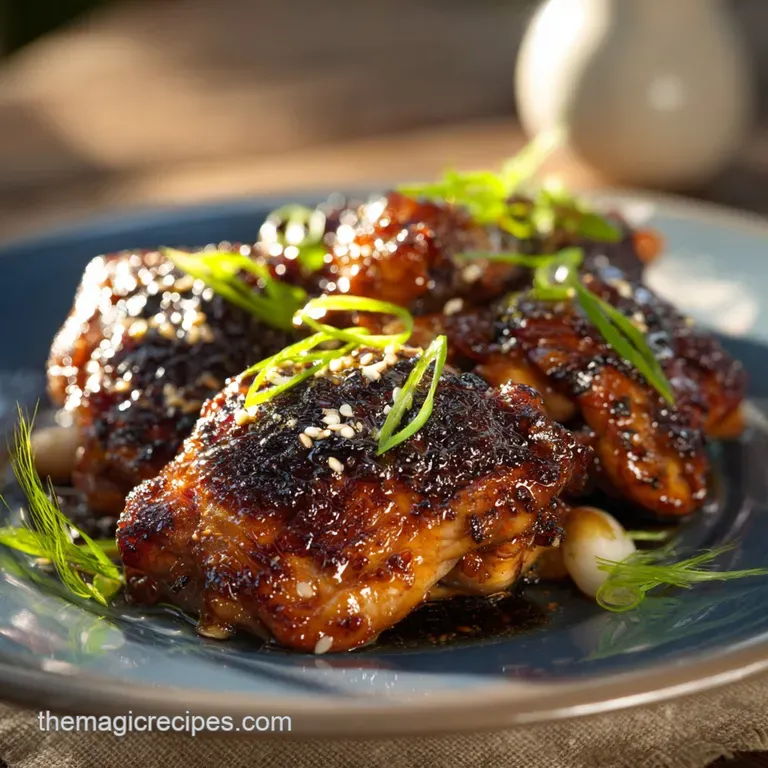
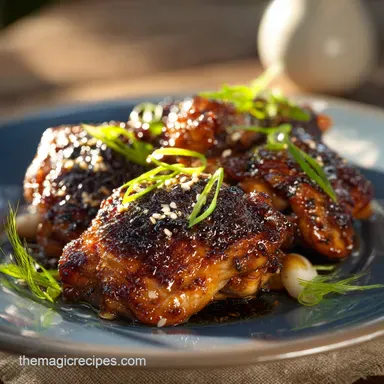
Visualizing Success: What the Finished Dish Should Look Like
The final result should look dark, glossy, and intensely sticky. The glaze should not be pooling in the bottom of the pan; it must cling entirely to the pieces of Asian Chicken, almost like a candy coating.
Garnish heavily with sliced spring onions and toasted sesame seeds, and then get ready to eat before you accidentally burn your fingers tasting a piece.
Elevate Your Dish: Pro Chef Tips and Troubleshooting
Preventing the Honey Glaze from Burning
Honey is essentially sugar, and sugar burns incredibly fast, especially when mixed with soy sauce. You must lower the heat right after you’ve removed the chicken, before you start sautéing the aromatics and adding the honey.
If you notice the sauce is turning black or sticking aggressively to the pan base, immediately take the pan off the heat for a minute to let it cool down before continuing to simmer.
Ensuring Maximum Chicken Crispness (Without Frying)
I made this mistake for years: rushing the pre-cook process. The trick I eventually learned? After coating the Asian Chicken in cornstarch, let it rest in the fridge for 30 minutes.
This allows the starch to hydrate slightly and dry out on the surface, guaranteeing a much crispier, more resilient exterior when you sear it. Don't skip the resting time!
Fixing a Glaze That Is Too Thin or Too Thick
If your sauce is too thin, it means your cornstarch didn’t fully activate or you need more thickening power. Whisk another small slurry (1/2 tsp cornstarch + 1 Tbsp cold water) and add it to the sauce while it simmers, whisking until it’s perfect.
If it becomes too thick or gloopy, just whisk in a splash of water or stock to loosen it up, bringing it quickly back to a simmer.
Practical Kitchen Guide: Storing and Reheating
Best Practices for Refrigerated Leftovers
This Sticky Asian Chicken is absolutely fantastic the next day; often, the flavors deepen overnight. Store any leftovers in an airtight container in the fridge for up to four days. If the glaze appears very solid or sticky when cold, don't worry it will relax and re-hydrate when properly reheated.
Freezing Cooked Glazed Chicken: Is It Recommended?
But does it freeze well? You bet it does! The fat in the thighs helps protect the moisture content during freezing. Place the fully cooked and cooled glazed chicken in a sturdy, freezer safe bag, ensuring you squeeze out all the excess air to prevent freezer burn.
It maintains excellent quality for about 3 months, though the glaze might look slightly less glossy after thawing.
How to Reheat Asian Chicken Without Losing the Glaze
My top reheating tip is to avoid the microwave if possible, which tends to steam and soften the glaze. Instead, reheat it in a lightly oiled non-stick pan over medium heat for about 5 to 7 minutes, stirring gently.
The heat reactivates the sticky glaze and gives the chicken a chance to crisp up slightly on the edges.
What to Serve Alongside Your Sticky Asian Chicken
Honestly, this dish screams for some fluffy, perfectly steamed Jasmine rice to soak up every last drop of that extra sticky, intensely savory glaze. For a contrasting texture, a simple steamed green like blanched broccoli, sautéed asparagus, or green beans is the perfect vibrant counterpoint to the richness.
Quick, easy, and endlessly satisfying.

Recipe FAQs
Why is my sticky glaze too thin or runny?
The glaze is thickened primarily by reduction, meaning excess liquid must be evaporated by simmering vigorously. If the sauce is still too thin after adding the chicken, let it bubble rapidly for 3 5 minutes to concentrate; alternatively, you can quickly stir in an additional teaspoon of cornstarch mixed with cold water.
Can I use a different protein instead of chicken?
Absolutely; this sweet and savory glaze works brilliantly with other proteins like pork tenderloin, firm tofu, or shrimp. If using tofu, ensure it is pressed and seared until golden before adding the sauce, and if using shrimp, simmer for only 2 3 minutes to prevent them from becoming tough.
My chicken pieces turned out dry. What went wrong?
Dry chicken usually results from overcooking or using overly lean chicken breast. We highly recommend using boneless, skinless chicken thighs for this recipe, as their higher fat content ensures the meat remains juicy and tender throughout the searing and simmering process.
I need to make this recipe gluten-free. What substitutions do I need?
Making this dish gluten-free is very simple by substituting traditional soy sauce with Tamari or coconut aminos. Tamari offers the most comparable flavor profile and maintains the desired savory depth of the original sauce.
Can I prepare the sauce ahead of time?
Yes, you can mix all the sauce ingredients (honey, soy, ginger, garlic, etc.) ahead of time and store it sealed in the refrigerator for up to three days. However, for the best results, sear the chicken and thicken the sauce just before serving, as the glaze tends to lose its glossy texture upon reheating.
What is the best substitute if I don't have fresh ginger?
While fresh ginger provides the best vibrant flavor, you can substitute it with dried ground ginger in a pinch. Use about 1/2 teaspoon of dried ginger for every tablespoon of fresh grated ginger requested in the recipe, remembering that the dry spice is far more concentrated.
What side dishes pair well with the Sticky Glazed Chicken?
Because the chicken is rich and sticky, pair it with simple sides that offer contrast and lightness. Steamed jasmine rice is essential for soaking up the excess sauce, while steamed or lightly blanched green vegetables like broccoli or snow peas provide a necessary, crisp texture.
Sticky Glazed Asian Chicken Thighs
Ingredients:
Instructions:
Nutrition Facts:
| Calories | 287 kcal |
|---|---|
| Protein | 27.0 g |
| Fat | 11.0 g |
| Carbs | 21.0 g |
