The Ultimate Crispy Buttermilk Waffles: Light As a Feather
- Achieving the Perfect Buttermilk Waffle: The Secret to Supreme Crispness
- The Science of Waffles: Why Buttermilk Guarantees a Tender Crumb
- Essential Ingredients for Light and Fluffy Buttermilk Waffles
- Step-by-Step: Mastering the Buttermilk Waffle Batter and Cooking
- Troubleshooting and Expert Tips for Your Next Batch
- Making Ahead: Storage, Freezing, and Reheating Buttermilk Waffles
- Elevating Your Buttermilk Waffle Experience: Toppings and Pairings
- Recipe FAQs
- 📝 Recipe Card
Achieving the Perfect Buttermilk Waffle: The Secret to Supreme Crispness
Can we just talk about that specific Sunday morning aroma? It’s not just toast, and it’s definitely not cereal; it’s the smell of hot butter, sweet vanilla, and bubbling brown sugar dancing off a scorching hot iron.
That moment when you lift the lid and see those perfectly deep, golden brown squares is pure kitchen bliss. This isn't just a basic recipe, trust me.
I used to be a boxed mix girl, shamefully. Seriously, it was convenient, but the waffles were always limp, chewy, and totally lacking personality. Once I figured out that making them from scratch takes maybe ten minutes more effort, and costs practically nothing, I never looked back.
This version is cheap, easy, and completely blows any chain restaurant brunch item out of the water.
This Buttermilk Waffle Recipe is based on a few non-negotiable kitchen hacks that deliver maximum crispness without sacrificing any of that gorgeous interior fluff. We are talking proper, structurally sound waffles that hold up to a mountain of syrup, fresh berries, and whatever else your heart desires.
Let's get this batter mixed and crack on with breakfast royalty.
The Science of Waffles: Why Buttermilk Guarantees a Tender Crumb
Achieving the perfect waffle texture involves juggling two forces: structure and tenderness. We need enough structure to hold the iconic grid shape, but we want zero rubbery chewiness. That’s where the magic of separating the eggs comes in, along with the specific chemistry of buttermilk.
The Magic of Separated Eggs: Why We Whip the Whites
This technique is the biggest secret to getting those ridiculously tall, light, and airy pockets. We beat the egg whites separately until they become foamy, stabilizing air inside the proteins.
This essentially creates a natural, super powered leavener that keeps the batter voluminous, light, and almost soufflé like when folded in. Do not skip this step ; it makes all the difference.
Defining Waffle Perfection: Crispy, Light, and Tangy
A perfect buttermilk waffle should snap when you bite the edge, yielding instantly to a soft, almost melt-in-your mouth interior. The acid in the buttermilk provides that quintessential tangy flavour, balancing the sweetness and richness of the butter perfectly. It's a flavor profile that is absolutely addictive.
Essential Kitchen Tools for Waffle Success
You truly don't need much, but a good electric waffle iron is obviously non-negotiable. I prefer using a stand mixer for the egg whites, but a strong hand mixer or even just a balloon whisk will absolutely work. Make sure you have a quality rubber spatula for folding, too.
Buttermilk's Role: Activating Baking Soda and Adding Flavor
Buttermilk isn't just for flavor (though the tang is delicious). It's a key chemical player because it’s acidic. Baking soda, a powerful leavener, needs an acid to activate it fully, releasing carbon dioxide gas rapidly.
This reaction gives our Buttermilk Waffle batter a massive initial lift when it hits the heat, resulting in those magnificent internal bubbles.
Understanding Gluten Development in Waffle Batter
Gluten is the enemy of tenderness here. Overmixing your batter activates the gluten in the flour, making it tough and chewy. We want to mix the wet and dry ingredients only until just combined a few lumps are completely fine, actually they are encouraged!
Controlling Moisture for Maximum Exterior Crunch
We use melted butter for richness, but we must let it cool slightly before adding it to the wet mix. This prevents it from accidentally cooking the eggs. Crucially, the short rest time for the batter ( 30 minutes!) allows the flour to hydrate fully, which helps ensure that all the moisture is stabilized before cooking.
Essential Ingredients for Light and Fluffy Buttermilk Waffles
Here is everything you need for the Best Buttermilk Waffle Recipe . Quality ingredients truly shine through when the recipe is this simple.
Measuring Flour and Leaveners Accurately
Flour should always be measured using the scoop and level method, or even better, by weight. Too much flour means a dense, heavy waffle. We use both baking powder and baking soda here; the soda reacts with the buttermilk, and the powder provides a backup lift.
Always check the expiration date on your leaveners.
Sourcing Quality Buttermilk (And the Cultured Milk Substitute)
Try to find real, cultured buttermilk. It’s thicker and tangier than the powdered stuff. It makes such a difference in the final taste and texture of your light and crisp buttermilk waffles .
| Ingredient | Measurement | Quick Substitute |
|---|---|---|
| All-Purpose Flour | 2 cups (250g) | 1:1 gluten-free Blend |
| Buttermilk | 1 ¾ cups (420ml) | 1 ¾ cups milk + 1 ¾ Tbsp white vinegar (rest 5 min) |
| Large Eggs | 2 (Separated) | No good substitute for the structure! |
| Unsalted Butter | 6 Tbsp (85g) | Neutral oil (canola or vegetable) |
| Granulated Sugar | 2 Tbsp | Brown sugar (adds subtle molasses flavor) |
| Baking Soda | ½ tsp | N/A (Essential for buttermilk reaction) |
Butter vs. Oil: Choosing Your Preferred Fat
I use melted unsalted butter because it imparts a gorgeous, rich flavour that oil simply cannot match. Oil will technically make a slightly crispier waffle since it's 100% fat, but the flavour trade off isn’t worth it, in my opinion. Always melt the butter first and let it cool slightly.
Detailed Ingredient Checklist and Preparation Notes
Before you start, melt the butter and let it sit. Separate the eggs now while your hands are clean. Having everything ready (the French call this mise en place ) makes the mixing process super fast.
step-by-step: Mastering the Buttermilk Waffle Batter and Cooking

This process involves an extra step (whipping the whites), but honestly, it’s only five minutes and delivers supreme fluffy buttermilk waffles .
The Dry Mix and Wet Mix Combination Method
- Dry Ingredients: Whisk the flour, sugar, baking powder, baking soda, and salt together in a large bowl. Ensure everything is thoroughly mixed so the leaveners are evenly distributed.
- Wet Ingredients (Phase 1): In a separate medium bowl, whisk together the egg yolks, buttermilk, vanilla extract, and the cooled melted butter.
- Combine: Pour the wet mixture into the dry ingredients. Stir just until the dry streaks disappear. Stop stirring! Lumps are good, remember? This is the core of making great buttermilk waffle batter .
- Rest: Cover and let the batter rest at room temperature for 30 minutes. The rest period is non-negotiable for tender results.
Whipping the Egg Whites to Stiff Peaks
While the batter rests, prepare your egg whites. Use a clean, grease free bowl. Whisk the two egg whites until they hold glossy, stiff peaks. Stiff peaks mean that when you pull the whisk out, the tips of the meringue stand straight up without flopping over.
Gently Folding the Aerated Whites (The Key to Volume)
- Loosen Up: Take about a third of the stiff egg whites and gently whisk them into the rested batter. This lightens the mixture and makes the remaining folding easier.
- The Fold: Add the remaining egg whites. Use a large rubber spatula and cut down the middle of the bowl, then sweep up the side, turning the batter over onto itself. Rotate the bowl and repeat. Stop folding the second the whites are mostly incorporated; a few small streaks are totally fine. This is the secret to light texture.
Chef’s Note: Do NOT mix or stir the batter after the whites are folded in. You will deflate all that beautiful volume you just created! The batter should look puffy, light, and cloud like.
Preheat Settings and Perfect Waffle Iron Technique
Preheat your waffle iron on a medium high setting until it is screaming hot. If your iron doesn't have a non-stick coating, lightly brush it with oil or a neutral cooking spray. Ladle the batter onto the iron (usually ¾ cup to 1 cup per large waffle). Close the lid and resist the urge to peek!
Cook until the steam almost stops escaping and the light indicates the waffle is done (usually 3 to 4 minutes).
Troubleshooting and Expert Tips for Your Next Batch
Even with the easy buttermilk waffle recipe instructions, things can go wrong. Here are the most common pitfalls and how to avoid them.
Why Is My Waffle Limp? (The Batter Temperature Check)
There are two main reasons for limp, soggy waffles. First, the iron wasn't hot enough when the batter went in, meaning the butter just melted instead of frying the exterior. Second, you stacked the hot waffles! Always cool waffles individually on a wire rack.
The air circulation prevents trapped steam from causing sogginess.
Dealing with Sticking: Iron Maintenance Tips
Sticking is usually a sign that your iron is either not hot enough, or it needs a quick cleaning and re-seasoning. Ensure you are using the right amount of fat (melted butter is in the batter), and if necessary, use a paper towel dipped in over high heat oil (like peanut or grapeseed) to wipe the iron plates before each waffle.
How to Achieve Uniform Browning
Browning comes from the sugar content and the heat. If your waffles are pale, increase the heat setting on your iron slightly. If you still struggle, consider adding 1/2 teaspoon of malted milk powder or increasing the sugar to 3 tablespoons; this helps the Maillard reaction (the browning process) along beautifully.
The Best Way to Cool Waffles for Crispness
I already said it, but I’m saying it again: use a wire rack. Set it over a cooling sheet and transfer the waffles immediately when they come off the iron. You can hold them, still on the wire rack, in a 200°F (95°C) oven to keep them warm until ready to serve.
Making Ahead: Storage, Freezing, and Reheating Buttermilk Waffles
But does it freeze well? You bet it does! Making a double batch of these homemade buttermilk waffles on a Sunday is the ultimate meal prep win.
Flash Freezing for Long Term Storage
Once the waffles are completely cool on the wire rack, arrange them in a single layer on a baking sheet. Freeze them for about an hour until solid (this is the flash freeze step). Once solid, stack them with small squares of parchment paper between each one and transfer them to a freezer bag or airtight container.
They keep perfectly for up to three months.
Reheating Waffles in the Toaster or Oven
Never microwave a waffle unless you enjoy sadness and chewiness.
- Toaster: This is the fastest and best way. Pop frozen waffles directly into the toaster slots and toast on a medium setting until piping hot and re-crisped.
- Oven: Preheat your oven to 350°F (175°C). Place frozen waffles directly on a baking sheet (no need to thaw) and bake for about 8– 10 minutes. They will come out crunchy and hot, just like fresh.
- Fridge Storage: Leftover batter keeps surprisingly well in an airtight container in the fridge for up to 2 days. Give it a gentle stir before using.
Elevating Your Buttermilk Waffle Experience: Toppings and Pairings
You've mastered the waffle, now for the fun part. Ditch the cheap table syrup your magnificent, light and crisp buttermilk waffles deserve better!
Here are some of my favorite ways to serve them:
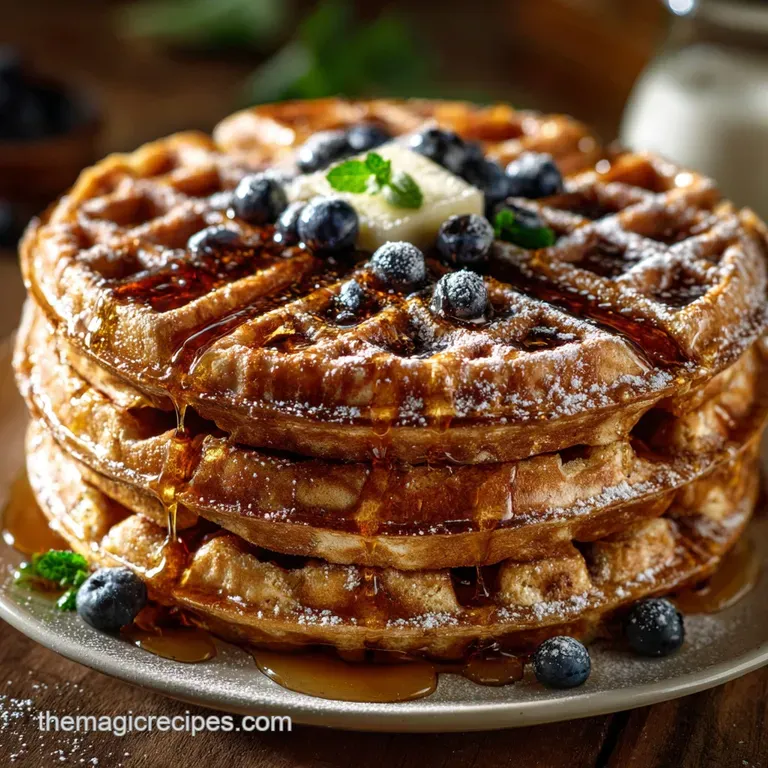
- Classic Deluxe: Real maple syrup (Grade A Dark Robust is my favourite), sliced fresh strawberries, and a dollop of high-quality whipped cream.
- Savoury Power Play: If you’re feeling bold, pair them with crispy fried chicken and drizzle the whole thing with chili infused honey. The sweet, salty, and spicy balance is truly divine.
- Decadent Dessert: Top with a scoop of vanilla bean ice cream, warm peach compote, and toasted pecans.
- Simple & Tangy: Dust with powdered sugar and serve with a bowl of plain Greek yogurt and a sprinkle of cinnamon.

Recipe FAQs
Why are my waffles chewy or dense instead of perfectly crispy and light?
Overmixing is the primary culprit; it develops the gluten, leading to a tough texture. Ensure you only mix until the dry ingredients are just incorporated before carefully folding in the whipped egg whites. Also, verify your waffle iron's temperature it must be piping hot to set the crust quickly.
I don’t have buttermilk. What is the best substitute for this recipe?
The most reliable homemade substitute is 1 cup of regular milk mixed with 1 tablespoon of white vinegar or lemon juice, allowing it to sit for five minutes until it curdles slightly.
While this provides the necessary acid to reactivate the baking soda, true cultured buttermilk offers a superior flavor and thicker consistency.
Can I skip separating the eggs and just mix them whole into the batter?
You can technically skip this step, but you will sacrifice the signature light texture. Whipping the egg whites creates a stable, voluminous foam that acts as a natural leavener, providing the incredible lift and fluffy interior that defines a truly great buttermilk waffle.
My batter is a little lumpy. Should I keep mixing until it is smooth?
Absolutely not; a few small lumps are perfectly acceptable and even desirable when making waffle batter. Overmixing activates gluten, leading to toughness, so stop mixing as soon as the last of the flour streaks disappear, regardless of perfect smoothness. A slightly lumpy batter yields a more tender waffle.
How do I store leftover waffles and reheat them for maximum crispness?
Allow freshly made waffles to cool completely on a wire rack before storing them in an airtight freezer bag for up to two months. To reheat, avoid the microwave as it steams them; toast them directly from the freezer in a toaster or toaster oven until they are golden brown and crispy again.
Can I make the batter ahead of time for a quick breakfast later?
It is not recommended to prepare the full batter in advance once the whipped egg whites and chemical leaveners are incorporated. The whipped air will deflate, and the baking soda will lose its potency, resulting in noticeably heavy, flat waffles when cooked.
The dry and wet components (minus the egg whites) can be prepped separately and combined just before cooking.
Can I use whole wheat flour or make these completely gluten-free?
For a gluten-free option, use a high-quality 1:1 gluten-free baking blend that includes xanthan gum for necessary structure. If substituting whole wheat, replace no more than half of the all-purpose flour; using 100% whole wheat often results in a drier, denser, and tougher final product.
Ultimate Crispy Buttermilk Waffle Recipe

Ingredients:
Instructions:
Nutrition Facts:
| Calories | 341 kcal |
|---|---|
| Protein | 13.2 g |
| Fat | 4.5 g |
| Carbs | 62.1 g |
