Vanilla Wafer Cake Recipe
- Time: Active 20 minutes, Passive 1 hours 15 mins, Total 1 hours 35 mins
- Flavor/Texture Hook: Toasted coconut and buttery pecans with a velvety, melt in-the mouth finish.
- Perfect for: Holiday gatherings, tea parties, or as a nostalgic Southern dessert.
- Secrets Behind a Perfect Vanilla Wafer Cake
- Essential Specs for Successful Baking
- Selecting the Perfect Pantry Essentials
- Tools for a Flawless Bake
- Step-By-Step Bundt Cake Method
- Fixing Bakes and Texture Issues
- Adjusting the Yield for Groups
- Debunking Old Fashioned Baking Beliefs
- Customizing Flavors and Dietary Needs
- Storing and Freezing Your Cake
- Serving Suggestions and Pairings
- Vanilla Wafer Cake FAQs
- 📝 Recipe Card
Secrets Behind a Perfect Vanilla Wafer Cake
The first time I pulled a Vanilla Wafer Cake out of the oven, the aroma was so intense it stopped me in my tracks. It wasn't just the scent of sugar and butter, it was a deep, toasted vanilla note that smelled like a high end bakery.
I remember standing in my kitchen, watching the steam curl off the golden brown crust, wondering how a simple box of cookies could transform into something so sophisticated. This isn't just a cake, it's a sensory experience that starts the moment the wafers hit the food processor.
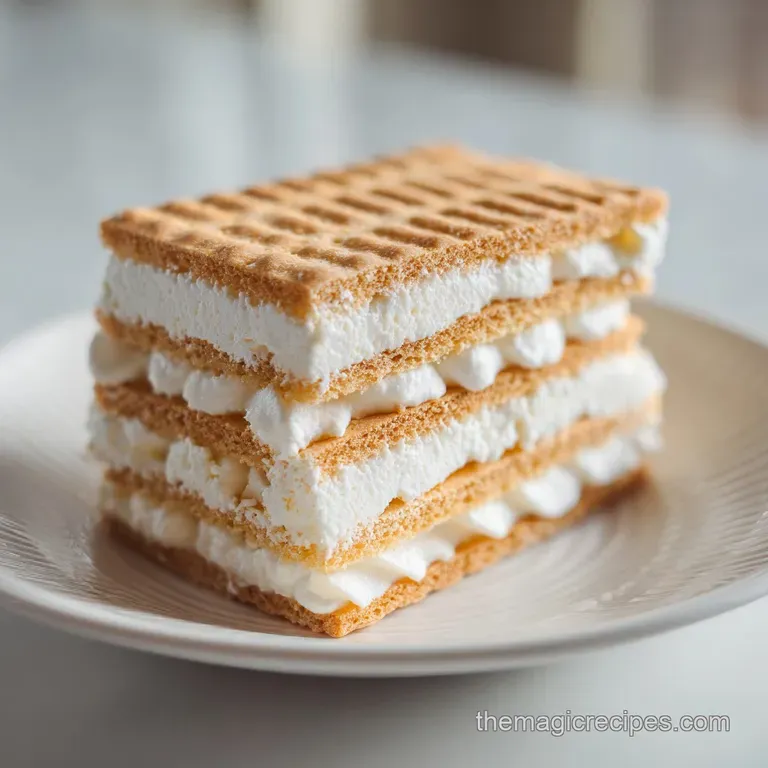
You might be skeptical about a cake that skips the flour bag entirely, but trust me on this, it's a revelation. Most people expect something light and airy, but this is a heavyweight dessert. It has this incredible, tight crumb that holds up perfectly under a scoop of ice cream or a dollop of whipped cream.
The shredded coconut adds a subtle chew, while the pecans provide a necessary earthy crunch that balances the sweetness. It’s an old-fashioned Southern staple for a reason, but we’re bringing it into the modern kitchen with a few precision tricks.
We've all had those "shortcut" cakes that taste, well, like a shortcut. But this is the opposite. By using the wafers as your base, you're actually building on a flavor profile that's already been developed during the cookie baking process. It’s like starting a marathon at the halfway point.
You get all that caramelized sugar and vanilla depth without having to wait for the Maillard reaction to do the heavy lifting in your own oven. Let’s look at why this works so well.
The Physics of Pre Baked Starch
Mechanism: Since the wafers are already baked, the starch is pre gelatinized, which means it absorbs moisture and fat much more efficiently than raw flour. This creates a remarkably stable, moist structure that resists the typical crumbling seen in traditional pound cakes.
Chef Note: For the most intense flavor, toast your pecans in a dry pan for 3 minutes before chopping. The heat wakes up the natural oils, making the finished cake smell incredible.
| Baking Method | Active Time | Resulting Texture | Best For |
|---|---|---|---|
| Traditional Bundt | 20 mins | Thick crust, moist center | Large gatherings |
| Loaf Pan (Half) | 12 mins | Denser, easier to slice | Afternoon tea |
| Muffin Tins | 10 mins | Crisp edges, soft heart | Individual portions |
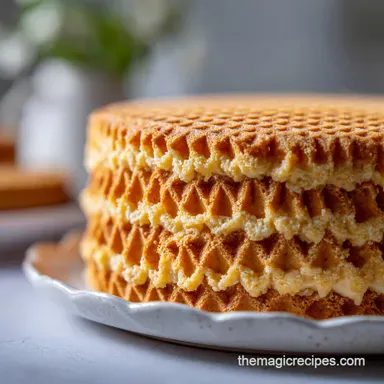
Choosing the right pan changes everything about the final bite. If you use a heavy cast aluminum Bundt pan, you'll get a beautiful mahogany crust that shatters slightly when you bite into it. Using a loaf pan often leads to a softer, more velvety side wall.
I personally love the classic Bundt for this recipe because the center tube helps the dense batter cook evenly through to the middle.
Essential Specs for Successful Baking
| Component | Science Role | Pro Secret |
|---|---|---|
| Vanilla Wafer Crumbs | Primary Structure | Pulse them into a powder to avoid large, sandy lumps in the crumb. |
| Large Eggs (6) | Emulsification | Add them one at a time to ensure the fat and water bond perfectly. |
| Unsalted Butter | Moisture & Flavor | Use high-quality European butter for a richer, more indulgent mouthfeel. |
| Sweetened Coconut | Texture & Fat | The sugar in the coconut caramelizes against the pan for a sweet crust. |
If you are looking for a different kind of nostalgic treat, this technique of using pre made components is quite similar to my Icebox Fruitcake recipe, which relies on the interaction between dry ingredients and moisture over time.
Selecting the Perfect Pantry Essentials
- 12 oz Vanilla Wafers: The backbone of the cake. Why this? They provide the starch and a pre developed toasted sugar flavor profile.
- Substitute: Graham crackers (adds a honeyed, darker flavor).
- 1 cup Pecans: Finely chopped for even distribution. Why this? Their high oil content adds richness and a buttery crunch.
- Substitute: Walnuts (slightly more bitter but very earthy).
- 7 oz Sweetened shredded coconut: For moisture and chew. Why this? The shreds hold onto moisture, keeping the cake fresh for days.
- Substitute: Unsweetened coconut flakes (reduce sugar in recipe by 2 tbsp).
- 1 cup Unsalted butter: Softened to 65°F. Why this? This specific temperature allows for maximum air aeration during creaming.
- Substitute: Salted butter (omit the extra kosher salt in the recipe).
- 2 cups Granulated sugar: To sweeten and tenderize. Why this? Sugar interferes with protein bonding, ensuring the cake isn't tough.
- Substitute: Light brown sugar (adds a molasses like depth).
- 6 Large eggs: Room temperature is non negotiable. Why this? Cold eggs will curdle your creamed butter and sugar instantly.
- Substitute: 1.5 cups liquid egg substitute.
- 0.5 cup Whole milk: For hydration. Why this? The fat in whole milk creates a more luxurious crumb than skim.
- Substitute: Buttermilk (adds a pleasant tang and extra tenderness).
- 1 tbsp Pure vanilla extract: For floral notes. Why this? It bridges the gap between the cookie flavor and the fresh batter.
- Substitute: Vanilla bean paste (for those beautiful black speckles).
- 0.5 tsp Kosher salt: To balance the sugar. Why this? Salt is a flavor enhancer that makes the vanilla "pop."
- Substitute: Sea salt (use slightly less as it's finer).
Tools for a Flawless Bake
You don't need a culinary degree, but you do need the right gear. A heavy duty stand mixer (like a KitchenAid) is your best friend here because the creaming process takes a full 5 to 7 minutes to get the volume we want.
You will also need a food processor to turn those 12 oz of vanilla wafers into a fine dust. If you don't have one, a rolling pin and a heavy duty freezer bag work, but you'll have to work those muscles to get the crumbs fine enough.
A 10 cup Bundt pan is the gold standard for this cake. Make sure it's well seasoned or non stick, but even then, we're going to grease it like our lives depend on it. This batter is sticky due to the sugar in the wafers and the coconut, and there's nothing more heartbreaking than a cake that leaves half its soul behind in the pan.
I also recommend a digital thermometer to check the internal temperature, which should hit about 205°F to 210°F when finished.
step-by-step Bundt Cake Method
- Preheat and Prep: Set your oven to 325°F and generously grease your Bundt pan with butter and a dusting of wafer crumbs. Note: This creates a "barrier" that helps the cake slide out later.
- Pulverize Wafers: Pulse the 12 oz vanilla wafers in a food processor until they resemble fine sand with no large chunks.
- Cream Butter: Beat the 1 cup unsalted butter and 2 cups granulated sugar until the mixture is pale, fluffy, and doubled in volume. Note: This should take about 5 minutes on medium high speed.
- Emulsify Eggs: Add the 6 large eggs one at a time, beating for 30 seconds after each addition. The batter should look smooth and silky.
- Incorporate Flavors: Stir in the 1 tbsp vanilla extract and 0.5 tsp kosher salt until just combined.
- Alternate Additions: Turn the mixer to low and add the wafer crumbs and 0.5 cup whole milk in three batches, starting and ending with crumbs. Mix until just combined to avoid overworking the batter.
- Fold In Texture: Using a spatula, gently fold in the 1 cup chopped pecans and 7 oz shredded coconut. Look for an even distribution of nuts and coconut throughout.
- The Golden Bake: Pour the batter into the prepared pan and bake for 1 hours 15 mins until a skewer comes out clean and the aroma of toasted vanilla fills the room.
- Cooling Phase: Let the cake sit in the pan for exactly 15 minutes before inverting it onto a wire rack. Listen for a slight "hiss" as the steam releases the edges.
If you enjoy this style of cake, you might also love the texture of a traditional Butter Cake recipe, which also focuses heavily on the creaming method for its structure.
Fixing Bakes and Texture Issues

Preventing the Death Grip
This cake is notorious for sticking because the sugar in the wafer crumbs and the shredded coconut caramelizes against the pan. If you don't grease the pan properly, it’s going to be a struggle.
I always use a paste made of equal parts melted butter, oil, and flour (or wafer crumbs) and brush it into every nook and cranny of the Bundt pan. If it does stick, don't panic. Place a hot, damp towel over the inverted pan for 5 minutes; the steam often helps release the sugar bond.
Solving a Dense Crumb
While this is a naturally dense cake, it shouldn't be "gummy." Gummy textures usually happen if the eggs were too cold or if the butter wasn't creamed long enough. The creaming stage is where we build the air bubbles that allow the cake to rise. If your butter is too soft (almost oily), it won't hold air.
If it's too cold, it won't incorporate. Aim for that "Goldilocks" temperature of 65°F where it's pliable but still cool to the touch.
| Problem | Root Cause | Solution |
|---|---|---|
| Cake Sinks | Oven door opened too early | Don't peek until at least 60 minutes have passed. |
| Dry Texture | Overbaked or crumbs too coarse | Check temp at 1 hour 10 mins and ensure wafers were finely powdered. |
| Dark Crust | Excess sugar in wafers burning | Move rack to the lower middle position to shield from top heat. |
The cooling process is just as vital as the baking. If you try to flip it too soon, it will collapse. If you wait too long, the cooling sugar will act like glue. Set a timer for 15 minutes the moment it comes out of the oven.
Common Mistakes Checklist
- ✓ Use room temperature eggs to prevent the batter from breaking/curdling.
- ✓ Pulse the wafers until they are a fine powder; coarse pieces lead to a sandy cake.
- ✓ Do not skip the "one at a time" egg addition; this is crucial for a stable emulsion.
- ✓ Measure your pecans after chopping to ensure the volume is accurate.
- ✓ Verify your oven temperature with an external thermometer to prevent burning.
Adjusting the Yield for Groups
Downsizing for Two
To make a half recipe, use a 5 cup Bundt or a standard loaf pan. Since you can't easily halve 6 eggs, beat 6 eggs in a bowl and use exactly 3/4 cup of the liquid. Reduce the baking time by about 20% and start checking for doneness at the 50 minute mark.
The texture remains the same, but you get a much more manageable amount for a small household.
Scaling Up for Crowds
When doubling this recipe for a big party, don't just double everything blindly. Keep the salt and vanilla at 1.5x the original amount to avoid overpowering the other flavors. You'll need two separate Bundt pans; do not try to bake a double batch in one giant pan, as the center will remain raw while the outside burns.
Rotate the pans halfway through the baking time to ensure even browning.
| Original Ingredient | Substitute | Why It Works |
|---|---|---|
| Whole Milk | Heavy Cream | Higher fat content creates an even silkier, richer crumb. |
| Pecans | Toasted Almonds | Provides a different nut profile while maintaining the crunch. |
| Vanilla Wafers | Chocolate Wafers | Note: Changes the flavor to a deep cocoa base, similar to a brownie cake. |
If you find yourself with leftover wafers, you can actually use them as a base for a Cookie Cake with recipe variations, which is another great way to use pantry staples.
Debunking Old Fashioned Baking Beliefs
One common myth is that you must use a specific brand of vanilla wafers for this cake to turn out. While the yellow box is classic, store brands often work just as well as long as they are the crisp, snap able kind.
Avoid the soft baked versions, as they have too much moisture and will turn your batter into a soggy mess. The structural integrity relies on that dry, toasted wafer starch.
Another misconception is that the coconut is just for flavor. In reality, the shredded coconut acts as a structural element. As the cake bakes, the coconut fibers help hold the dense crumb together, preventing it from becoming too fragile.
It also acts as a moisture reservoir, which is why this cake often tastes better on day two once the moisture has redistributed through the crumb.
Customizing Flavors and Dietary Needs
Tropical Twist
For a "Vanilla Wafer Cake with pineapple" version, fold in 1/2 cup of very well drained crushed pineapple along with the coconut. You must squeeze the pineapple in a paper towel until it’s nearly dry, or the extra liquid will cause the cake to sink.
The acidity of the pineapple cuts through the rich butter beautifully.
gluten-free Alternative
You can actually make this gluten-free by using gluten-free vanilla wafers (like Kinnikinnick). Because these wafers are often even drier than the standard version, you might need to add an extra tablespoon of milk to the batter to ensure it doesn't become crumbly.
The flavor remains nearly identical since the vanilla and butter do the heavy lifting.
Storing and Freezing Your Cake
- Countertop: This cake keeps exceptionally well at room temperature for up to 4 days. Keep it under a glass dome or wrapped tightly in plastic wrap to maintain that moisture.
- Refrigerator: If your kitchen is warm, store it in the fridge for up to a week. Let it come to room temperature before serving, as the butter in the cake will be firm when cold.
- Freezing: This is a freezer superstar. Wrap individual slices in plastic wrap and then foil. It will stay fresh for up to 3 months. To thaw, just leave it on the counter for an hour.
- Zero Waste: If you have a few slices that have gone slightly stale, don't toss them! Cube them up and use them as the base for a decadent bread pudding or toast them in a pan with a little butter to use as "cake croutons" over vanilla ice cream.
Serving Suggestions and Pairings
This cake is so rich that it really doesn't need a heavy frosting. A simple dusting of powdered sugar is elegant and highlights the beautiful pattern of the Bundt pan. However, if you want to take it to the next level, a warm lemon glaze or a drizzle of salted caramel can really make the flavors sing.
The acidity of a lemon glaze, in particular, balances the sweetness of the coconut perfectly.
For the ultimate experience, serve a thick slice slightly warm with a scoop of high-quality vanilla bean ice cream. The heat from the cake starts to melt the ice cream, creating a luscious sauce that soaks into the crumb. It’s also fantastic with a cup of strong, black coffee or a dark Earl Grey tea.
The tannins in the tea or the bitterness of the coffee provide a perfect contrast to the buttery, sugar rich cake.

Vanilla Wafer Cake FAQs
What is the difference between Nilla wafers and vanilla wafers?
Generally, no significant difference for baking. Nilla Wafers are a specific brand that popularized the thin, crisp vanilla cookie. For most recipes, including this Vanilla Wafer Cake, any crisp vanilla wafer will yield similar results.
What is the most delicious cake in the world?
Taste is subjective, but this Vanilla Wafer Cake is a top contender! Its dense, buttery crumb and intense vanilla flavor, derived from the crushed wafers, offer a unique and luxurious experience that many find irresistible.
What is the 1234 cake rule?
This is not a standard baking rule for Vanilla Wafer Cake. Some older cake recipes might use a "1-2-3-4" ratio (e.g., 1 cup butter, 2 cups sugar, 3 cups flour, 4 eggs), but this Vanilla Wafer Cake follows a different structure by using crushed wafers as its base.
What are the ingredients for a vanilla cake?
A traditional vanilla cake uses flour, sugar, butter, eggs, milk, vanilla extract, and leavening agents. This Vanilla Wafer Cake deviates by using finely crushed vanilla wafers as its primary dry ingredient, creating a denser, richer crumb. The key flavors still come from vanilla and butter.
Can I substitute the vanilla wafers with another cookie?
Yes, you can experiment with other crisp cookies, but it will change the flavor. For a similar texture and subtle sweetness, shortbread cookies could work, though they lack the distinct vanilla note. If you enjoy this method of using pre-baked components, you might like our Icebox Fruitcake recipe, which also relies on pantry staples for its structure.
Why is my Vanilla Wafer Cake sticking to the pan?
It's likely due to the caramelized sugar in the wafers and coconut. Ensure you grease your Bundt pan very thoroughly with butter and a dusting of wafer crumbs, and don't skip the recommended 15-minute cooling period in the pan before inverting.
Can I make this Vanilla Wafer Cake gluten-free?
Yes, this cake can be adapted to be gluten-free. You would need to use gluten-free vanilla wafers, as they will provide the necessary starchy base. You might also find that gluten-free wafers are a bit drier, so you may need to add an extra tablespoon of milk to the batter for moisture.
Vanilla Wafer Cake
Ingredients:
Instructions:
Nutrition Facts:
| Calories | 513 kcal |
|---|---|
| Protein | 5.8 g |
| Fat | 31.3 g |
| Carbs | 54.5 g |
| Fiber | 2.1 g |
| Sugar | 42.1 g |
| Sodium | 171 mg |
