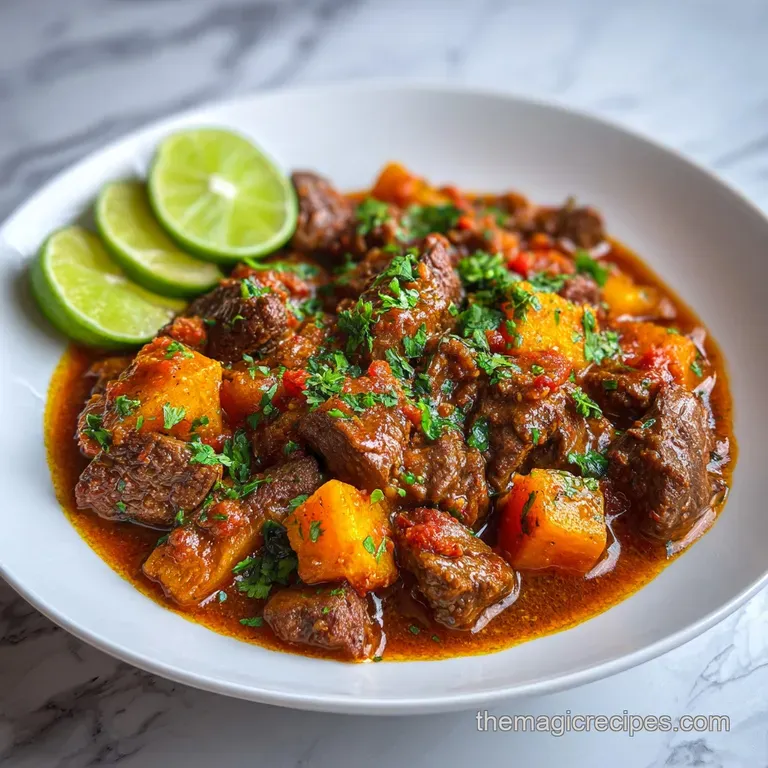
Fork-Tender Beef Chuck Roast
- Time: Active 20 minutes, Passive 2 hours 30 mins, Total 2 hours 50 mins
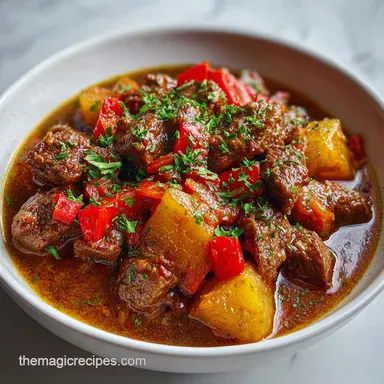
- Flavor/Texture Hook: Savory, fork tender beef with a rich, silky tomato garlic gravy.
- Perfect for: Busy Sunday meal prep or a high reward weeknight dinner.
- Hearty Weeknight Solutions for Traditional recetas de carne
- The Essential Logic of Tender Braising
- Precision Timing for Perfect Beef Results
- Structural Components for Deep Umami Flavor
- Essential Tools for Successful Beef Stews
- The Step by Step Braising Flow
- Fixing Common Beef Texture and Flavor Issues
- Customizing Flavor Profiles for Picky Eaters
- Preserving Flavor and Freshness for Later
- Smart Pairings for a Complete Dinner
- Debunking Common Meat Myths
- Very High in Sodium
- Recipe FAQs
- 📝 Recipe Card
Hearty Weeknight Solutions for Traditional recetas de carne
The sound of cold beef hitting a shimmering, oil slicked Dutch oven is a noise I never get tired of hearing. It starts as a sharp, aggressive hiss that gradually mellows into a rhythmic sizzle as the moisture evaporates and the crust begins to form.
Yesterday, my kitchen was filled with that exact sound, followed quickly by the punchy, aromatic scent of fresh sofrito and garlic hitting the fat. There is something deeply grounding about a big pot of beef simmering on the stove while the kids are finishing homework and the house starts to feel a bit more like a home.
I used to rush this process, thinking I could cheat time by cranking up the heat. I ended up with gray, rubbery meat that no amount of gravy could save. This specific approach to recetas de carne is about doing less but doing it smarter.
We aren't looking for a "quick boil"; we are looking for a gentle, lazy bubble that coaxes the beef into submission. It is a functional meal that works for a busy parent because most of the magic happens while you are doing something else.
If you have ever stared at a package of beef chuck and wondered if it could actually taste like a restaurant meal, this is the one. We are going to build layers of flavor from the initial hard sear to the final addition of briny olives to ensure every bite has a purpose.
You'll see the sauce transform from a thin broth into a thick, glossy glaze that clings to the potatoes. Trust me, once you master the timing, this will become your go to whenever you need a win in the kitchen.
The Essential Logic of Tender Braising
- Connective Tissue Conversion: Collagen in the beef chuck roast begins to melt into gelatin starting at 160°F, providing a silky mouthfeel that lean cuts can't replicate.
- Acidity for Fiber Relaxation: Apple cider vinegar acts as a chemical tenderizer, breaking down tough muscle fibers during the long simmer.
- The Maillard Crust: Searing the meat at high heat creates hundreds of new flavor compounds that later dissolve into the braising liquid.
- Starch Emulsification: As the russet potatoes soften, they release small amounts of starch that naturally thicken the bone broth without needing a flour roux.
- Osmotic Seasoning: Salt penetrates the beef over the 2.5 hour cook time, ensuring the interior of the meat is seasoned, not just the surface.
The Physics of Collagen Conversion
Braising works by maintaining a constant temperature that allows tough proteins to denature slowly. If the temperature is too high, the fibers squeeze out all their moisture before the collagen can melt, resulting in dry meat.
| Cook Method | Active Time | Resulting Texture | Best For |
|---|---|---|---|
| Stovetop | 20 minutes | Concentrated, thick sauce | Control over reduction |
| Oven (325°F) | 10 minutes | Even heat, very tender | Hands off cooking |
| Slow Cooker | 15 minutes | Thinner sauce, softest meat | Maximum convenience |
When choosing between methods, I usually stick to the stovetop. It allows me to see the sauce reduce in real time. If the liquid is disappearing too fast, I can just pop a lid on. If it looks too watery, I leave it open for the last 30 minutes.
It's about having that functional control over the final plate.
Precision Timing for Perfect Beef Results
Understanding exactly when your meat has reached its peak is the difference between a good dinner and a legendary one. We use the chuck roast here specifically because it is high in fat and connective tissue, which are the two things that prevent the meat from drying out during the long haul.
| Beef Thickness | Internal Temp | Rest Time | Visual Cue |
|---|---|---|---|
| 1.5 inch Cubes | 205°F (Final) | 10 minutes | Meat shreds easily with a fork |
| 1 inch Cubes | 200°F (Final) | 8 minutes | Edges look rounded and soft |
| 2 inch Cubes | 210°F (Final) | 15 minutes | Deep mahogany color throughout |
Chef Tip: Freeze your beef chuck for about 20 minutes before you start cubing it. This firms up the fat, allowing your knife to glide through without the meat sliding around. It results in much more uniform pieces, which means they all finish cooking at the exact same time.
Structural Components for Deep Umami Flavor
To get the most out of these recetas de carne, you have to look at your ingredients as building blocks. We aren't just throwing things in a pot; we are creating a foundation of flavor that gets stronger as it simmers.
Each ingredient has a job to do, whether it's providing the base, the body, or the "bright" finish.
| Ingredient | Science Role | Pro Secret |
|---|---|---|
| Beef Chuck | Primary protein and fat source | Pat it dry with paper towels to get a better sear. |
| Fresh Sofrito | Aromatic base and flavor bridge | Sauté it until the water evaporates for more intensity. |
| Bone Broth | Liquid medium and collagen boost | Use unsalted broth to control the final salt level perfectly. |
| Manzanilla Olives | Briny acid and salt balance | Add them in the last 20 minutes to keep them firm. |
We often focus so much on the meat that we forget the aromatics. The onion and green bell pepper provide the "sweet" vegetal notes that balance the heavy, savory nature of the beef. If you skip the sear or rush the aromatics, the stew will taste flat. Similar to the technique used in our Carne Guisada recipe, the magic is in the patience.
Essential Tools for Successful Beef Stews
You don't need a kitchen full of gadgets, but you do need tools that can handle high heat and long simmers. A heavy bottomed pot is non negotiable here. Thin pots have "hot spots" that will scorch your tomato sauce and ruin the whole batch before the meat is even halfway done.
- Cast Iron Dutch Oven: A 6 quart size is ideal for 3 lbs of beef. It retains heat better than any other material.
- Sharp Chef's Knife: Essential for cubing the roast without tearing the muscle fibers.
- Wooden Spoon: Best for scraping up the "fond" (the brown bits) from the bottom of the pot after searing.
- Paper Towels: The most underrated tool. Dry meat sears; wet meat steams.
I personally use a Lodge cast iron Dutch oven that has been in my family for years. It’s a workhorse. If you're using stainless steel, just keep an eye on your oil levels, as the meat is more likely to stick.
The step-by-step Braising Flow

- Dry and season the beef. Pat the 3 lbs of beef chuck cubes dry and toss with 2 tsp kosher salt and 1 tsp black pepper. Note: Salt draws out moisture, so do this immediately before searing.
- Sear in batches. Heat 3 tbsp neutral oil until it shimmers and slightly smokes. Brown the beef in 2 or 3 batches to avoid crowding.
- Sauté the aromatics. Remove the beef and add the diced yellow onion and green bell pepper. Cook 5 minutes until the onions are translucent and gold.
- Blooming the spices. Stir in the 6 minced garlic cloves, 0.5 cup sofrito, 1 tbsp cumin, and 1 tbsp dried oregano. Cook 2 minutes until the room smells like a spice shop.
- Deglaze the pot. Pour in 1 tbsp apple cider vinegar and 8 oz tomato sauce. Scrape the bottom of the pot with your wooden spoon to release the brown bits.
- Start the simmer. Return the beef to the pot and add 2 cups beef bone broth and 2 bay leaves. Bring to a boil, then drop to the lowest possible simmer.
- The long wait. Cover tightly and cook for 1 hour 45 mins. The beef should be starting to yield to pressure.
- Add the potatoes. Stir in the cubed russet potatoes. Cover and cook another 30 minutes until the potatoes are fork tender.
- Finish with olives. Add 0.5 cup manzanilla olives. Simmer uncovered for 10 minutes until the sauce is thick and glossy.
- Rest the stew. Remove the bay leaves. Let the pot sit for 10 minutes before serving. Note: This allows the juices to redistribute inside the meat.
Fixing Common Beef Texture and Flavor Issues
Even with the best intentions, things happen. Maybe the heat was a bit too high, or maybe the beef you bought was particularly stubborn. Don't panic; most issues in recetas de carne are easily fixed if you know what to look for.
The Meat is Still Tough
If you reach the 2.5 hour mark and the beef is still resisting your fork, it simply hasn't finished the collagen to gelatin conversion. This usually happens if the simmer was too low (below 180°F).
Just add another 0.5 cup of broth, put the lid back on, and give it another 30 minutes. Time is the only cure for tough beef.
The Sauce is Too Thin
If your stew looks more like a soup, don't worry. You can fix this without adding flour. Take a few pieces of the cooked potato and mash them against the side of the pot with your spoon. Stir them back into the liquid.
The released starch will act as a natural thickener, giving you that velvety texture we’re after.
| Problem | Root Cause | Solution |
|---|---|---|
| Grey Meat | Crowded pan during sear | Sear in smaller batches next time. |
| Bland Sauce | Under seasoned at the start | Add a splash of ACV or a pinch of salt at the end. |
| Mushy Potatoes | Added too early in the process | Always wait until the last 45 mins of cooking. |
Common Mistakes Checklist:
- ✓ Never skip the searing step; it’s where 50% of your flavor comes from.
- ✓ Don't use lean beef like sirloin; it will become dry and stringy.
- ✓ Keep the lid on tight to prevent the braising liquid from evaporating too fast.
- ✓ Check the simmer every 30 minutes to ensure it’s not a rolling boil.
- ✓ Taste for salt only at the very end, as the sauce concentrates as it cooks.
Customizing Flavor Profiles for Picky Eaters
One of the reasons I love these recetas de carne is how adaptable they are. If your kids hate olives, swap them out. If you want something richer, add a different fat. You can easily tweak this to fit your family’s specific palate without losing the integrity of the dish.
- For a Spicy Kick: Add 1 chopped jalapeño or a teaspoon of red pepper flakes during the aromatic sauté phase.
- Low Carb / Keto Swap: Replace the russet potatoes with cauliflower florets. Add the cauliflower in the last 15 minutes so they don't turn to mush.
- Deepened Umami: Add a tablespoon of soy sauce or Worcestershire sauce when you add the bone broth.
If you find yourself with leftover ingredients, you can apply similar logic to a different protein. For example, the aromatic base here works beautifully if you're looking for a Pollo en Pepitoria Receta recipe alternative.
Preserving Flavor and Freshness for Later
Storage Guidelines: This stew is a meal prep dream. Store it in an airtight container in the fridge for up to 4 days. In fact, many people (myself included) think it tastes better on day two because the spices have more time to meld and the beef continues to absorb the sauce as it cools.
Freezing Instructions: You can freeze this for up to 3 months. However, be aware that potatoes can sometimes change texture after freezing (they can become a bit grainy).
If you plan to freeze a whole batch, consider undercooking the potatoes slightly or leaving them out and adding fresh ones when you reheat.
Reheating Tips: Always reheat on the stove over medium low heat. If you use a microwave, the beef can become rubbery. Add a splash of water or broth to loosen the sauce, as it will thicken significantly in the fridge.
Zero Waste Tip: Don't throw away the potato peels! Toss them with a little oil and salt and bake them at 400°F until crispy for a quick snack while the stew simmers. Also, if you have leftover sauce but no meat, use it as a base for a quick pasta dish the next day.
Smart Pairings for a Complete Dinner
The classic pairing for this dish is a big mound of fluffy white rice. The rice acts like a sponge for that incredible gravy. If you want to go the extra mile, a side of sweet fried plantains (maduros) provides a beautiful sugary contrast to the salty, savory beef.
For a lighter option, a simple avocado salad with lime and red onion cuts through the richness of the stew perfectly. If you are serving this for a crowd, it also pairs well with crusty bread for dipping. For another great dinner idea, you might enjoy my Pollo Teriyaki Receta recipe, which offers a different but equally functional approach to weeknight proteins.
| Servings | Beef Amount | Pan Size | Total Cook Time |
|---|---|---|---|
| 2 People | 1 lb beef | 3 quart pot | 2 hours |
| 6 People | 3 lbs beef | 6 quart Dutch oven | 2 hours 50 mins |
| 12 People | 6 lbs beef | 10 quart stockpot | 3 hours 15 mins |
When scaling up, remember that you don't need to double the oil or the spices exactly. Start with 1.5x the spices and taste as you go. The most important thing is to make sure your pot is large enough that the beef isn't stacked more than two layers deep, or it won't cook evenly.
Debunking Common Meat Myths
Myth: Searing meat "locks in the juices." Truth: This is simply not true. Searing is entirely about the Maillard reaction, which creates flavor and color. Moisture is actually lost during the searing process because of the high heat. We sear for the taste, not the moisture.
Myth: You must boil the beef to make it tender. Truth: Boiling (212°F) is actually the enemy of tender beef. High heat causes the muscle fibers to contract violently, squeezing out moisture.
A gentle simmer (around 180-190°F) is the sweet spot for breaking down tough tissues while keeping the meat succulent.
Myth: Expensive cuts make better stew. Truth: Using a ribeye or filet mignon in a 3 hour stew is a waste of money. Those cuts are tender because they lack connective tissue. In a long braise, they will simply fall apart into dry, flavorless shreds.
The "cheaper," tougher cuts like chuck or shank are objectively better for this cooking method.

Very High in Sodium
1385 mg mg of sodium per serving (60% % of daily value)
The American Heart Association recommends limiting sodium intake to about 2,300mg per day for most adults. This recipe exceeds that limit.
Tips to Reduce Sodium in Your Recipe
-
Low-Sodium Broth-30%
Swap the regular beef bone broth for a low-sodium or no-salt added version. This can significantly reduce the overall sodium content.
-
Reduce Added Salt-25%
Cut back on the amount of kosher salt added. Start by halving the amount to 1 teaspoon and adjust to taste after cooking.
-
Rinse or Reduce Olives-20%
Manzanilla olives are brined and high in sodium. Rinse them thoroughly before adding, or consider reducing the quantity by half, or omitting them entirely.
-
No-Salt Added Tomato Sauce-15%
Use no-salt added tomato sauce. Many brands offer this option without compromising flavor.
-
Fresh Herbs & Spices
Enhance flavor with fresh herbs and spices like smoked paprika, garlic powder, onion powder, or a pinch of cayenne pepper. Experiment with different combinations to boost taste without adding sodium. The cumin and oregano are great, but consider adding more to compensate for less salt!
Recipe FAQs
What dishes can be prepared using beef chuck roast through braising?
Many comfort dishes work well. Braising is ideal for hearty stews like this recipe, classic pot roasts, flavorful shredded beef for tacos, or rich goulash style meals.
What are the 10 best cuts of beef worldwide for slow cooking?
Chuck, Brisket, Short Ribs, and Oxtail are top tier. These cuts are prized for their high collagen and fat content, which yields gelatin and deep flavor when cooked low and slow.
Which cut of beef is the most tender once braised?
Beef shank (osso buco cut) often achieves the softest texture. Because it has significant connective tissue and is surrounded by bone marrow, it breaks down into a silky, almost disintegrated consistency after 3+ hours of simmering.
What should I add to beef to maximize flavor during the sear?
Ensure the beef is completely dry before adding it to shimmering hot oil. Patting it dry is crucial because moisture prevents the high heat Maillard reaction, which creates hundreds of new flavor compounds.
How long must the stew simmer for the meat to become fork tender?
Aim for a minimum of 2 hours and 15 minutes total cooking time. The conversion of collagen to gelatin is fully realized when the internal temperature reaches between 200°F and 210°F, allowing the fibers to separate easily.
Is it true that adding acid like vinegar ruins the texture of the meat?
No, adding acid actually aids in tenderizing the fibers. A small amount of apple cider vinegar acts as a chemical tenderizer early in the braise, helping to relax the muscle tissues before the long simmer begins.
How can I thicken the sauce if my braise ends up too watery?
Mash some of the cooked potatoes against the side of the pot. The starch released from the potatoes naturally emulsifies into the liquid, creating a glossy, thickened gravy without needing a separate flour roux.
Velvety Beef Chuck Roast
Ingredients:
Instructions:
Nutrition Facts:
| Calories | 748 kcal |
|---|---|
| Protein | 51.6 g |
| Fat | 47.2 g |
| Carbs | 28.4 g |
| Fiber | 4.1 g |
| Sugar | 5.2 g |
| Sodium | 1385 mg |
