Crispy Buttermilk Waffles

- Time: 10 min active + 10 min cook
- Flavor & Texture: Tangy, buttery, and crispy
- Perfect for: A decadent weekend brunch
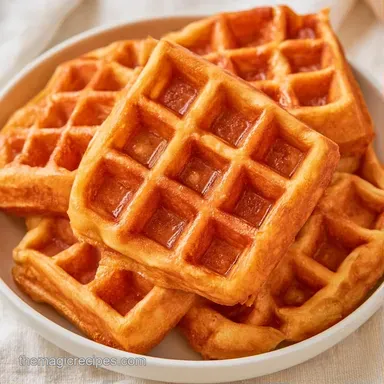
You can tell these are ready the moment that scent of toasted butter and vanilla fills the kitchen. There is something about the sound of the waffle iron clicking open to reveal a mahogany brown grid that just feels like a win.
These waffles avoid the common trap of being rubbery or limp. Instead, you get a shatter crisp exterior and a velvety center that holds up under a mountain of syrup.
This Buttermilk Waffles recipe relies on a few simple rules about mixing and heat. Follow the cues, and you will have bakery quality results without spending all morning in the kitchen.
Recipe Specs
This batch makes 6 waffles, which is usually enough for a family of four. The total time from cracking the first egg to plating is about 20 minutes.
The Ingredient List
A rich, tangy foundation is achieved by mixing butter and buttermilk. For a truly indulgent result, I recommend using the full-fat variety.
- 2 cups (250g) all-purpose flour Purpose: Creates the necessary structure
- 2 tbsp (25g) granulated sugar Purpose: Aids in browning
- 2 tsp (10g) baking powder Purpose: Provides lift
- 1 tsp (5g) baking soda Purpose: Creates fluffiness through acid reaction
- 1/2 tsp (3g) salt Purpose: Offsets the sweetness
- 2 cups (480ml) buttermilk Purpose: Brings tenderness and tang
- 2 large eggs Purpose: Acts as a binder
- 1/2 cup (115g) unsalted butter, melted and slightly cooled Purpose: Ensures a rich, crisp texture
- 1 tsp (5ml) vanilla extract Purpose: Contributes a sweet scent
Should you run out of buttermilk, a substitute can be used, though the tartness will vary.
| Original Ingredient | Substitute | Why It Works |
|---|---|---|
| Buttermilk (2 cups) | Whole milk + 2 tbsp lemon juice | Replicates the acidity. Note: A bit thinner than authentic buttermilk |
Necessary Gear
A standard waffle iron is the only specialty tool here. I suggest using a wire cooling rack to keep them from steaming on a flat plate. Two medium mixing bowls and a whisk will handle the batter.
Putting It Together
1. Prepare the Dry Mix
In a medium bowl, whisk together the all-purpose flour, granulated sugar, baking powder, baking soda, and salt. Stir until the mixture is free of any large clumps.
2. Blend the Wet Ingredients
In a separate bowl, whisk the buttermilk and melted butter, noting the rich, nutty scent. Add the eggs one by one, whisking well until the consistency is smooth. Stir in the vanilla extract.
3. Combine the Batter
Pour the wet mixture into the dry ingredients. Stir with a whisk just until the flour streaks vanish. A few small lumps are acceptable. Avoid over-mixing, as this will make the buttermilk waffles chewy instead of light.
4. The Cooking Process
Preheat the waffle iron until the indicator light signals it's ready. If necessary, lightly grease the iron with cooking spray.
Pour the batter into the center and spread it slightly with a spoon. Cook for 10 mins until steam stops escaping from the sides of the iron. This is the most dependable sign that they are done.
Move the waffles to a wire rack to preserve their crispness.
How It Actually Works

- The Acid Reaction: Buttermilk and baking soda create carbon dioxide bubbles immediately. This gives the batter a fast, airy lift.
- Minimal Mixing: Stopping before the batter is perfectly smooth limits gluten development. This keeps the crumb tender.
- Wire Rack Cooling: Moving waffles to a rack lets air circulate. It stops the bottom from getting soggy.
Fixing Common Problems
If your waffles are coming out soft, it is usually a heat or air issue. Stacking them on a plate creates a steam chamber that ruins the crunch.
Waffles Are Too Soft
Check your iron temperature. If the batter doesn't sizzle immediately, the iron isn't hot enough.
Batter Is Too Thick
The flour measurement can vary. If the batter won't spread, whisk in one extra tablespoon of buttermilk.
Waffles Stick to Iron
Ensure you grease the plates even if they are non-stick. Avoid using too much oil, or they will fry instead of bake.
| Problem | Fix |
|---|---|
| Soggy bottom | Move to a wire rack immediately |
| Rubbery texture | Mix less; leave small lumps |
| Sticking | Lightly grease with cooking spray |
Storage and Reheating
Place cooled waffles in a sealed container and refrigerate for up to 3 days.
These also freeze beautifully. Arrange them on a baking sheet for a 1-hour flash freeze before transferring them to a freezer-safe bag. They will last up to 1 month.
When reheating your buttermilk waffles, skip the microwave to prevent them from becoming soggy. Instead, use a toaster or heat them in a 350°F (175°C) oven for 5 minutes to restore their crispiness.
Easy Flavor Twists
You can easily change the profile of these buttermilk waffles by adding a few pantry staples.
Cinnamon Swirl
Whisk 1 tsp of cinnamon and 1 tbsp of brown sugar together. Swirl this into the batter after mixing but before cooking for a marbled look.
High-Protein Power
Swap 1/2 cup of the flour for a plain whey protein powder. The batter will be thicker, so you might need a splash more buttermilk to get the right consistency.
Plating Your Waffles
I enjoy pairing these with a pat of salted butter and warmed maple syrup. For an extra indulgent version, add fresh berries and a dollop of whipped cream. If you're in the mood for something savory, try a fried egg and a drizzle of spicy honey.
Recipe FAQs
How many calories are in a buttermilk waffle?
One waffle contains 365 kcal.
Tip: serve them warm for the best flavor.
Can batter be kept in the refrigerator?
Store the batter in the refrigerator for up to 24 hours.
Tip: gently whisk the mixture before cooking to recombine the ingredients.
Why are my waffles soggy?
Stacking them immediately or leaving them in the iron too long traps moisture.
Tip: transfer finished waffles to a wire rack to maintain crispiness.
Where should leftovers be stored?
Store cooled waffles in an airtight container and refrigerate for no more than 3 days.
Tip: For longer storage, flash freeze the waffles on a baking sheet before bagging them.
Which reheating method preserves the crunch?
Heat in a toaster or a 350°F (175°C) oven for 5 minutes.
Tip: skip the microwave to keep the waffles from getting soggy.
How are the waffles cooked?
Cook until steam stops escaping from the sides of the iron.
Tip: check that the iron is fully preheated before pouring the batter.
Do these waffles require melted butter?
Yes, melted and slightly cooled butter is essential for the richness.
Tip: ensure the butter has cooled slightly so it does not cook the eggs prematurely.
What makes these waffles fluffy?
The reaction between the buttermilk and the baking soda creates lift.
Tip: stir the batter only until flour streaks disappear to keep them light.
Buttermilk Waffles in 20 Minutes