Easy Easter Deviled Eggs: Pastel-Colored
- Time: 20 min active + 12 min cook + 60 min prep/chill = Total 1 hours 32 mins
- Flavor/Texture Hook: Velvety filling with a tangy, silky finish
- Perfect for: Family brunches, budget party appetizers, or easy meal prep
Deviled Eggs
That sound of eggs clicking against the bottom of the pot is basically the official soundtrack of every family gathering I've ever been to. For the longest time, I just followed the standard advice: put the eggs in, bring them to a boil, and let them bubble away for ten minutes.
But my eggs always came out like rubber balls, and that weird, sulfurous green ring around the yolk was basically a permanent fixture. It was frustrating because I wanted that bright, sunny yellow center, not something that looked like a science experiment.
Then I found out that most of us are just overcooking them by letting them boil too long. Once I switched to the "boil and sit" method, everything changed. The whites stayed tender, the yolks became creamy, and the peeling process actually worked without taking half the egg white with it.
This recipe is all about those small, smart tweaks that make Deviled Eggs actually taste high end without spending a fortune on fancy ingredients.
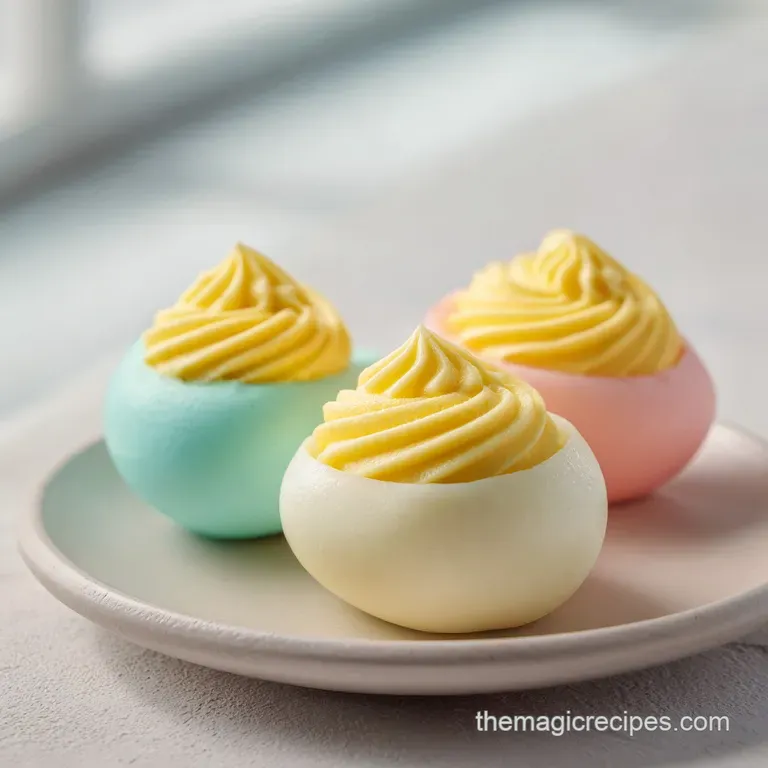
You can expect a filling that's completely smooth, almost like a savory mousse, and whites that have a soft, pastel glow. We're keeping the costs down by using pantry staples, but the presentation will look like you spent hours on it.
Whether you're making these for a casual snack or as part of some cute easter deviled eggs ideas, this method is the only way I'll do them now.
Why Most Recipes Fail
The biggest mistake people make is thinking that a rolling boil for the entire cooking time is the goal. When eggs bubble violently for ten minutes, the proteins in the white tighten up too much, leading to that rubbery texture. Plus, the sulfur in the whites reacts with the iron in the yolks, creating that unsightly green ring. According to the guides at Serious Eats, controlling the temperature is the only way to avoid this chemical reaction.
But the issues don't stop at the boiling. Most recipes tell you to just mash the yolks with a fork. Trust me on this, a fork is never enough. You'll always have tiny little yellow clumps that ruin the mouthfeel. The goal is a velvety consistency that pipes cleanly and melts in your mouth.
And then there's the seasoning. A lot of people just dump in mayo and mustard, but they forget the acid. Without a hit of vinegar, the fat from the mayo just coats your tongue and masks the flavor. You need that sharp contrast to make the flavors pop.
The Secrets to Success
- Thermal Shock: Moving eggs immediately from boiling water to ice water stops the cooking process instantly, which prevents the green ring.
- Sieve Filtering: Pressing yolks through a mesh sieve breaks them down into tiny particles, creating a silky paste.
- Acid Balance: A small amount of apple cider vinegar cuts through the richness of the mayonnaise.
- Dye Diffusion: Using gel coloring in warm water ensures the color sticks to the whites without bleeding into the filling.
| Method | Time | Texture | Best For |
|---|---|---|---|
| Stovetop Boil | Fast | Firm | Quick snacks |
| Boil & Sit | Medium | Tender | Party platters |
| Oven Baked | Slow | Consistent | Large batches |
Quick Recipe Specs
When you're planning your menu, it's helpful to know exactly how this fits in. These Deviled Eggs are incredibly budget friendly because the cost per serving is pennies, yet they feel like a premium appetizer.
I've found that prepping the whites and the filling separately allows you to manage your time better, especially if you're hosting a crowd.
The total time of 1 hours 32 mins might look long, but most of that is passive. The 12 minutes of sitting and the 10 minutes of icing are things you can do while you're tidying the kitchen or prepping other sides.
The real "work" is the 20 minutes of active assembly.
If you're looking for something to serve alongside these, a fresh spring salad provides a great acidic balance to the creamy eggs. It keeps the whole spread feeling light and seasonal.
The Essential Ingredients
I'm a big believer in using what you have, but a few specific choices here make a massive difference. For instance, I always use Dijon mustard instead of plain yellow mustard. It has a more complex, spicy profile that adds depth without being overpowering.
For the Eggs
- 6 large eggsWhy this? Large eggs provide the best yolk to white ratio
- 2 cups water
- 1 tsp saltWhy this? Helps prevent shells from cracking
- 2 cups ice water
For the Creamy Filling
- 1/2 cup mayonnaiseWhy this? Provides the necessary fat for a velvety texture
- 1 tbsp Dijon mustardWhy this? Adds a sharp, sophisticated tang
- 1 tsp apple cider vinegarWhy this? Cuts through the richness of the mayo
- 1/4 tsp salt
- 1/8 tsp black pepper
- 1/2 tsp smoked paprikaWhy this? Adds a subtle woodsy flavor and color
For the Easter Decorations
- 4 drops gel food coloringWhy this? More concentrated than liquid, prevents bleeding
- 1 tbsp warm water
- 1 stalk chives
- 1 small carrotWhy this? budget friendly way to add a pop of orange
| Original Ingredient | Substitute | Why It Works |
|---|---|---|
| Mayonnaise (1/2 cup) | Greek Yogurt (1/2 cup) | Similar creaminess. Note: More tangy and lower in fat |
| Dijon Mustard (1 tbsp) | Yellow Mustard (1 tbsp) | Same basic flavor profile. Note: Lacks the depth of Dijon |
| Apple Cider Vinegar | Lemon Juice | Same acidity. Note: Adds a brighter, citrusy note |
| Smoked Paprika | Regular Paprika | Similar color. Note: Lacks the smoky depth |
Right then, once you have your ingredients ready, make sure your eggs are at room temperature if possible. This prevents them from cracking when they hit the hot water.
Necessary Kitchen Gear
You don't need a professional kitchen to make these, but a few tools make the process way faster. I used to try and spoon the filling in, but it always looked messy. Using a simple Ziploc bag is a great budget hack if you don't own a piping bag.
The most critical piece of gear here is the fine mesh sieve. If you don't have one, you can use a potato ricer, but the sieve is the gold standard for getting those lumps out of the yolks.
Also, have a wide bowl ready for your ice bath. You want the eggs to be completely submerged so they cool evenly. If they're just floating in a small cup, some parts of the egg will keep cooking, and you'll be right back to dealing with those green rings.
Step-by-step Instructions
Let's get into it. Follow these steps closely, and you'll have the smoothest Deviled Eggs you've ever made.
Phase 1: The Perfect Hard Boil 1. Place eggs in a single layer at the bottom of the saucepan and cover with water by at least one inch. 2. Bring water to a rolling boil, then immediately remove from heat and cover with a lid. Let sit undisturbed for 12 minutes.
Note: This gentle heat prevents rubbery whites. 3. Transfer eggs into an ice water bath for 10 minutes to stop the cooking process. until the shells feel cold to the touch.
Phase 2: Pastel Coloring & Prep 4. Slice eggs in half lengthwise. Remove yolks and place them in a bowl. 5. Mix gel food coloring into warm water. Dip the bottom of each white into the dye for 5-10 seconds to achieve a pastel hue and set aside to dry.
Note: Don't soak them, or the color will be too dark.
Phase 3: Creating the Silky Filling 6. Press the yolks through a fine mesh sieve into a bowl to remove all lumps. until the yolk looks like a fine powder. 7. Stir in mayonnaise, Dijon mustard, apple cider vinegar, salt, and black pepper. Whisk vigorously until a smooth paste forms.
Note: Whisking introduces air, making the filling lighter.
Phase 4: The Easter Finishing Touches 8. Spoon the mixture into a piping bag or Ziploc bag with a snipped corner and pipe the filling into the colored whites. 9. Garnish with a pinch of smoked paprika and decorated with finely snipped chives and shaved carrot ribbons.
Until the colors look vibrant and balanced.
Chef's Note: To get those carrot ribbons, use a vegetable peeler to take long, thin strips from the carrot, then julienne them into tiny shreds. It looks fancy but takes two seconds.
Mistakes and Troubleshooting
Even for a pro, things can go sideways. Maybe the shells are sticking, or the filling is too soft to hold its shape. Most of these issues come down to temperature and ratios.
| Issue | Solution |
|---|---|
| Why are my eggs cracking during the boil | This usually happens because of a sudden temperature jump. If you put ice cold eggs into simmering water, the air inside the egg expands too quickly and cracks the shell. To avoid this, let your eggs |
| My filling is too runny to pipe | If your filling isn't holding a peak, you've likely added too much mayonnaise or vinegar. The fix is simple: add another hard boiled egg yolk. Mash it through the sieve and stir it in. This adds struc |
| Stop the food coloring from bleeding | Liquid food coloring is too watery and will seep into the egg white. Gel coloring is thicker and sits on the surface. If you must use liquid, dip the eggs in the dye and then immediately pat them dry |
Common Mistakes Checklist
- ✓ Avoid boiling the eggs for the full 12 minutes.
- ✓ Never skip the ice bath; it's the only way to stop the cook.
- ✓ Use gel colors instead of liquid for colored easter deviled eggs.
- ✓ Always sieve your yolks for that velvety texture.
- ✓ Pat the egg whites dry before piping to ensure the filling sticks.
Flavor Twists and Swaps
Once you've got the base down, you can really have fun with the toppings. This is where you can turn a budget snack into something that feels like it belongs at a fancy party. If you want to go all out, you can try making some smoked salmon eggs, which use a similar base but add a luxurious salty kick.
- - Spicy Kick
- Add a pinch of cayenne pepper or a drop of Sriracha to the filling.
- - Freshness
- Stir in some finely minced celery or capers for a bit of crunch.
- - Bacon Twist
- Top with a tiny piece of crispy bacon and a slice of jalapeño.
If you're making easy easter deviled eggs for kids, you can use a tiny piece of black olive to make "bunny ears" or use the carrot ribbons to make little "flower" shapes on top. It's a great way to get kids involved in the kitchen.
Quick Decision Guide
- If you want more tang, do: Add an extra 1/2 tsp of apple cider vinegar.
- If you want more creaminess, do: Increase the mayo by 1 tbsp.
- If you want a smoky flavor, do: Double the smoked paprika.
Preservation Secrets
Storing Deviled Eggs can be tricky because the filling is mostly fat and protein, which can dry out or pick up smells from the fridge. I always recommend storing them in an airtight container, but here's the pro trick: cover the tops with a damp paper towel before closing the lid.
This keeps the filling from forming a "skin."
These will stay fresh in the fridge for about 2-3 days. I wouldn't recommend them after that, as the flavor of the eggs can start to shift. As for freezing, honestly, don't even bother. Freezing cooked egg whites makes them spongy and weird, and the mayo in the filling will separate. It's just not worth the risk.
To reheat them, you don't. These are best served chilled. If they've been in the fridge too long, just let them sit at room temperature for 15 minutes before serving to let the flavors wake up.
Zero Waste Tips
- Carrot Tops: If your carrot came with the green leaves, don't toss them! Chop them up and add them to a pesto or a salad.
- Eggshell Compost: Crush your shells and add them to your garden soil; they're a great source of calcium.
- Leftover Filling: If you have a bit of filling left in the bag, stir it into a tuna salad sandwich for an instant flavor boost.
Best Serving Suggestions
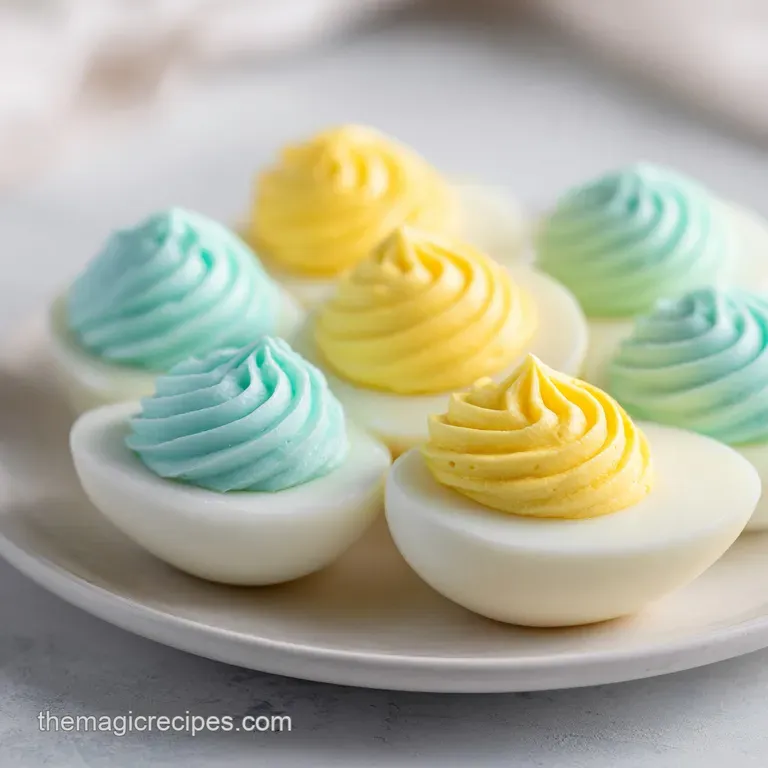
Presentation is everything when it comes to Deviled Eggs. If you're serving these for a holiday, I love arranging them in a circle on a large white platter. The pastel colors of the whites and the orange of the carrot ribbons really stand out against a clean background.
For a spring brunch, pair these with some fresh fruit and a light beverage. They're a great starter because they're filling but not too heavy. I usually put them out about 30 minutes before guests arrive, but I keep them chilled until the last second to maintain that velvety texture.
If you're taking these to a picnic, the biggest challenge is keeping them from sliding around. I use a muffin tin or a dedicated egg carrier to keep them locked in place. Just make sure you have a cooler bag with plenty of ice, as mayo based fillings need to stay cold for safety.
Right then, that's the secret to the best Deviled Eggs you'll ever make. They're simple, budget friendly, and look absolutely stunning on a platter. Whether you're doing a simple version or trying out some colored easter deviled eggs, the key is all in the temperature and that sieve.
Now, go get some eggs and start piping!
Recipe FAQs
Are deviled eggs an Easter tradition?
Yes, they are a classic staple for Easter. Their use of eggs aligns with the holiday's traditional themes of rebirth and spring.
What is the secret ingredient for the best flavor?
Apple cider vinegar. This provides a sharp, tangy acidity that cuts through the richness of the mayonnaise and egg yolks.
How to prevent the egg whites from becoming rubbery?
Remove the pan from the heat immediately after the water reaches a rolling boil. Let the eggs sit covered and undisturbed for 12 minutes to ensure a gentle cook.
How to achieve a perfectly smooth filling without lumps?
Press the cooked yolks through a fine mesh sieve into a bowl. This mechanical filtration removes all lumps before you whisk in the mayonnaise and Dijon mustard.
How to dye the egg whites for a pastel look?
Mix gel food coloring into warm water. Dip the bottom of each egg white into the dye for 5-10 seconds and let them dry.
Is it true that eggs must boil continuously for 12 minutes?
No, this is a common misconception. Boiling them continuously often leads to overcooking; instead, remove them from the heat and let them steep for 12 minutes.
How to stop the cooking process quickly after boiling?
Transfer the eggs into an ice water bath for 10 minutes. This immediate temperature drop prevents overcooking and makes the shells much easier to remove.
Easy Easter Deviled Eggs

