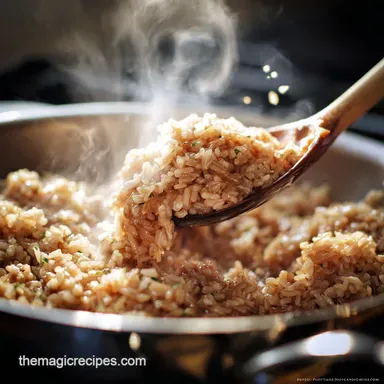
Fluffy Stovetop Brown Rice in 65 Minutes

Rinsing removes surface starch while toasting creates a nutty base, ensuring Stovetop Brown Rice stays fluffy. This method helps reduce the clumping common with whole grains.
- Time: 5 min active + 50 min cooking + 10 min resting
- Flavor & Texture: Nutty, chewy and distinct grains
- Perfect for: Healthy meal prep and nourishing side dishes
Easy Stovetop Brown Rice
Gummy, clumpy brown rice is a common kitchen fail. It usually happens because the surface starch creates a glue-like paste during the long simmer, turning your grains into a mushy mass.
The key is a two-step process: a thorough rinse and a quick toast. This ensures the grains stay separate and the texture remains chewy rather than sticky.
You'll get a vibrant, nourishing side that works with everything from stir-fries to roasted vegetables. This Stovetop Brown Rice method focuses on controlled steam to get the texture spot on.
The Texture Trick
- The Rinse
- Washing the grains removes excess starch so the rice doesn't stick together.
- The Toast
- Heating the rice in oil coats each grain, which creates a barrier against clumping.
- The Rest
- Letting the pot sit allows the remaining steam to redistribute, ensuring every grain is tender.
For those wondering about the stovetop brown rice water ratio, the 2:1 ratio is the standard here to account for the longer cook time of whole grains.
| Method | Time | Texture | Best For |
|---|---|---|---|
| Stovetop | 60 min | Nutty & Chewy | Texture control |
| Rice Cooker | 50 min | Soft & Uniform | Convenience |
The Ingredient List
The quality of the grain matters. Long-grain varieties generally stay more distinct than short-grain options.
| Ingredient | Role | If You Don't Have It |
|---|---|---|
| Brown Rice | Main Base | Farro (approximate) |
| Olive Oil | Coating | Butter or Ghee |
| Sea Salt | Flavor | Kosher salt |
- 1 cup (190g) long-grain brown rice
- 2 cups (480ml) water
- 1/2 tsp (3g) sea salt Why this? Enhances the natural nuttiness of the grain
- 1 tbsp (14g) extra virgin olive oil
Essential Gear
A heavy bottomed saucepan is a must. Thin pots create hot spots that can scorch the rice at the bottom before the top is cooked. You'll also need a lid that fits tightly to keep the steam trapped inside.
Cooking Steps

Rinsing the Grains
Place the 1 cup (190g) long-grain brown rice in a fine mesh strainer. Rinse under cold running water and agitate the grains with your fingers until the water runs clear.
Simmering the Rice
Heat 1 tbsp (14g) extra virgin olive oil in a heavy bottomed saucepan over medium heat. Add the rinsed rice and toast for 2 minutes until the grains smell nutty.
Pour in 2 cups (480ml) water and 1/2 tsp (3g) sea salt, then bring the mixture to a boil. Immediately reduce heat to the lowest setting, cover the pan with a tight fitting lid, and simmer undisturbed for 40–45 minutes.
Note: Do not lift the lid, as this lets out the steam needed for the stovetop brown rice cook time.
Finishing and Fluffing
Remove the pan from the heat while keeping the lid on. Let the pot sit for 10 minutes to allow the steam to settle. Remove the lid and gently fluff the grains with a fork to release excess moisture.
Fixing Common Issues
Fixing Crunchy Rice
If the grains are still too firm after resting, sprinkle 2 tbsp (30ml) of boiling water over the top. Cover again and return to the lowest heat for 5 more minutes. This usually happens if the lid isn't airtight.
Preventing Bottom Scorching
Keep the heat at the absolute lowest setting. If you notice a burning smell, immediately move the pot to a cool burner and add a splash of water to the edges.
Stopping the Mush
Avoid stirring the rice during the simmering process. Stirring releases more starch and breaks the grains, which leads to a gummy texture.
Customizing Your Grains
I like adding a pinch of turmeric or a crushed garlic clove during the toasting phase for a more vibrant flavor. You can also swap the liquid for a savory alternative.
| Original Ingredient | Substitute | Why It Works |
|---|---|---|
| Water | Vegetable Broth | Adds savory depth and richness |
| Olive Oil | Coconut Oil | Similar fat, adds a subtle tropical note |
Leftover Storage
Store the cooked rice in an airtight jar in the refrigerator for 4–5 days. To freeze, spread the rice on a baking sheet to cool fully before placing it in a freezer bag; it will keep for 3 months.
When reheating, stir in 1 tsp of water per cup of rice and microwave covered for 1–2 minutes, then check that the center reaches 165°F/74°C; if not, heat in short bursts until it does. This replenishes the moisture without making the grains mushy.
Serving Suggestions
This rice makes a wonderful foundation for a healthy bowl. Try combining it with grilled tofu and steamed bok choy, topped with Vietnamese Peanut Sauce for a vibrant, savory flavor. It is also delicious with a bit of fresh parsley and a squeeze of lemon.
Recipe FAQs
What is the cooking time for brown rice?
Simmer the grains for 40–45 minutes followed by a 10-minute rest.
Tip: Keep the lid tight to ensure the steam doesn't escape.
Why does brown rice take 45 minutes to cook?
The outer bran layer is tougher than white rice and needs more time to absorb water.
Tip: Rinsing the rice first helps the water penetrate the grains more evenly.
How to cook brown rice in cooker?
Combine the rinsed rice and water in the machine and use the brown rice setting for a softer, uniform texture.
Tip: This method takes about 50 minutes and is ideal for convenience.
Can a pressure cooker be used?
Yes, a pressure cooker can be used to reduce the total cooking time significantly.
Tip: This pairs well with a spicy topping like a cayenne garlic sauce for extra flavor.
Stovetop Brown Rice for 6 Servings