Summer Slab Cherry Pie with Fresh Cherries
- Time: 20 min active + 45 min baking
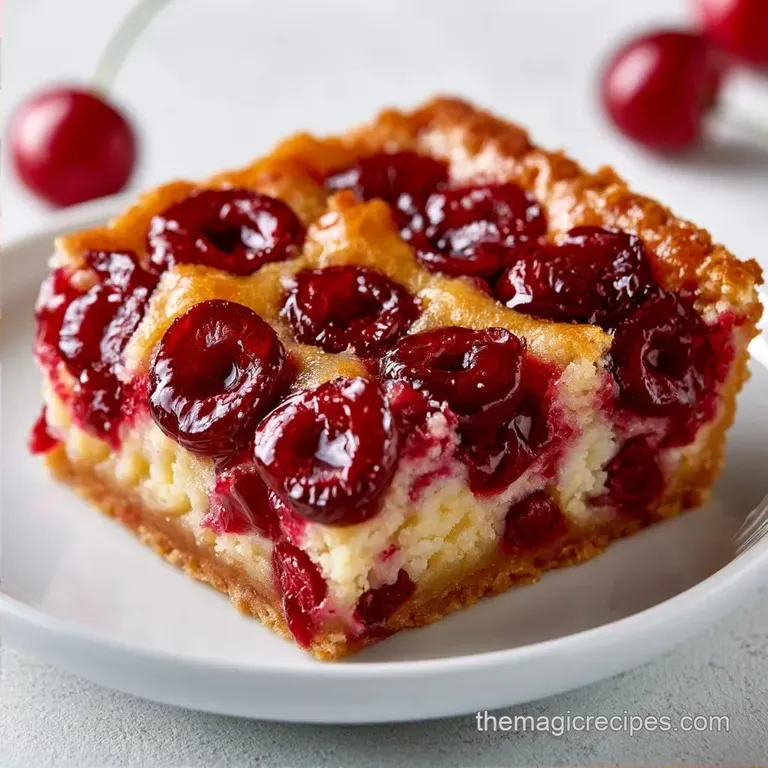
- Flavor/Texture Hook: Deep mahogany brown crust with tart, bubbling cherries
- Perfect for: Family reunions and summer porch parties
- Summer Slab Cherry Pie for Big Crowds
- Reasons to Love This Pie
- What Each Ingredient Does
- Gear for the Job
- The Baking Process
- Solving Common Baking Issues
- Troubleshooting Common Issues
- Easy Flavor Twists
- Adjustment Guidelines
- Pie Baking Myths
- Saving and Storing Leftovers
- Serving Your Cherry Pie
- Recipe FAQs
- 📝 Recipe Card
Summer Slab Cherry Pie for Big Crowds
The smell of hot cherries and toasted sugar always takes me back to my aunt's backyard parties. I remember watching her slide a massive sheet of pie into the oven while the kids ran through the sprinklers.
It wasn't a dainty round pie; it was a sprawling, rustic rectangle that fed twenty people without anyone having to fight over the last slice.
Most people dread making fruit pies because the bottom often turns into a soggy mess. I've spent a few summers figuring out how to avoid that. This version skips the deep dish and goes for a flat, wide spread. It means more of the crust hits the heat, and the cherries cook down evenly.
This Summer Slab Cherry Pie isn't about precision or fancy plating. It's about getting a huge amount of decadent, fruit filled pastry on the table. You get that bakery quality crunch on the edges and a center that stays jammy and rich.
Reasons to Love This Pie
The Slab Shape: Using a baking sheet means you get more "corner pieces," which are the best part of any pie. It also makes it way easier to transport to a potluck than a round dish.
Maple Syrup Base: I swapped white sugar for maple syrup. This adds a woody depth that cuts through the tartness of the cherries. It also helps the filling thicken into a glossy, rich consistency.
Fast Prep: Since we aren't rolling out a complex lattice or crimping edges for an hour, you spend less time stressing and more time eating.
| Feature | Stovetop Pre cook | Oven Only Method |
|---|---|---|
| Time | Adds 15 minutes | Faster overall |
| Filling | Thicker, more stable | Fresh, jammy texture |
| Best For | Extremely juicy fruit | Standard sweet cherries |
What Each Ingredient Does
Almond Extract: This is the magic touch. Cherries and almonds are in the same botanical family, so a tiny bit of extract makes the fruit taste more "cherry like."
Cornstarch: It acts as the binder. Without it, the maple syrup and cherry juices would just run all over your baking sheet.
Turbinado Sugar: Those large crystals don't melt completely. They leave a crunchy, sparkling finish on the crust that looks professional.
| Ingredient | What It Does | Best Swap |
|---|---|---|
| Fresh Cherries | Main flavor and bulk | Frozen cherries (thawed) |
| Maple Syrup | Sweetener and thickness | Honey (adds floral notes) |
| Cornstarch | Thickens the juices | Arrowroot powder |
| Refrigerated Crust | Structural base | Homemade flaky pastry |
Gear for the Job
You don't need a professional kitchen for this, but a few specific tools make it a breeze. A 12x17 inch rimmed baking sheet is mandatory. If you use a cookie sheet without a rim, the cherry juice will leak onto your oven floor and cause a smoke show.
I recommend using parchment paper. It prevents the bottom crust from sticking and makes cleanup a five second job. You'll also need a pastry brush for the egg wash and a fork to prick the bottom of the dough.
The Baking Process
Preparing the Filling
Toss the pitted cherries, maple syrup, cornstarch, lemon juice, almond extract, and salt in a large bowl. Stir until the cornstarch is fully dissolved and the cherries are coated.
Layering the Base
Line a 12x17 inch rimmed baking sheet with parchment paper. Roll out the first pie crust to fit the dimensions of the pan, pressing it firmly into the corners. Prick the bottom with a fork. Note: This prevents the crust from puffing up in the middle.
Assembling the Slab
Pour the cherry mixture evenly over the bottom crust, spreading it with a spatula to ensure no gaps. Roll out the second crust and drape it over the top. Either seal the edges for a closed pie or cut strips to create a lattice top.
Achieving the Golden Finish
Whisk the egg and water together, brush the entire top crust generously, and sprinkle with turbinado sugar.
Baking to Perfection
Bake at 400°F (200°C) for 40-45 minutes until the crust is deep mahogany brown and the filling is bubbling.
Chef's Note: If the edges of the crust start to brown too quickly, loosely tent them with foil for the last 10 minutes. This keeps the edges from burning while the center finishes.
Solving Common Baking Issues

The most common complaint with slab pies is the "soggy bottom." This happens when the fruit releases too much moisture before the crust can set. Using a high heat of 400°F helps sear the bottom crust quickly, locking out the juice.
Another issue is the filling bubbling over the sides. This usually means the cherries were too juicy or the cornstarch wasn't mixed in well. If you see it happening, just slide the pan a few inches to a different spot in the oven.
Troubleshooting Common Issues
| Issue | Solution |
|---|---|
| Why Your Crust Stays Pale | If your crust isn't browning, you might have skipped the egg wash. The proteins in the egg caramelize under the heat. Ensure you brush the dough edge to edge. |
| Why Your Filling Is Runny | This often happens if the cherries were frozen and didn't drain. Excess water dilutes the cornstarch. You can add an extra tablespoon of cornstarch if using frozen fruit. |
| Why The Crust Shrinks | If the dough is too cold or stretched too thin, it can pull away from the edges. Let the rolled out dough sit for 2 minutes before pressing it into the pan. |
Easy Flavor Twists
If you want to switch things up, you can easily adapt this Summer Slab Cherry Pie for other fruits. A peach pie recipe uses similar logic but requires slightly less cornstarch because peaches are less acidic than cherries.
For those who want a different texture, try a crumb topping. Mix 1/2 cup flour, 1/2 cup brown sugar, and 4 tbsp cold butter. Sprinkle this over the cherries instead of using a second crust. It creates a buttery, sandy layer that contrasts the tart fruit.
If you're using canned pie filling to save time, skip the maple syrup and cornstarch. Just pour the filling in, top with the crust, and bake as directed. It's less decadent than fresh fruit but works in a pinch.
Adjustment Guidelines
Scaling Down (Half Batch) Use a 9x13 inch pan. Reduce the bake time by about 10 minutes. Since you only need half an egg, whisk one egg in a bowl and pour half of it into your wash.
Scaling Up (Double Batch) Do not try to fit more filling into one pan, or it will overflow. Instead, bake two separate sheets. Keep the temperature at 400°F, but rotate the pans halfway through the bake to ensure even browning.
Baking Variations If you prefer a more shattering crust, replace the refrigerated dough with puff pastry. Puff pastry is richer and fluffier, but it needs a slightly lower temperature (375°F) to avoid burning before the cherries bubble.
Pie Baking Myths
Some people believe you must "blind bake" (pre bake) the bottom crust to avoid sogginess. While that works for custard pies, it's unnecessary here. The high heat and the cornstarch binder do the job.
Another myth is that you should avoid frozen cherries in slab pies. Actually, frozen cherries often hold their shape better than fresh ones because the freezing process breaks down the cell walls, allowing the syrup to penetrate deeper.
Saving and Storing Leftovers
This pie stays fresh at room temperature for about 2 days if kept in a cool spot. For longer storage, move it to the fridge. It will last 4-5 days there, though the crust loses some of its crunch.
To reheat, avoid the microwave. It makes the crust rubbery. Instead, pop a slice in a 350°F oven for 5-10 minutes. This brings back the crispy texture.
If you have a lot left over, you can freeze individual slices. Wrap them tightly in plastic wrap and then foil. They'll stay good for 2 months. Thaw in the fridge overnight before reheating.
For zero waste, don't throw away the cherry pits if you pitted them yourself. While you can't eat them, some people dry them out to use in homemade infusions. More practically, any leftover scraps of pie crust can be sprinkled with cinnamon sugar and baked for 8 minutes as a quick snack. If you love tart fruit desserts, you might also enjoy a rhubarb pie during the same season.
Serving Your Cherry Pie
The best way to serve this is warm, but not piping hot. Let it sit for 20 minutes after leaving the oven. This allows the filling to set so it doesn't run everywhere when you slice it.
A scoop of vanilla bean ice cream is the classic choice. The cold cream melts into the warm cherries, creating a rich, creamy sauce. For a more modern twist, try a dollop of crème fraîche or a sprinkle of flaky sea salt on top to highlight the maple syrup.
Since it's a slab, you can cut it into squares or long rectangles. Rectangles feel more like a tart and look great on a platter. This Summer Slab Cherry Pie is a crowd pleaser because it's generous, rustic, and tastes like a true summer afternoon.
Recipe FAQs
What makes this slab cherry pie a great summer dessert recipe?
Yes, it is ideal for warm weather. The slab format allows the pie to cool faster and makes it much easier to slice and serve at outdoor gatherings than a deep dish pie.
Is a slab pie the best dessert for summer hosting?
Yes, it is the most efficient choice for crowds. Using a 12x17 inch baking sheet yields 12 generous servings in one batch, removing the need to bake multiple traditional round pies.
Is it true that slab pies are no-bake desserts?
No, this is a common misconception. This recipe must be baked at 400°F (200°C) for 40-45 minutes to ensure the crust reaches a mahogany brown color and the filling bubbles.
Can this cherry pie be made as a healthy vegan dessert?
No, this recipe is not vegan. It requires a large egg for the glaze and refrigerated pie crusts which typically contain animal based fats.
Why is this one of the best dessert recipes for fresh cherries?
It enhances the natural fruit flavor without masking it. The combination of maple syrup and almond extract brings out the cherries' sweetness. If you loved the sweet tart balance in this recipe, see how we use the same acid technique in classic red sangria.
Is this a good go-to simple dessert recipe for beginners?
Yes, it is incredibly straightforward. Using pre-made refrigerated crusts and a single rimmed baking sheet eliminates the technical difficulty of rolling and fitting dough into a deep pie tin.
How do I prevent the crust from staying pale?
Brush the top crust generously with an egg wash. Whisk one egg with one tablespoon of water and apply it edge to edge before sprinkling with turbinado sugar to ensure proper caramelization.
Summer Slab Cherry Pie

