Burger Patty Masterclass: How to Get a Pub-Style Juicy Burger

- The Ultimate Burger Patty: Elevating the Standard Recipe
- Mastering Juiciness: The Science Behind the Perfect Burger Patty
- Essential Components: Ingredients for a Professional Burger Patty
- From Grind to Grill: Step-by-Step Patty Formation and Cooking
- Professional Techniques: Chef's Secrets and Troubleshooting Your Hamburger
- Preparation and Preservation: Storing Your Homemade Burger Patties
- Building the Perfect Burger: Recommended Pairings and Assembly
- Recipe FAQs
- 📝 Recipe Card
The Ultimate Burger Patty: Elevating the Standard Recipe
That sizzling sound when the patty hits the ripping hot cast iron? That’s not just noise, that’s the sound of the Maillard reaction kicking off it’s the start of something truly magnificent. A perfect burger patty is deeply savoury, rich, and so juicy it threatens to drip down your forearm.
It should smell like the best summer cookout you’ve ever attended.
We’re not talking about those dry, dense hockey pucks you sometimes get at cookouts. This is about effortless weeknight excellence. Nailing the burger patty recipe is a culinary superpower; it takes a simple, inexpensive ingredient and turns it into a gourmet feast in minutes.
Trust me, once you master this basic technique, you will never buy pre-made patties again.
So, let’s ditch the weird fillers and the old myths about over seasoning. We’re going to focus purely on science, temperature, and technique. This is how you make a burger patty that is unbelievably juicy every single time.
Mastering Juiciness: The Science Behind the Perfect Burger Patty
Defining the Pub-Style Difference
When I talk about "pub-style," I mean maximum flavour with minimal fuss. This isn't a complex, blended patty packed with herbs and spices. It relies on the quality of the fat and the sear to deliver deep, unmistakable flavour. We want a robust, slightly crumbly texture, not something that bounces when you drop it.
Why We Skip the Fillers
I know, I know. Your grandmother added breadcrumbs soaked in milk. But honestly? Fillers like eggs, breadcrumbs, or onion powder are usually just used to mask mediocre meat or prevent shrinkage when cooking lean cuts. If you start with good, fatty meat, you don't need them.
Fillers dilute the pure, satisfying flavour of the ground chuck. Pure meat power wins every time.
The Importance of the 80/20 Ratio
This ratio is non-negotiable for true pub-style perfection. The 80% lean meat gives you structure, but the 20% fat provides the incredible moisture. That fat renders down during cooking, effectively basting the patty from the inside out. If you go leaner, you end up with dry sawdust, which is a tragedy we must avoid.
The Chill Factor: Preventing Fat Loss
The temperature of your meat is your single biggest ally. Cold fat melts slower. If your meat is even slightly warm when you form the patties, that precious fat starts melting and separating before it hits the pan.
Keep the ground chuck refrigerator cold until the very second you cook it, which helps the patties hold their shape brilliantly.
Utilizing the Crucial 'Dimple' Technique
Have you ever cooked a patty perfectly, only to find it ballooned into a frustrating dome shape? That’s where the dimple comes in. Meat naturally contracts inward as it cooks under high heat.
By pressing a shallow indentation (the 'dimple') in the centre of the raw patty, you allow the meat to contract without forming that annoying bulge. This ensures an even, flat cooking surface for your cheese.
The Role of Salt and Resting Time
We treat salt like a surgical tool in this recipe. Salt draws out moisture, which is great for a steak crust, but bad for a burger mix. We season heavily, but immediately before the patty hits the scorching heat.
After cooking, resting is key just two minutes allows the stressed internal juices to redistribute. Skipping the rest means serving dry, tense patties.
Essential Components: Ingredients for a Professional Burger Patty
Selecting the Optimal Grind (Chuck)
Chuck is the absolute champion for burgers. It has a beautiful, rich flavour and typically hits that sweet 80/20 fat ratio naturally. Ask your butcher to grind it fresh —pre-packaged meat often gets smashed and loses its light, airy texture.
If you’re feeling extra, mix chuck with a bit of short rib.
Essential Seasoning Ratios
The key here is simplicity and liberal application. We use flaky sea salt and freshly ground black pepper, and that's usually it. I sometimes throw in a tablespoon of Worcestershire sauce directly into the cold meat for an extra layer of savouriness.
But don't go crazy with a spice rack; we want the quality of the meat to speak for itself.
What Not to Substitute (The Purest Method)
The fat content is sacred; don't substitute the 20% fat. If you absolutely need to use a leaner meat for health reasons, you must introduce fat back in (like softened butter or rendered bacon fat).
| Ingredient | Why I Use It | Viable Substitute |
|---|---|---|
| 80/20 Ground Beef | Perfect internal moisture | high-quality ground brisket (richer flavour) |
| Worcestershire Sauce | Deep umami kick | 1 tsp Soy sauce or Marmite (use sparingly!) |
| Flaky Sea Salt | Ideal textural crunch | Kosher salt (Avoid fine table salt, which over seasons quickly) |
From Grind to Grill: step-by-step Patty Formation and Cooking

Gentle Mixing: Maintaining Meat Texture
This step is critical for a tender burger. You must use extremely light, cold hands. Think of it less like kneading dough and more like lovingly folding laundry. Mix the ground chuck and the optional Worcestershire sauce together for no more than 30 seconds.
If you overwork the meat, the texture gets dense, tight, and rubbery.
Achieving Uniform Patty Weight and Size
Consistency equals perfection. I always use a digital scale to portion my patties 170g (6 oz) is my sweet spot. Press them into discs about ¾ inch thick and slightly wider than your bun, remembering they shrink slightly in diameter as they cook.
The scale ensures they all finish cooking at the exact same moment.
Sear and Finish: Timing the Cook
Get your cast iron pan screaming hot. Seriously. Add your oil until it shimmers slightly. Now, and only now, remove your patties from the fridge and season the top side heavily. Place the seasoned side down, then season the other side while it cooks.
Cook 3– 5 minutes per side, depending on how you like it. DO NOT PRESS THEM. That's the money shot you're crushing out!
Resting Your Patty Post Grill
Once they hit the desired temperature (145°F / 63°C for medium is great), pull them off. Let them rest on a cooling rack or a warm plate for a couple of minutes. This step is non-negotiable; it lets the fibres relax and reabsorb all those delicious juices.
You want the juices inside the patty, not swimming on your bun.
Chef's Note: If you want to melt cheese, add it during the last minute of cooking, covering the pan with a lid or pouring a teaspoon of water next to the patty to steam the cheese into gooey perfection.
Professional Techniques: Chef's Secrets and Troubleshooting Your Hamburger
The Danger of Overworking the Meat
I made this mistake for years, thinking the ingredients needed to be thoroughly integrated. Wrong! Overworking develops the proteins (myosin), making the patty resemble a meatball dense and firm. Fix: Keep your hands ice cold and mix for the briefest time possible.
If you must use a mixing tool, grab a fork, not your hand, and handle it like fragile glass.
Fixing Common Shrinkage Issues
Shrinkage happens for two main reasons: high fat content melting out, and protein tightening. We solve both! First, ensure the meat is cold when it goes in. Second, always use the crucial dimple technique .
If you have a problem with shrinkage, you might also be pressing the patty while it cooks stop that immediately!
When to Apply the Seasoning (Crucial Timing)
This is the big one. If you mix salt into the raw meat mixture and let it sit, the salt acts as a myosin solvent, basically drawing moisture out and making the texture mushy and sausage like. Fix: Only apply your salt and pepper seconds before the patty hits the hot pan.
We want that seasoning to contribute to the crust, not to the internal structure.
Preparation and Preservation: Storing Your Homemade Burger Patties
Prepping Patties 24 Hours Ahead
Yes, you can absolutely make your patties a day ahead of time! It saves so much stress. Form them perfectly, stack them with squares of parchment paper, and place them back in the coldest part of your fridge. Crucially, do not salt them yet.
Save the seasoning until right before they go on the heat.
Safe Freezing and Wrapping Techniques
Burger patties freeze like a dream. Form them, stack them with parchment paper, and then wrap each stack tightly in plastic wrap. Then, wrap that bundle again in heavy duty aluminum foil to prevent freezer burn. Store them flat in a freezer bag. They’ll keep perfectly for up to three months.
They make a fantastic emergency meal!
Thawing Burgers for Optimal Cooking
Slow and steady wins the race when thawing. Transfer your wrapped patties from the freezer to the refrigerator 24 hours before you plan to cook them. This gentle thawing prevents excessive moisture loss and keeps the texture perfect. Never thaw on the counter.
Cook them from their chilled state, which is vital for maintaining the internal moisture integrity.
Building the Perfect Burger: Recommended Pairings and Assembly
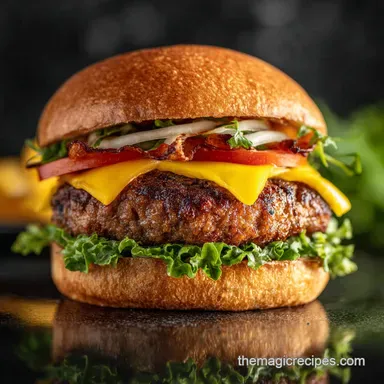
The patty is the star, so let’s give it the supporting cast it deserves. Always, always toast your bun; a soft bun collapses under the weight and juiciness of a proper pub-style patty. We use a sturdy brioche or potato bun.
For assembly, keep it simple. A swipe of burger sauce, some fresh lettuce for crunch, maybe a thin slice of tomato (if they are in season), and the melted cheese applied during that last minute of cooking. The richness of this patty stands up well to strong flavours, like a sharp cheddar or even a blue cheese crumble.
Let the gorgeous, deeply savoury flavour of the meat take the lead!

Recipe FAQs
Why do my burger patties consistently bulge and become ball shaped when cooking?
This common issue occurs because the muscle fibers contract rapidly when exposed to high heat. To prevent this, always create a shallow indentation (or "dimple") in the center of the raw patty before cooking; this technique ensures the patty cooks flat and maintains an even thickness.
What is the ideal fat-to-meat ratio for the juiciest burger patty?
The culinary standard for a truly juicy patty is 80% lean meat to 20% fat (80/20), often sourced from ground chuck. This high fat content is critical because the melting fat renders during cooking, effectively basting the lean muscle and guaranteeing superior moisture retention.
Why are my patties dense and tough, even though I used the correct fat ratio?
Density and dryness are usually caused by overworking the meat mixture, which develops the tough muscle proteins prematurely. You must mix the meat gently and minimally until the ingredients are just combined, and ensure the mixture stays extremely cold until it hits the grill or pan.
Should I add eggs or breadcrumbs to the beef mixture to help them bind?
For a proper, pub-style beef patty, binders like eggs or breadcrumbs are unnecessary and will detract from the pure beef flavor. These fillers are only required when using very lean meats or trying to incorporate high amounts of liquid or seasoning that need stabilization.
Trust the quality of the beef and the chilling process for structure.
How long can I safely store raw patties in the refrigerator or freezer?
Raw, formed patties can be safely stored in the refrigerator for up to 2 days, provided they are tightly wrapped to prevent oxidation. For longer storage, freeze the patties, separated by squares of parchment paper, where they will maintain optimum quality for 3 to 4 months.
What internal temperature ensures the patty is cooked to medium rare or medium?
For the desired medium rare doneness, remove the patty from the heat when it reaches an internal temperature of 130 135°F (54 57°C). If you prefer medium, target 135 140°F (57 60°C), and always use an instant read thermometer inserted sideways into the patty's center.
Can I substitute ground turkey or a non-beef option in this patty recipe?
You may substitute leaner meats like turkey or chicken, but be aware that they lack the inherent fat necessary for juiciness. To compensate, you will need to manually add significant supplemental fat, such as finely ground bacon or butter, and potentially use a very light binder to hold the mixture together.
Ultimate Juicy Beef Burger Patty
Ingredients:
Instructions:
Nutrition Facts:
| Calories | 450 calories |
|---|---|
| Fat | 30 g |
| Fiber | 0 g |
