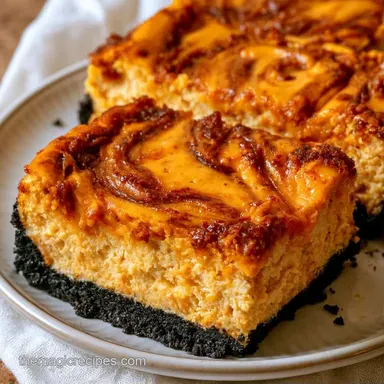
Pumpkin Swirl Halloween Cheesecake Bars
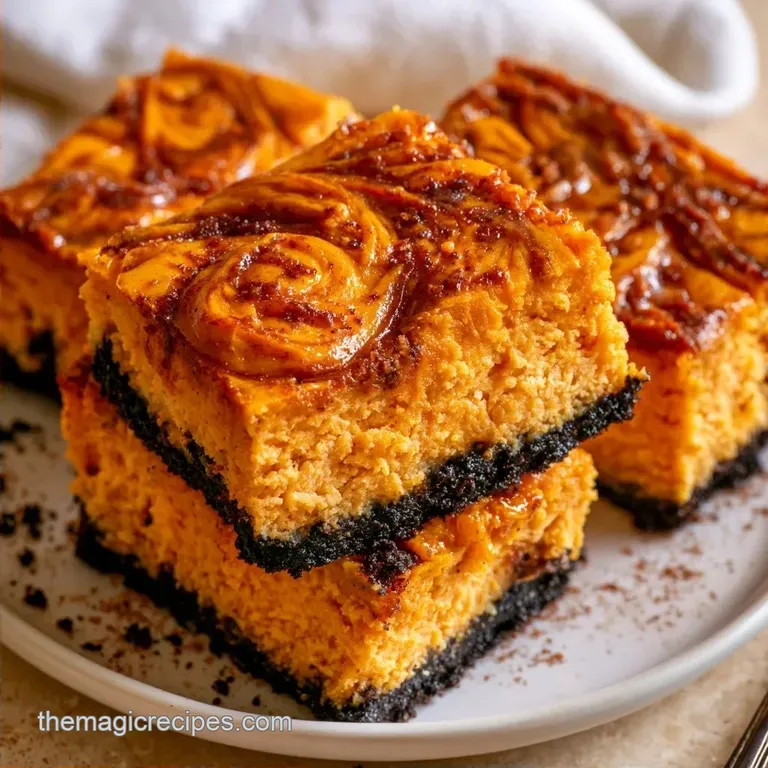
- Time: 30 min active + 50 min cook + 4 hr chilling
- Flavor/Texture Hook: Crunchy cocoa crust with a silky pumpkin cream cheese filling
- Perfect for: Spooky party platters or autumn gatherings
Decadent Halloween Cheesecake Bars with Pumpkin Swirls
The sound of Oreos being crushed into a fine dust is the best part of this process. It's that first sensory hit that tells you something indulgent is coming. But let's be honest, many holiday bars end up as a disappointment.
You've probably dealt with a soggy, mushy crust that doesn't hold its shape or a rubbery filling that feels more like a sponge than a dessert. It's frustrating when you spend an hour in the kitchen only for the bars to collapse the moment you slice into them.
I've spent enough time in the kitchen to know that these issues usually come down to temperature and timing. Most recipes gloss over the importance of the "room temperature" rule, but that's where the magic happens. When your cream cheese is too cold, you get lumps. When you over mix your eggs, you get cracks.
These Halloween Cheesecake Bars fix those problems by focusing on the emulsion of the filling and a pre baked crust that actually stays crisp.
Expect a dessert that hits all the right notes. You get the deep, dark cocoa flavor from the Oreo base, the tangy richness of the cream cheese, and the warm, spiced glow of the pumpkin puree. It's a balance of textures, from the crunch of the bottom layer to the smooth, creamy top.
These Halloween Cheesecake Bars are designed to look spooky and taste professional, without requiring a degree in pastry arts.
Why These Bars Actually Work
- Temperature Control: Using room temperature cream cheese and eggs prevents the batter from breaking. This is the secret to getting that smooth, professional texture instead of a grainy mess.
- Pre Baking the Crust: Baking the Oreo layer for 8 minutes sets the structure. It creates a barrier that stops the cheesecake filling from soaking into the crust, which prevents that dreaded soggy bottom.
- Density Matching: The pumpkin mixture has a similar viscosity to the white cheesecake batter. This means when you swirl them together, the pumpkin stays in place rather than sinking to the bottom or floating on top.
| Feature | Classic Baked | No Bake Version |
|---|---|---|
| Texture | Dense, rich, and creamy | Light, airy, and mousse like |
| Prep Time | 5 hours 20 mins (total) | 2 hours (total) |
| Flavor Profile | Deep, caramelized notes | Fresh, bright, and milky |
Recipe Specs
Here are the essential numbers. To ensure your Halloween Cheesecake Bars turn out perfectly, timing is key. This isn't about laboratory precision; it's simply to make sure the eggs set properly without introducing too much air into the mixture.
Stick to these three critical milestones: 1. Bake the crust at 350°F (175°C) for exactly 8 minutes. 2. Bake the filled bars for the remaining 42 minutes. 3. Chill for a minimum of 4 hours before slicing.
Be patient with the chilling process. If you slice into them while they're still warm, the filling may ooze, destroying those sharp, spooky lines.
The Ingredient Deep Dive
Before the complete list, here is a breakdown of how these components function. Every part of these Halloween Cheesecake Bars serves a specific purpose, so adjusting one ingredient may affect the overall balance.
| Ingredient | Role | If You Don't Have It |
|---|---|---|
| Oreo Cookies | Creates a deep, cocoa-heavy foundation | Chocolate wafers (slightly less sweet) |
| Cream Cheese | The main source of richness and stability | Full fat Neufchatel (a great swap) |
| Pumpkin Puree | Contributes seasonal taste and hydration | Roasted butternut squash puree |
| Sour Cream | Adds a bright tang and helps prevent cracks | Greek yogurt (creates a denser texture) |
Your Shopping List
Prepare your workspace before beginning. It is much simpler to mix the batter when you aren't searching for ingredients while the oven is heating up.
For the Crust: 24 Oreo cookies, crushed (260g) Why this? Provides the rich cocoa flavor and structural base 5 tbsp (70g) unsalted butter, melted Why this? Holds the crumbs together in a solid layer
For the Cheesecake Filling: 16 oz (450g) cream cheese, brought to room temperature Why this? Ensures a smooth, luscious consistency ½ cup (100g) granulated sugar Why this? Offsets the natural tang of the cheese 2 large eggs, room
Temperature Why this? Acts as a binder and helps the cake rise 1 tsp (5ml) vanilla extract Why this? Harmonizes the different flavor notes ¼ cup (60g) sour cream Why this? Gives the filling a velvety feel and bright
Acidity
For the Pumpkin Swirl: ½ cup (120g) pumpkin puree Why this? The primary seasonal flavor 2 tbsp (25g) brown sugar Why this? Introduces a deep, molasses-like sweetness 1 tsp (2g) pumpkin pie spice Why this?
Adds traditional autumn warmth 1 tbsp (15ml) heavy cream Why this? Refines the texture of the puree
| Original Ingredient | Substitute | Why It Works |
|---|---|---|
| Oreo Cookies | Graham Crackers | A traditional choice. Note: Lacks the dark chocolate contrast |
| Sour Cream | Full fat Greek Yogurt | Similar tanginess. Note: Slightly more acidic |
| Heavy Cream | Coconut Cream | Comparable fat content. Note: Adds a subtle coconut flavor |
The Right Tools
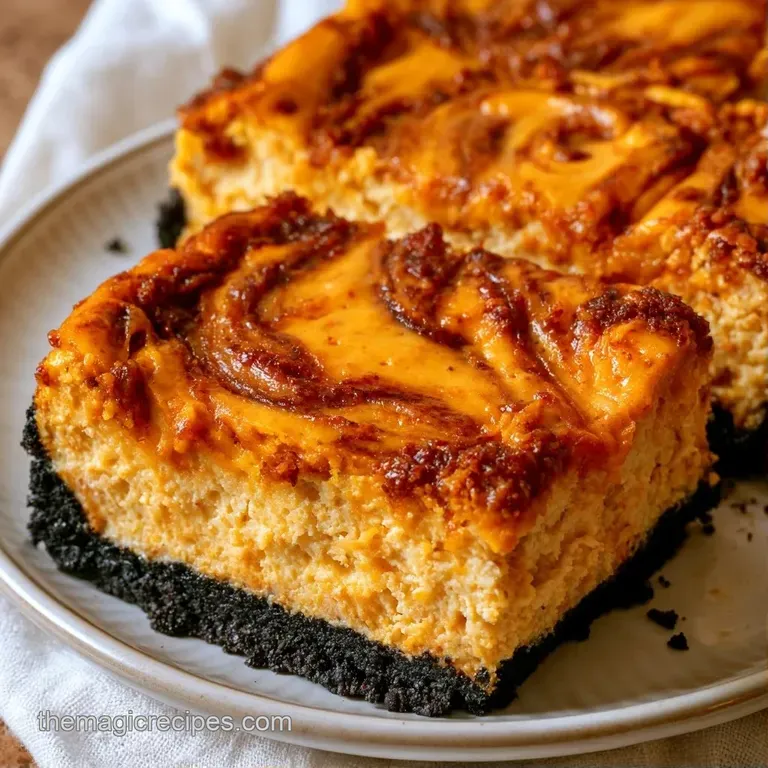
While you don't need high-end equipment, having the right gear simplifies the process. I prefer using a stand mixer like a KitchenAid, though a handheld mixer is perfectly fine. The pan is the most critical piece of equipment; a standard 9x9 inch square pan is required.
Parchment paper is an absolute must. Without lining your pan, you'll spend ages struggling to remove the cheesecake bars. You will also need a toothpick or a thin skewer for the swirling process.
Step by step Assembly
Begin by following these instructions, paying close attention to the visual indicators to ensure the best results.
Phase 1: Pressing the Crust
- Stir together the crushed cookies and melted butter in a bowl until the crumbs resemble wet sand.
- Press the mixture firmly into a 9x9 inch pan lined with parchment. Note: To avoid air gaps, use the bottom of a flat glass to pack it down tight.
- Bake at 350°F (175°C) for 8 minutes until it smells toasted and fragrant. Remove it and let it cool briefly.
Phase 2: Whipping the Filling
- Beat the granulated sugar and softened cream cheese on medium speed until the mixture is smooth and fluffy.
- Mix in the eggs one at a time on low speed just until combined. Note: Avoid overbeating here, as too much air can cause the cheesecake to crack.
- Stir in the sour cream and vanilla extract, mixing until the batter is a uniform, pale ivory color.
Phase 3: Creating the Spooky Swirls
- In a small bowl, whisk the pumpkin puree, brown sugar, pumpkin pie spice, and heavy cream until the mixture is completely smooth.
- Pour the white batter over the cooled crust and level the top with a spatula.
- Spoon dollops of the pumpkin mixture on top, then use a skewer or toothpick to swirl the puree through the batter for a spooky look.
Phase 4: Baking and Setting
- Bake for 42 minutes; the edges should be firm, though the center should still have a slight jiggle.
- Remove from the oven and refrigerate for 4 hours. This is essential for achieving clean slices.
Stopping Kitchen Nightmares
Not every batch is perfect. Here are a few ways to solve typical issues that may arise with your Halloween Cheesecake Bars.
Fixing Cracked Tops
Cracks are typically caused by excessive oven heat or beating the eggs too hard. According to Serious Eats, you can prevent these gaps by avoiding over-mixing. If they appear, don't worry; it's a treat, not a work of art. Simply hide the cracks under some whipped cream or a dusting of cinnamon sugar.
Preventing Sinking Centers
A dip in the center usually indicates the cheesecake was underbaked or cooled too rapidly, meaning the eggs didn't set properly. To avoid this, follow the "slight jiggle" rule: the outer edges should be set, while the center should still wobble slightly, similar to gelatin.
Handling Grainy Filling
A gritty texture is almost always the result of using cream cheese that wasn't sufficiently softened, leading to small lumps. If your batter is grainy, you can strain it through a fine-mesh sieve before adding it to the crust, although it takes a little extra effort.
Tasty Pairing Ideas
These bars are rich, so they pair well with things that offer a bit of contrast. I love serving them with a side of fresh blackberries or sliced Granny Smith apples. The tartness of the fruit cuts through the decadence of the cream cheese.
If you're putting together a full dessert spread, these go great with something warm. I often serve them alongside a Salted Caramel Skillet Cookie for a mix of textures. A cup of strong black coffee or a spiced chai latte is also a great shout to balance the sweetness.
Keeping Them Fresh
Store your Halloween Cheesecake Bars in the refrigerator. Use a container that is airtight to keep them from picking up other fridge smells. They stay fresh for up to 5 days.
If you want to freeze them, slice the bars first. Place pieces of parchment paper between the layers so they don't stick together. They'll keep in the freezer for about 2 months. To eat them, let them thaw in the fridge overnight.
For zero waste, if you have a bit of leftover pumpkin puree in the can, don't toss it. Stir it into your morning oatmeal or mix it into a smoothie with a bit of cinnamon and honey.
Ways to Swap Flavors
Once you've nailed the base recipe, you can get creative with the swirls. For a different vibe, swap the pumpkin for a raspberry reduction or a melted chocolate ganache. These Halloween Cheesecake Bars are a great canvas for different seasonal flavors.
If you're looking for other treats to round out your party, these bars pair beautifully with Chocolate Crinkle Cookies. You get the creamy tang of the cheesecake and the fudgy chew of the cookies.
- For a firmer set
- chill 6 hours instead of 4.
- For a deeper crust
- add 2 more Oreos.
- For a milder spice
- reduce pumpkin pie spice to 1/2 tsp.
Whether you stick to the pumpkin or try something new, the key to these Halloween Cheesecake Bars is the contrast. That dark crust against the bright, swirled top is what makes them a showstopper.
Just remember to keep your ingredients at the right temperature, give them plenty of time to chill, and you'll have a bakery quality treat on your hands. Happy baking!
Recipe FAQs
How do I assemble the pumpkin swirls?
Drop dollops of pumpkin mixture onto the white batter and drag a toothpick through the puree. This creates the spooky marbled effect before baking.
What ensures the bars stay creamy?
Mix eggs on low speed just until combined. If you enjoyed controlling the air in this batter, the same precision applies to our sugar cookie recipe to prevent over-spreading.
Which pan is best for these bars?
Use a 9x9 inch pan lined with parchment paper. This specific size ensures the bars have the correct height and the parchment allows for effortless removal.
Why are these better than candy treats?
They provide a rich, baked profile that feels more substantial than sugar-heavy candy. The Oreo crust adds a salty-sweet contrast to the pumpkin.
Is it true that overbeating eggs makes the bars fluffier?
No, this is a common misconception. Overmixing incorporates air that causes the cheesecake to rise and then crack as it cools.
Can I use a larger baking dish?
No, stick with the 9x9 size. A larger pan will spread the batter too thin, resulting in overbaked bars that lose their creamy texture.
When is the best time to slice the bars?
Wait until they have chilled for 4 hours. This allows the filling to fully set, preventing the bars from smudging when you cut them.
Halloween Cheesecake Bars with Oreo Base