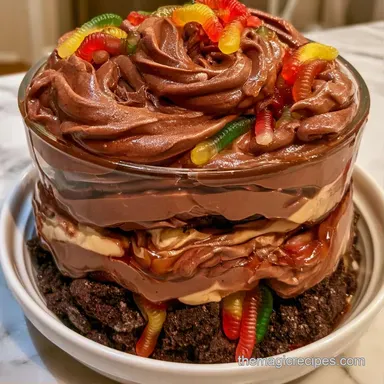
Failure-Proof Halloween Dirt Cups
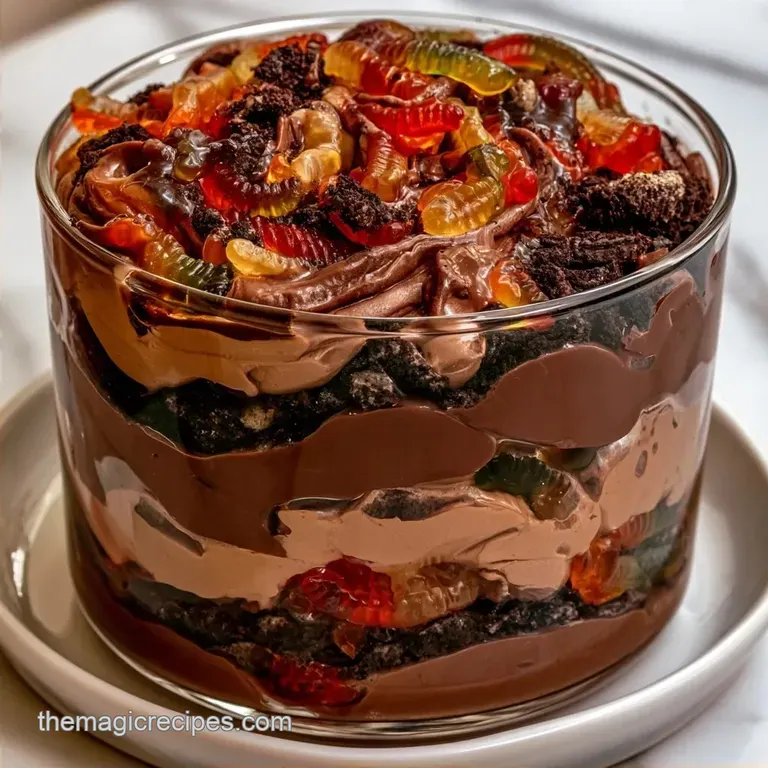
- Time:30 minutes active + 1 hour chilling
- Flavor/Texture Hook: Velvety chocolate mousse with gritty, crunchy cookie "soil"
- Perfect for: Spooky gatherings, kid-friendly snacks, and party spreads
The thud of a rolling pin hitting a Ziploc bag of cookies is the signature sound of October in my household. There's a certain joy in that crunch, but I've learned that great "dirt" involves more than just crushing.
I once hosted a get-together using simple instant pudding, only to find that by the time the kids arrived, the gummy worms had drifted to the bottom and the Oreo crumbs had become a soggy, brown blur. It resembled a swamp more than a graveyard.
That’s why this specific version of Halloween Dirt Cups is different. I spent quite a bit of time perfecting a base sturdy enough to support a full Oreo "tombstone" without it tilting or disappearing into the chocolate. The secret is incorporating a bit of whipped topping and cream cheese into the pudding.
This turns the mixture into a thick, reliable mousse. You get the nostalgic hit of chocolate, but with a far more polished texture. Once you experience how the layers stay sharp and the decorations remain upright, you'll realize the old way of making these just doesn't compare.
What Makes These Work
- Cream Cheese Grip: The fats in the cheese create a stable structure that keeps the pudding from running. This prevents the "sinkhole" effect.
- The Air Factor: Whipped topping adds air pockets, which lightens the density so heavy candies don't dive to the bottom.
| Method | Time | Texture | Best For |
|---|---|---|---|
| Fast | 15 min | Soft and runny | Last minute snacks |
| Classic | 90 min | Stable and airy | Dessert tables and photos |
The Best Ingredients
For these Halloween Dirt Cups, the balance between the fat in the cream cheese and the air in the whipped topping is key. Using whole milk instead of skim keeps the mouthfeel rich and prevents the pudding from feeling too "gelatinous." Serious Eats' testing on stabilizer fats shows that adding a fat dense base like cream cheese prevents moisture migration from the pudding into the cookies, which keeps your "soil" from getting soggy too quickly.
- 1 box (96 g) instant chocolate pudding mix Why this? Provides the core chocolate flavor and thickening power.
- 480 ml whole milk Why this? Fat content makes the pudding creamier than skim milk.
- 113 g softened cream cheese Why this? Stabilizes the mousse so toppings don't sink.
- 240 ml whipped topping, thawed (for the mix) Why this? Adds air and a lighter texture.
- 405 g Oreo cookies (for the dirt) Why this? The classic cocoa crunch "soil" look.
- 227 g whipped topping (for decoration) Why this? Holds stiff peaks for ghosts.
- 227 g gummy worms Why this? Essential spooky graveyard detail.
- 227 g candy pumpkins Why this? Adds a pop of orange color.
- 8 Oreo cookies (whole) Why this? Used as tombstones.
Substitution Guide
| Original Ingredient | Substitute | Why It Works |
|---|---|---|
| Whole Milk | Full fat Coconut Milk | Similar fat ratio. Note: Adds a slight coconut flavor |
| Oreo Cookies | Chocolate Wafers | Similar dark color. Note: Lacks the creamy filling center |
| Whipped Topping | Stabilized Whipped Cream | More natural flavor. Note: Slightly less stable over long hours |
Quick Setup Guide
While you don't need professional equipment, a few key tools will streamline the assembly. I suggest using a hand mixer to ensure the cream cheese is completely smooth, as removing lumps from the base can be tedious later.
- Hand Mixer: For the mousse base.
- Ziploc Bag: To crush cookies without any mess.
- Rolling Pin: For a consistent "dirt" grit.
- 10 oz Clear Cups: To showcase the layers.
- Piping Bag or Plastic Bag: To shape the ghosts.
Equipment Needed
Right then, let's get the gear ready. If you don't have a piping bag, just snip a tiny corner off a freezer bag. It works just as well for the ghosts.
Assembling the Treats
- Beat the softened cream cheese in a bowl until smooth. Note: Room temperature is a must here to avoid lumps.
- Whisk in the chocolate pudding mix and milk gradually until the mixture thickens into a rich paste.
- Fold in 240 ml of whipped topping gently with a spatula until the color is a uniform mahogany brown and the texture is airy.
- Crush the Oreo cookies inside a Ziploc bag using a rolling pin. Stop when you have a mix of fine crumbs and small chunks until it looks like real garden soil.
- Spoon a layer of pudding into the bottom of each 10 oz cup.
- Sprinkle a generous layer of Oreo crumbs over the pudding, pressing down lightly with a spoon to create a stable base for the next layer.
- Repeat the pudding and cookie layers until the cup is nearly full.
- Finish with a thick layer of Oreo crumbs on top to seal the "graveyard."
- Pipe small dollops of whipped topping to look like ghosts, insert gummy worms, place one whole Oreo cookie upright as a tombstone, and scatter candy pumpkins around the edge.
- Chill in the refrigerator for 1 hour until the mousse feels set and firm.
Fixing Common Issues
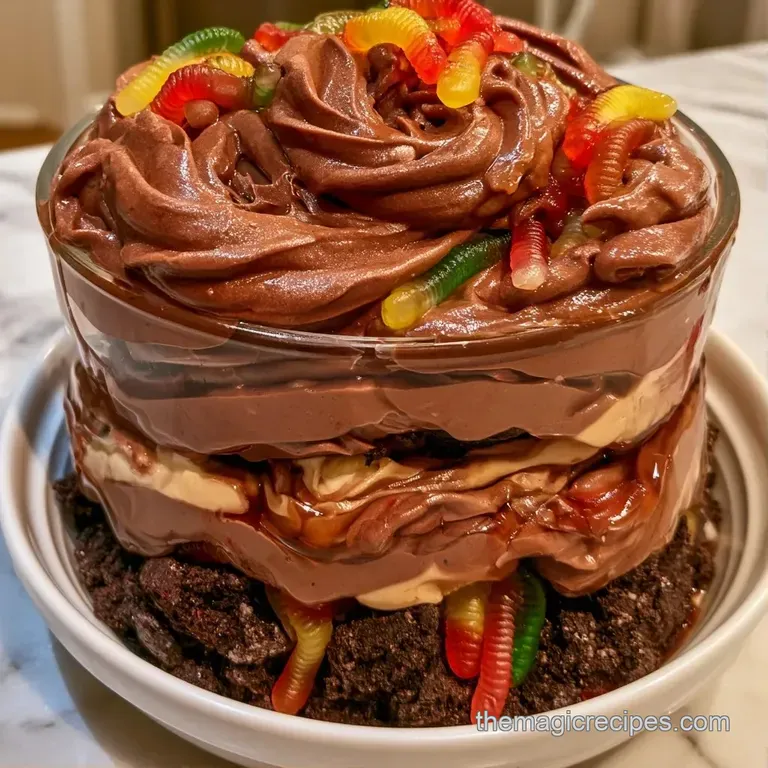
If your pudding looks curdled, it usually happens because the cream cheese was too cold. It won't incorporate properly and creates tiny white beads in your chocolate. Just keep whisking or use a hand mixer for another minute to smooth it out.
But what about the toppings? If your gummy worms are sliding down the side of the glass, it means the mousse is too soft. This usually happens if the whipped topping wasn't fully thawed or if the milk was too warm.
Fixing Lumpy Pudding
This is almost always a temperature issue. Make sure your cream cheese is truly room temperature before you start.
Stopping Sinking Worms
Increase the amount of whipped topping folded into the base. The extra air creates more "lift" to hold the candy.
Fixing Powdery Dirt
If your cookies look like dust, you've over crushed them. For the next batch, leave more pea sized chunks for a more realistic look.
| Problem | Root Cause | Solution |
|---|---|---|
| Lumpy Base | Cold cream cheese | Soften to room temp before beating |
| Sinking Toppings | Lack of aeration | Fold in more whipped topping |
| Soggy Cookies | Pudding too wet | Add a layer of crumbs at the very bottom |
Changing the Batch Size
If you're making these for a small family gathering, you can easily cut the recipe in half. Just use 2 oz of cream cheese and half a box of pudding. Since you're using smaller quantities, the mixing time is about 20% faster.
For a huge school party, you can 2x or 4x the batch. I suggest working in batches of two. If you try to whisk 4 cups of milk and a pound of cream cheese in one bowl, you might end up with pockets of unmixed pudding.
Also, remember that the chilling time stays the same, one hour is enough regardless of how many cups are in the fridge.
- For a firmer set
- chill 2 hours instead of 1 hour.
- For a darker look
- use Double Stuf Oreos for more cocoa content.
- For a lighter taste
- increase whipped topping by 1/2 cup.
Common Dessert Myths
Some people think that using a food processor is the best way to make the "dirt." In reality, a processor often pulverizes the cookies into a fine powder that looks like cocoa powder, not soil. A rolling pin in a bag gives you those crucial chunks that create the texture.
Another myth is that instant pudding tastes "fake" compared to scratch. When you fold in softened cream cheese and whipped topping, it masks that artificial tang and replaces it with a decadent, bakery quality flavor.
Storage and Waste
Store these Halloween Dirt Cups in the refrigerator for 3 days. Cover them with plastic wrap so the whipped topping doesn't pick up any other smells from the fridge. I wouldn't recommend freezing them, because the pudding may separate and the cookies will turn mushy.
To minimize waste, use leftover whipped topping to garnish fresh berries or fold it into cocoa powder for a simple chocolate mousse. If you have extra Oreo crumbs, mix them into your morning yogurt or use them to coat chocolate truffles.
Ideal Complements
Because these are so rich, they pair well with something a bit lighter or a bit crunchier. I love serving these alongside some Halloween Sugar Cookies for a variety of textures on the plate.
If you're planning the drink menu, a ghoulish green punch provides a bright, tart contrast to the deep chocolate flavors of the dirt cups.
Alternative Ingredient Swaps
If you prefer a different flavor, try the "Pumpkin Patch" version. Substitute the chocolate with pumpkin-flavored pudding and use crushed graham crackers or golden Oreos instead of the standard cookies. Follow the same cream cheese stabilization process to keep the pumpkin shapes from sinking.
For a gluten-free alternative, just use a gluten-free chocolate sandwich cookie in place of the Oreos. The crushed texture is almost identical, and the stability of the mousse remains unchanged.
To make this dairy-free, opt for coconut milk and a cashew-based cream cheese. This version remains creamy, though it may require an extra 30 minutes of chilling to reach the same level of firmness.
Nutrition Note: You can find a detailed breakdown of the individual ingredients, such as cocoa cookies and cream cheese, at the USDA FoodData Central.
Recipe FAQs
Can I prepare these a day in advance?
Yes, they stay fresh when chilled for three days. Just cover them with plastic wrap so the whipped topping doesn't absorb other odors.
What ingredients are necessary?
You will need instant chocolate pudding mix, milk, cream cheese, whipped topping, Oreo cookies, gummy worms, and candy pumpkins. These create the layered "dirt" effect and the festive decorations.
Which pudding creates the best consistency?
Instant chocolate pudding mix is the best choice because it sets quickly. When whisked with the cream cheese and milk, it provides the structural stability needed to support the cookie layers.
How to keep the cookie layers distinct?
Press down lightly with a spoon after sprinkling the Oreo crumbs. This helps the crumbs stay in place and prevents them from sinking too deep into the pudding.
Is it true that freezing these is a good way to save them?
No, and here's why. Freezing causes the pudding to separate and turns the Oreo cookies mushy once they thaw.
What's the trick for the perfect cookie crumb?
Place the cookies inside a Ziploc bag and use a rolling pin. This creates a balanced mix of fine crumbs and small chunks for a more realistic look.
Do gluten-free cookies work for this dessert?
Yes, gluten-free chocolate sandwich cookies are an excellent substitute. If you enjoy the simple assembly of these themed cups, see how that same creative approach works for Witch Finger Cookies.
Store these where to prevent them from smelling like the fridge?
Keep them in the refrigerator covered with plastic wrap. This seals out other food smells and keeps the whipped topping fresh until you serve them.
Halloween Dirt Cups for 8 Servings