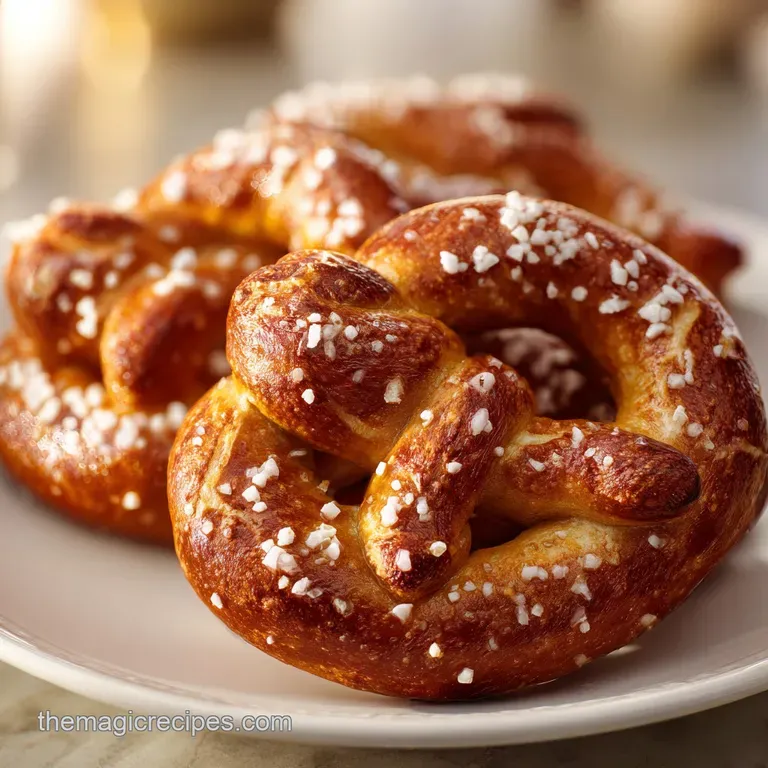
Soft Pretzel Recipe: Chewy and Golden
- Time: 15 min active + 60 min rising = Total 90 mins
- Flavor/Texture Hook: Deep mahogany crust with a salty, shatter crisp exterior
- Perfect for: Game day crowds, cozy weekend baking, or a treat for the kids
That distinct, pungent scent of a boiling soda bath hitting the air is the first sign that things are going right. It's a strange smell, almost metallic, but it's the precursor to that bakery quality aroma that fills the whole house once they hit the oven.
I used to think you needed a professional kitchen or some scary food grade lye to get that specific dark brown color and chewy pull. Honestly, I spent way too long believing the myth that home ovens just couldn't handle the "pretzel effect."
But here's the truth: you don't need a commercial steam oven or a degree in food science to make a decadent snack. You just need a pot of water and some baking soda. This soft pretzel recipe is all about the contrast, that gorgeous tension between the salty, slightly bitter skin and the velvety, buttery interior.
Once you see that first batch turn that deep, rich brown, you'll never go back to the frozen aisle.
We're aiming for something that feels like a true indulgence, not just another piece of bread. It's the kind of treat that makes you want to clear the table and just dive in while they're still steaming.
Trust me on this, the magic happens in the dip and the high heat, which transforms a simple dough into something that feels like a specialty shop find.
Nail This Soft Pretzel Recipe
Getting the texture right is all about managing the dough and the heat. If you've ever had homemade pretzels that tasted like regular rolls, you probably skipped the alkaline bath or didn't let the water get hot enough.
The goal here is a skin that resists the tooth just a bit before giving way to a soft, pillowy middle. It's a balance of hydration and chemical reaction.
Right then, let's talk about the dough. You want it smooth, but don't overwork it to the point where it becomes tough. When you're kneading, it should feel like a stress ball, springing back when you poke it.
If it's too sticky, add a pinch of flour, but remember that a slightly tacky dough often leads to a more tender crumb.
The shaping is where most people get nervous, but it's actually the most satisfying part. Rolling those long ropes and twisting them into knots is almost meditative. Just make sure you don't over stretch the dough, or you'll pop the air bubbles you worked so hard to create during the rise.
Let's crack on to the specifics.
Why It Works
Alkaline Surface: The baking soda raises the pH of the dough's surface, allowing it to brown much faster and more deeply than normal bread.
Gluten Structure: Kneading creates a strong network that traps gas, giving the pretzel its signature chew rather than a cakey texture.
Thermal Shock: Moving the dough from a room temperature state into boiling water and then a 425°F (218°C) oven creates that distinct crust.
Butter Finish: Brushing melted butter on the hot crust seals in moisture and adds a rich, savory layer of fat.
| Method | Time | Texture | Best For |
|---|---|---|---|
| Fresh Baked | 90 mins | Shatter crisp skin, airy middle | Fresh parties |
| Frozen/Reheat | 10 mins | Softer skin, dense middle | Quick cravings |
| store-bought | 0 mins | Rubbery, uniform texture | Last resort |
Component Analysis
| Ingredient | Science Role | Pro Secret |
|---|---|---|
| Baking Soda | pH Modifier | Use distilled water to prevent mineral interference |
| Active Dry Yeast | Leavening Agent | Ensure water is exactly 105-115°F to avoid killing yeast |
| All Purpose Flour | Structure | Measure by weight (375g) for consistent chew |
| Unsalted Butter | Tenderness | Cool it slightly before adding to avoid melting the yeast |
Gathering Your Essentials
For the dough, we're using basic pantry staples, but the quality of your yeast is everything. If your yeast doesn't foam up in the first ten minutes, toss it and start over. There is nothing worse than waiting an hour for a dough that refuses to rise. I always keep a fresh jar in the fridge to keep it potent.
For the soda bath, distilled water is a nice touch. Some tap water has minerals that can interfere with the baking soda, leading to a paler crust. It's a small detail, but when you're chasing that mahogany look, every little bit helps.
| Original Ingredient | Substitute | Why It Works |
|---|---|---|
| All Purpose Flour | Bread Flour | Higher protein. Note: Creates a much chewier, denser pretzel |
| Granulated Sugar | Honey | Similar sweetness. Note: May brown faster due to fructose |
| Unsalted Butter | Coconut Oil | Similar fat content. Note: Adds a slight tropical scent |
| Coarse Pretzel Salt | Flaky Sea Salt | Same saltiness. Note: Melts faster; apply right before baking |
Keep in mind that while you can swap some things, the baking soda is non negotiable. It's the soul of this soft pretzel recipe. Without it, you're just making knots of dinner rolls.
Essential Tools for Success
You don't need a fancy bakery, but a few specific tools make this a breeze. A digital scale is your best friend here. Measuring flour by the cup is a gamble, and in baking, gambles usually lead to dry dough. If you have a stand mixer such as KitchenAid, use it for the kneading process to save your arms.
You'll also need a wide pot for the boiling water. If the pot is too small, the pretzels will crowd each other and stick, ruining those clean lines. A slotted spoon is absolutely mandatory; trying to fish a slippery, soda soaked pretzel out with a fork is a recipe for disaster.
Finally, get some high-quality parchment paper. These pretzels are buttery and salty, and they love to stick to baking sheets. Parchment ensures they slide right off once they've reached that deep brown color.
The Cooking Process
Activating the Yeast
Combine 240ml warm water, 12g sugar, and 7g active dry yeast in a bowl. Let it sit for 5-10 minutes until it's foamy and smells like a brewery. This tells you the yeast is alive and ready to work.
Developing the Dough
Mix in 28g melted and cooled butter and 6g fine sea salt. Gradually stir in 375g all purpose flour. Knead the dough for 5-7 minutes until it's smooth, elastic, and clears the sides of the bowl.
The First Rise
Place the dough in a greased bowl, cover it with a damp cloth, and let it rise in a warm spot for 60 minutes. It should double in size and feel light and airy when touched.
Shaping the Knots
Punch the dough down to release gas. Divide it into 12 equal pieces. Roll each into a 20 inch rope, form a 'U' shape, cross the ends twice, and press the tips into the bottom.
Executing the Alkaline Dip
Bring 950ml distilled water and 40g baking soda to a rolling boil. Dip each pretzel into the water for 30 seconds until the surface looks slightly gelatinized, then remove with a slotted spoon.
Adding the Crunch
Place pretzels on a parchment lined sheet and sprinkle 30g coarse pretzel salt immediately. The salt sticks best while the dough is still wet from the bath.
Achieving the Mahogany Crust
Bake at 425°F (218°C) for 12-15 minutes until they are a deep mahogany brown. Don't be afraid of the color; that's where the flavor lives.
The Final Touch
Brush 42g melted butter over the pretzels immediately after removing them from the oven. This gives them that velvety glow and a rich, bakery style finish.
Chef's Note: To get a really professional look, use a ruler to ensure your ropes are all the same length. Consistency in size means consistency in baking time, so you don't end up with some burnt and some pale.
What Can Go Wrong
Troubleshooting Common Issues
| Issue | Solution |
|---|---|
| Why Your Pretzels Stay Pale | If your pretzels look like bread rather than pretzels, the soda bath was likely too weak or the water wasn't boiling. The alkalinity needs to be high to trigger that dark browning. Make sure the water |
| Why Your Dough is Too Sticky | This usually happens due to humidity or over measuring the water. If the dough sticks to your hands and won't form a ball, add flour one tablespoon at a time. Be careful not to add too much, or you'll |
| Why Your Salt is Melting | If you salt the pretzels too early or use table salt, it will dissolve into the dough. Always use coarse pretzel salt and apply it immediately after the soda bath, just before they hit the oven. |
Common Mistakes Checklist:
- ✓ Did the yeast foam before adding flour?
- ✓ Is the water for the bath a full rolling boil?
- ✓ Did you avoid over flouring the dough?
- ✓ Is the oven preheated to exactly 425°F (218°C)?
- ✓ Did you brush the butter while they were steaming hot?
Variations and Twists
If you want to move away from the savory route, this soft pretzel recipe is a fantastic canvas for sweets. For a cinnamon sugar version, skip the coarse salt. Instead, dip the pretzels in melted butter immediately after baking and then toss them in a mixture of cinnamon and sugar.
It's a total indulgence that tastes exactly like the mall treats.
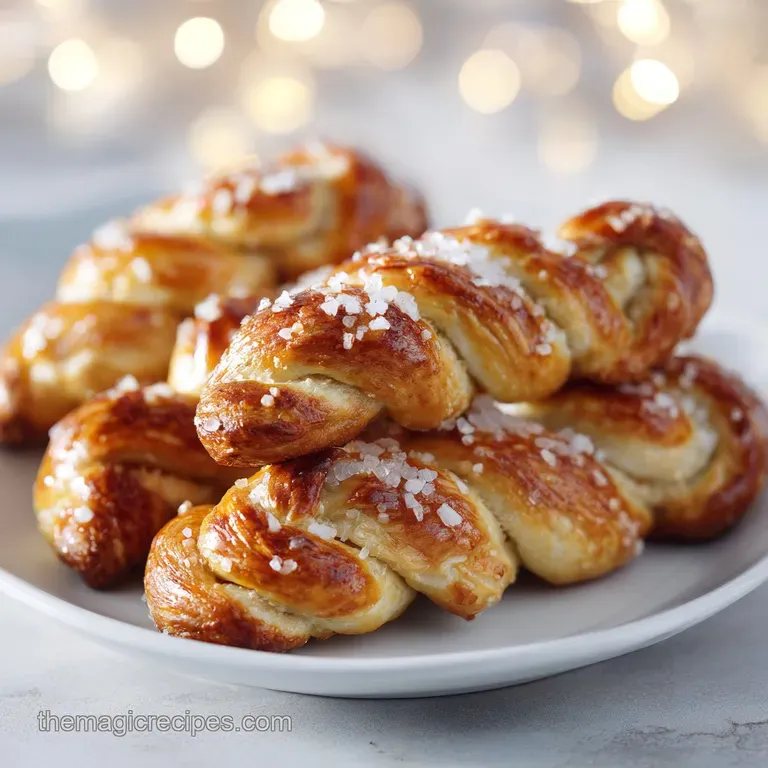
For those who want something a bit more modern, try making soft pretzel bites. Instead of rolling long ropes, just cut the dough into small, 1 inch nuggets. Follow the same soda bath and baking process. These are much easier to share and pair beautifully with a Dill Dip Recipe for a fresh, tangy contrast.
If you're feeling adventurous, you can add herbs to the dough. A tablespoon of dried rosemary or garlic powder mixed into the flour adds a wonderful depth. Just keep the shaping the same to ensure the cook time stays consistent.
Adjusting the Batch Size
When you're making a smaller batch, say half the recipe, be careful with the yeast. It's easier to measure 7g than 3.5g, so I often suggest making the full batch and freezing the extras. If you must scale down, reduce the baking time by about 20% since there's less mass in the oven.
For a double or triple batch, don't just triple the salt and spices; start with 1.5x and taste the dough. Work in batches for the soda bath. If you crowd the pot with too many pretzels, the water temperature will drop, and you'll lose that thermal shock needed for the crust.
If you're doubling the bake, lower the temperature to 400°F (200°C) and extend the time by 3-5 minutes. This prevents the outside from burning before the center of the crowded tray is fully cooked.
Common Kitchen Myths
Myth: You need lye for a real pretzel. Truth: While professional bakeries use sodium hydroxide (lye), baking soda is a safe, home friendly alternative. It creates a very similar alkaline environment that achieves the same mahogany color and chew.
Myth: Adding more flour makes the dough easier to handle. Truth: Excess flour makes the pretzels dense and dry. It's better to use a bench scraper or lightly oiled hands to handle a tacky dough than to over flour it.
Myth: The dough must rise in a professional proofing drawer. Truth: Any warm, draft free spot works. A turned off oven with the light on is a great makeshift proofer for this soft pretzel recipe.
Storage and Zero Waste
Store your leftovers in an airtight container at room temperature for up to 2 days. However, they'll lose that shatter crisp skin. To bring it back, pop them in a 350°F (175°C) oven for 5 minutes. For longer storage, they freeze beautifully for up to 3 months.
Just freeze them after the initial bake and butter brush.
To reheat from frozen, don't use the microwave, or they'll become rubbery. Use the oven or an air fryer at 350°F (175°C) for about 8-10 minutes until they're warmed through and the edges crisp up again.
For zero waste, if you have leftover soda bath water, don't pour it down the drain immediately if you have a sensitive septic system. Neutralize it with a bit of white vinegar first. Any leftover dough scraps can be rolled into tiny "pretzel pearls" and baked alongside the main batch for a little extra snack.
Serving and Pairing Ideas
These pretzels are the star of the show, but they love a good companion. A sharp cheddar cheese sauce is the classic choice, but for something a bit more refined, try a spicy brown mustard or a horseradish cream. The acidity of the mustard cuts through the rich, buttery dough perfectly.
If you're hosting a larger gathering, serve these alongside some heavy hitters like Giant Meatballs for a full on comfort food spread. The salty, chewy nature of the pretzels makes them a great palate cleanser between rich, savory bites.
For a drink pairing, something bright and bubbly works best. A chilled Classic Red Sangria provides a fruity, acidic contrast to the salty crust and rich butter finish of the pretzels. It turns a simple snack into a decadent party experience.
Recipe FAQs
What is the secret to chewy soft pretzels?
The baking soda bath. Dipping the dough in boiling water and baking soda creates the alkaline environment necessary for the distinctive chew and dark brown crust.
Why are Amish soft pretzels so good?
They use a traditional alkaline dip. This process, combined with a controlled rise, creates a high contrast texture between the crisp outer skin and the soft interior.
What are common pretzel making mistakes?
Using a weak soda bath or over flouring the dough. If the water isn't boiling or lacks enough baking soda, the pretzels stay pale and taste more like bread.
What is the secret ingredient which makes a pretzel taste like a pretzel?
Baking soda. It raises the pH of the dough's surface, triggering the Maillard reaction to produce that specific alkaline flavor and mahogany color.
How to store leftover soft pretzels?
Place them in an airtight container at room temperature for up to 2 days. To restore the crisp skin, pop them in a 350°F oven for 5 minutes.
Why did my pretzels come out pale?
The baking soda bath was likely too weak or the water wasn't boiling. High alkalinity is required to trigger the deep browning when baking at 425°F.
What should I serve with soft pretzels?
A spicy remoulade or warm cheese sauce. For a zesty flavor profile, pair these pretzels with a Cajun remoulade as a dipping sauce.
Homemade Soft Pretzel Recipe

