Lightened-Up No Bake Banana Pudding: Creamy and Fresh
- Time: 15 min active + 4 hrs 15 mins chilling
- Flavor/Texture Hook: Creamy custard with soft, cake like wafers
- Perfect for: Summer potlucks, family gatherings, or beginner bakers
- No Bake Banana Pudding
- Why This Dessert Works
- Ingredient Deep Dive
- Necessary Kitchen Tools
- Step-by-Step Assembly
- Avoiding Kitchen Disasters
- Troubleshooting Common Issues
- Taste Variations to Try
- Adjusting the Batch Size
- Pudding Misconceptions
- Storage and Waste Tips
- Best Pairing Ideas
- Recipe FAQs
- 📝 Recipe Card
Ever wonder why a hard vanilla wafer suddenly tastes like a piece of moist cake after sitting in a fridge? It's a weird bit of kitchen magic. I first noticed this when I tried to rush a dessert for my cousin's birthday and realized that time is actually the most important ingredient here.
Most people think they need to cook a custard from scratch to get a rich result. But when you combine the right amount of aeration with a slow soak, you get something just as decadent. This is a treat that rewards patience rather than skill.
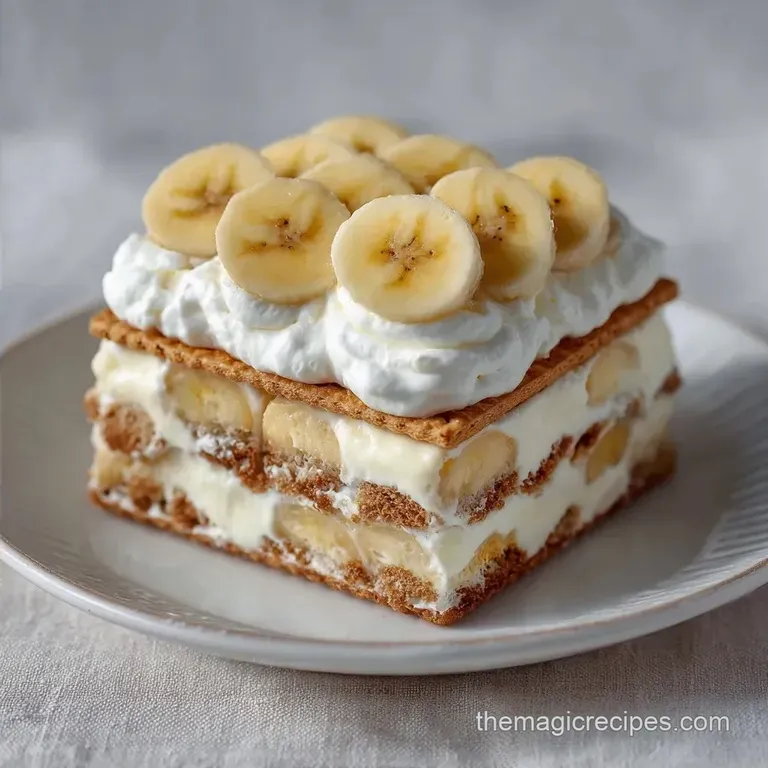
You can expect a light, airy cream that doesn't feel too heavy on the palate. This No Bake Banana Pudding balances the natural sweetness of the fruit with a slight tang from the yogurt, making it a crowd pleaser that doesn't taste cloying.
No Bake Banana Pudding
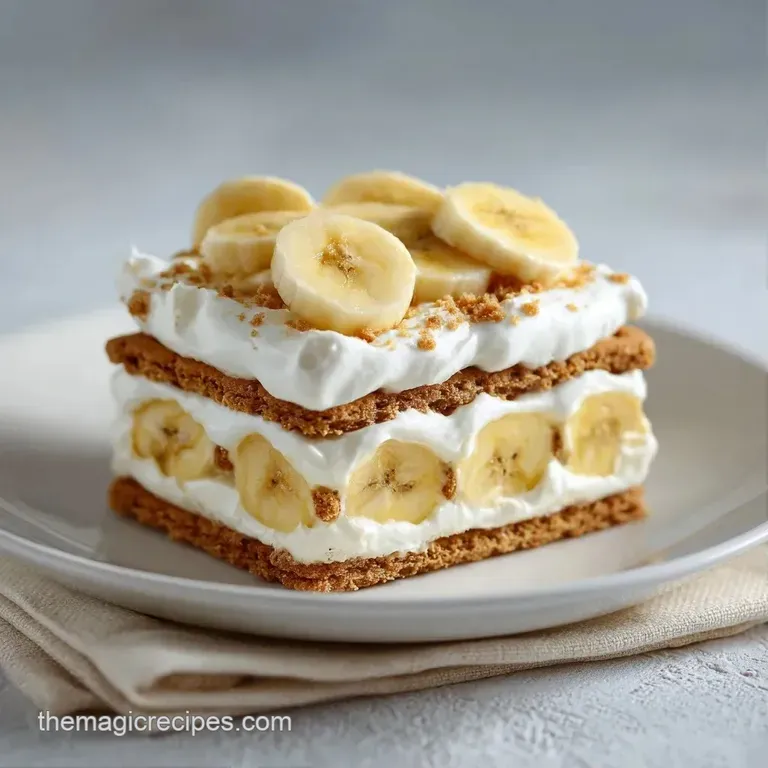
Whether you're looking for an Old Fashioned No Bake Banana Pudding or something a bit lighter, the layering technique is what makes it work. I've found that using a glass dish is a must because seeing those layers makes the dessert look much more professional.
The key is the contrast between the smooth cream and the textured cookies. If you're in the mood for something similar but a different base, you might like my Butter Cake recipe, which also has that comforting, nostalgic feel.
Why This Dessert Works
Wafer Absorption: The cookies pull moisture from the pudding over several hours, changing their structure from crisp to spongy.
Yogurt Balance: Adding Greek yogurt cuts through the sugar of the instant mix, giving the cream a more complex, natural flavor.
Lemon Acid: A tiny bit of lemon juice prevents the bananas from turning brown by lowering the pH on the fruit's surface.
| Style | Prep Effort | Texture | Best For |
|---|---|---|---|
| Fast/No Bake | Low (15 min) | Soft & Creamy | Quick parties |
| Classic/Cooked | High (1 hr) | Dense & Rich | Holiday dinners |
The difference comes down to how the starch is handled. While a cooked custard relies on heat to thicken, this version uses modified cornstarch in the instant mix for an immediate set.
Ingredient Deep Dive
| Ingredient | What It Does | Best Swap |
|---|---|---|
| Pudding Mix | Thickens the base | Cornstarch + sugar (requires cooking) |
| Greek Yogurt | Adds tang/body | Sour cream |
| Vanilla Wafers | Provides structure | Graham crackers |
| Bananas | Main flavor | Sliced pears (for a milder taste) |
The Greek yogurt is a clever addition here. It keeps the mixture from feeling like a bowl of glue and adds a subtle richness that reminds me of a cheesecake.
Necessary Kitchen Tools
You don't need much for this, which is the beauty of it. A large mixing bowl is essential for folding in the whipped topping without deflating the air. I recommend a rubber spatula because it allows you to scrape the sides cleanly.
A 9x13 inch glass baking dish is the standard. If you use a deeper, smaller dish, you'll get more layers, but you have to be careful not to pack the bananas too tightly or they'll mush. A whisk is needed for the initial pudding stage to get rid of any lumps.
Step-by-step Assembly
Phase 1: Creating the Lightened Base
- Whisk the instant pudding mix and cold milk in a bowl. Whisk for 2 minutes until the mixture thickens and looks glossy.
- Stir in the Greek yogurt. Mix until the color is uniform and no white streaks remain.
- Fold in the thawed whipped topping. Note: Use a cut and fold motion to keep the air in the mixture.
Phase 2: Layering the Dessert
- Lay vanilla wafers in a single layer across the bottom of the 9x13 dish.
- Toss banana slices with lemon juice. Arrange them in a tight layer over the cookies so no gaps show.
- Spread half of the pudding mixture over the bananas. Smooth it to the edges with your spatula.
- Add a second layer of wafers. Press them down gently into the cream.
- Layer the remaining bananas over the second set of cookies.
Phase 3: The Final Set
- Top with the remaining pudding. Level the surface with the back of a spoon.
- Garnish with crushed wafers or whipped topping.
- Cover with plastic wrap. Refrigerate for 4 hours 15 mins to ensure the wafers soften completely.
Avoiding Kitchen Disasters
When things go wrong with a No Bake Banana Pudding, it's usually a texture issue. If the pudding feels too stiff, you likely over whisked the whipped topping before folding it in.
Troubleshooting Common Issues
| Issue | Solution |
|---|---|
| Why Your Base Is Runny | This usually happens if the milk wasn't cold enough or if you used a "low-fat" whipped topping that didn't hold its peak. |
| Why Bananas Turn Brown | Even with lemon juice, bananas oxidize. If you're making this for a party tomorrow, slice the bananas just before assembling. Don't prep the fruit hours in advance. |
| Why Wafers Stay Hard | This is almost always due to a lack of chilling time. The cookies need those 4 hours to absorb the moisture. If you eat it too soon, you'll have crunchy islands in a sea of cream. |
If you enjoy these kinds of layered desserts, you should try a Fruit Tart recipe. It uses a different kind of cream, but the layering logic is very similar.
Taste Variations to Try
You can easily tweak this to make it a No Bake Banana Pudding Cheesecake by folding in 4 ounces of softened cream cheese to the pudding mix. It adds a denser, more savory note that pairs well with the fruit.
For a chocolate banana twist, swap the vanilla wafers for chocolate wafers and add a handful of mini chocolate chips to the pudding base. If you want a Quick No Bake Banana Pudding, you can use graham crackers instead of wafers, as they tend to soften slightly faster.
Some people prefer a No Bake Banana Pudding with Condensed Milk for a sweeter, fudgier texture. If you go this route, omit the Greek yogurt to keep the sugar levels from becoming overwhelming.
Adjusting the Batch Size
If you're making this for a small group, you can cut the recipe in half. Use an 8x8 inch square pan instead of the large rectangle. The chilling time remains the same, but be careful not to overfill the pan or the layers will slide.
For a double batch, I suggest using two separate dishes rather than one giant one. This ensures the middle of the pudding sets properly. Only increase the salt or vanilla extract by 1.5x rather than doubling it, as these flavors can become too intense in large volumes.
Pudding Misconceptions
A common myth is that you must bake the cookies first to "toast" them. This isn't necessary for this version. The moisture from the pudding handles the softening process perfectly on its own.
Another misconception is that frozen bananas work just as well. They don't. Frozen bananas release too much water as they thaw, which turns your No Bake Banana Pudding into a soup. Always use fresh, ripe fruit.
Storage and Waste Tips
Store this in the fridge for up to 3 days. Keep it tightly covered with plastic wrap, as the pudding can pick up smells from other foods in the fridge, like onions or leftovers.
This dessert doesn't freeze well because the whipped topping and bananas change texture when frozen. If you have leftovers, eat them within 72 hours for the best experience.
To avoid waste, use your overripe banana peels in a compost bin. If you have a few wafers left over, crush them and use them as a topping for yogurt or ice cream.
Best Pairing Ideas
Since this is a very sweet, creamy dish, it pairs well with something acidic or bitter. A strong cup of black coffee cuts through the richness and highlights the vanilla notes.
Fresh raspberries or blueberries on top add a pop of color and a tart contrast. If you're serving this as part of a larger dessert spread, it works well alongside something slightly more tart, like a lemon zest shortbread.
Recipe FAQs
How to make a quick banana pudding?
Whisk instant pudding and cold milk for 2 minutes, then stir in Greek yogurt and fold in whipped topping. Layer vanilla wafers, lemon tossed bananas, and the pudding mixture in a glass dish before chilling.
Is it true that bananas will stay white without any treatment?
No, this is a common misconception. Bananas oxidize and turn brown quickly, so toss the slices in lemon juice immediately to maintain their color.
Why are my vanilla wafers still hard?
You likely didn't chill the dessert long enough. The cookies require at least 4 hours in the refrigerator to absorb moisture from the pudding and soften properly.
How long should this dessert refrigerate before serving?
Chill for at least 4 hours. This setting time is critical for the pudding to firm up and for the wafers to reach the correct texture.
Can I freeze this pudding for later?
No, avoid freezing this recipe. Both the whipped topping and the fresh bananas change texture significantly when frozen, which ruins the creamy consistency.
Why is my pudding mixture runny?
Your milk may not have been cold enough. Ensure you use cold skim milk and a stable whipped topping to maintain the structural integrity of the base.
Is this a good dessert for a summer party?
Yes, it is an ideal choice. It requires zero cooking and stays refreshing when served cold. If you enjoyed the layering technique here, see how we use a similar approach to build textures in our baked tortellini casserole.
No Bake Banana Pudding

